Soap Making 101: How to Make Soap (+printable checklist)
Learn how to make soap using these step-by-step instructions. I’ve also included a free printable checklist to help you navigate the entire soapmaking process from start to finish!
Making soap is one of my favorite pastimes. There are so many ways to personalize a single recipe, that I rarely make the same soap twice! Once you get the hang of it, you’ll never want to go back to store-bought again!
What’s the difference between cold process and hot process soap?
Both cold process and hot process soap starts out being mixed the same way. The only difference is that cold process soap doesn’t have extra heat applied, so needs 24 to 48 hours in a mold to finish the saponification process (the chemical reaction of soapmaking). Hot process soap is heated, usually in a crockpot, which speeds up that initial saponification time. After that, both cold process and hot process soaps need a cure time of several weeks to be at their best!
Before We Begin
This method of making soap from scratch involves handling lye (sodium hydroxide). In the past, lye was traditionally made with wood ashes, while today we use a standardized product. No matter what it’s made from, lye is a caustic substance that requires careful handling by responsible adults only.
If you’re not comfortable working with lye yet, or want to make soap with kids, you may want to consider starting with melt and pour soap first. This type of soap making uses a pre-made soap base, manufactured in a factory where someone else handles the lye part for you. If that sounds more your speed, check out my article: How to Make Soap Without Handling Lye.

A Perfect Beginner Soap Recipe
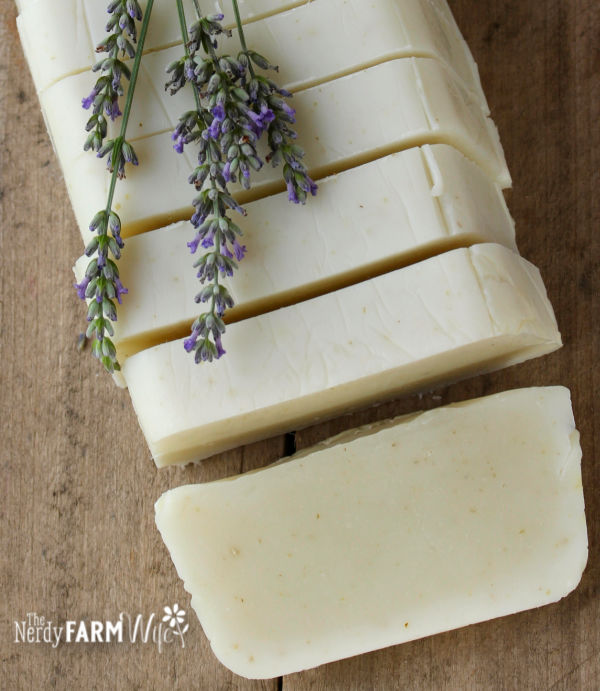
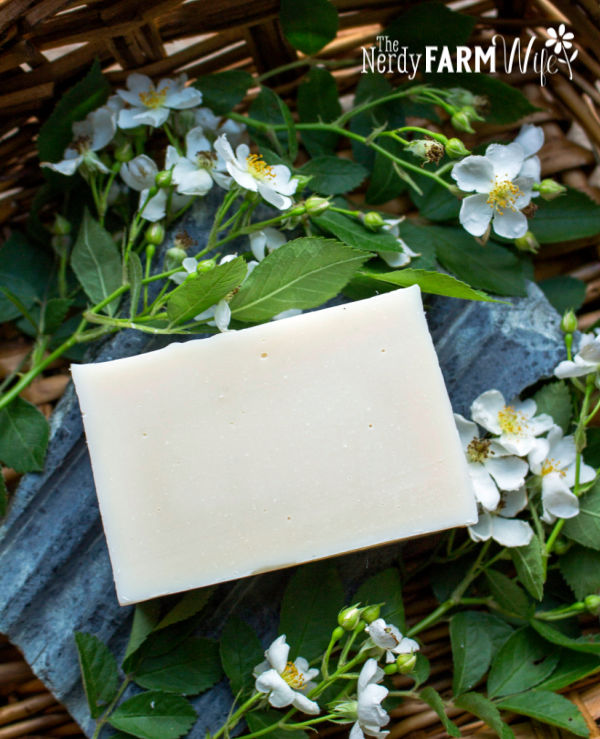
If this is your first time making soap, may I suggest a reliable recipe to try? Over the years, I’ve received countless emails from brand new soap makers who have successfully made my Oatmeal & Honey Soap Recipe for their first batch of soap, and have been very pleased with the outcome.
What makes it perfect for new soap makers is that it:
- Requires just two oils: olive oil and coconut oil, which can be purchased from local grocery stores.
- Includes a nourishing combination of oatmeal and honey. (Or agave, if you’re vegan.)
- Historically, has an incredibly high success rate. If you follow the directions precisely, and have quality lye, you will undoubtedly succeed!
You can find that recipe here: Oatmeal & Honey Soap Recipe
Here’s a video of me making a batch of simple Oatmeal & Honey Soap!
Sometimes an ad plays first, but the video will be right after. If you have an adblocker, it may also block your view of my video player.
Soap Making Tips & Notes
- Many people are afraid to make soap because it involves handling lye. I know that feeling, because I was the same way! I had my husband do that part at first until I got more comfortable with the idea.
- Lye requires caution, but you also just need to employ the same common sense you’d use for any potentially dangerous situation such as cooking with a hot stove, or handling a strong household chemical such as bleach.
- Handle the lye with proper protective gloves and eye wear along with a healthy dose of respect. Do NOT involve children in this activity and make sure pets are closed out of your work room.
- Always add lye to water and other liquids. (Not the other way around.) You can remember this by thinking of snow (the lye) falling on a lake (the water).
- Lye solution gets hot fast and puts off strong fumes for a few moments that you should avoid breathing in.
- An ideal place to work is your kitchen sink, near an open window. If lye spills on your skin, wash it off with copious amounts of cool water.
- An accurate digital scale is essential! Don’t measure soapmaking ingredients by volume (cups, tablespoons, etc.) as it’s just not accurate enough.
Helpful Articles for New Soap Makers:
Here are some articles that will be helpful for beginners as you start making homemade soap from scratch:
- List of Equipment to Make Soap at Home
- What’s Wrong With My Soap? (an ultimate troubleshooting guide)
- Why Do You Need Lye to Make Soap?
- Soapmaking Oils Properties & Chart
Okay! Now, we’re ready to start learning how to make soap step by step!
FREE Soapmaking Checklist
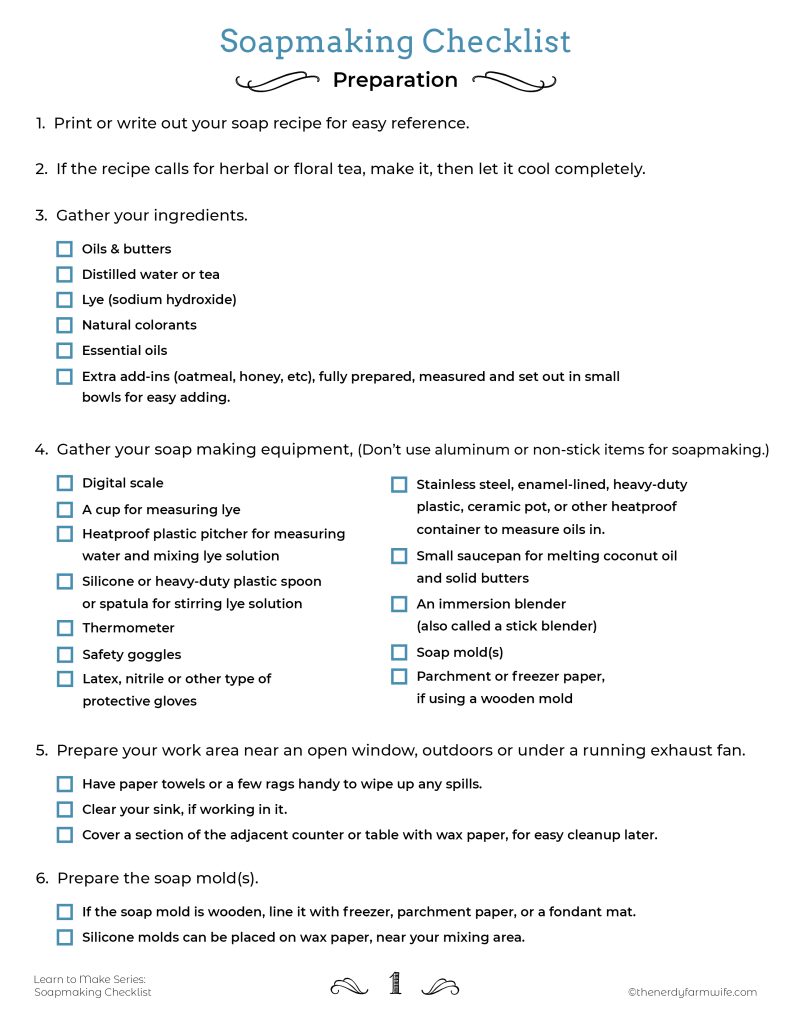
Be sure to grab a copy of my printable Soapmaking Checklist above. It’s indispensable to have a checklist for at least the first several times you make soap, to make sure you don’t miss an important step along the way.
It’s yours completely free when you sign up to my Soap Tips Tuesdays email series. Each week, you’ll get an email sharing one of my best soap tips, tricks, recipes, or more free printables. By the end of the series, you’ll have accumulated a great deal of knowledge about making natural soap!
12 Steps to Make Cold Process Soap
1. Choose a recipe and check it with a lye calculator.
I’ve included a beginner soap recipe suggestion for you above, but there are tons of other soap recipes out there to choose from! You can find many dozens of tried and true natural soap recipes in my published print books, ebooks, and soapmaking course.
No matter where you get the recipe from, it’s a good idea to run the ingredient list through a lye calculator to make sure the amounts are correct. Typos happen, even with the best editors! You’ll also need to recalculate the lye amount if you’re changing the oil types or amounts.
2. Assemble ingredients and safety gear.
You’ll need:
- Lye (sodium hydroxide) – sometimes hard to find locally, but check local small hardware stores. From Amazon you can buy ComStar, Red Crown High Test Lye, or Essential Depot Food Grade Lye. If buying locally, shake the bottle and if you hear lumps and clumps rattling around, it’s past its prime and won’t weigh out correctly.
- Other Ingredients – oils, butters, and additives such as essential oils for natural scent. Be VERY careful buying from Amazon, there are many mislabeled ‘essential oils’ that are really fragrance oils will make your soap misbehave. I recommend trusted suppliers such as Wholesale Supplies Plus, Bramble Berry, Soap Goods, New Directions Aromatics, and Bulk Apothecary.
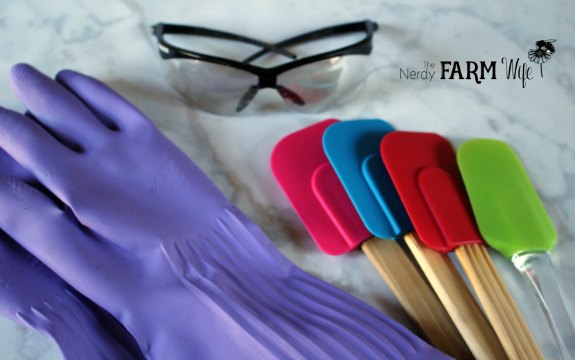
- You’ll also need a scale to weigh ingredients, a thermometer, an immersion blender, mixing containers (heavy duty plastic, or stainless steel), rubber gloves (or nitrile or latex gloves), safety goggles, and a soap mold. Read through my List of Equipment You Need to Make Soap at Home for a complete overview of the gear you’ll want to have on hand before you begin.
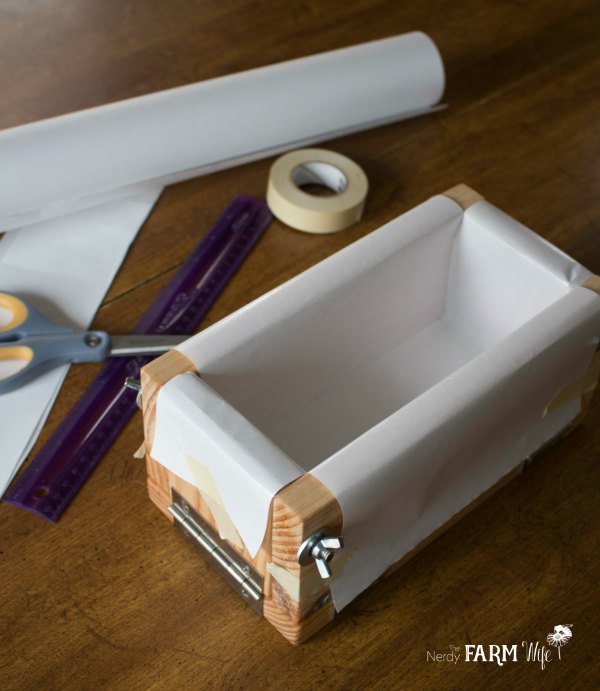
3. Prepare the mold.
If using a wooden loaf or box mold, line it with freezer paper. If your mold is made of silicone, you do not need to line it.
I use a Crafter’s Choice Regular Silicone Loaf Mold or similarly sized homemade wooden soap molds for my recipes. I’ve also seen soap makers successfully use rubbermaid containers, heavy duty cardboard boxes, and silicone bread loaf pans.
If you want to make your soaps extra pretty, check out my list of 15+ Pretty Silicone Molds for Making Handmade Soap.
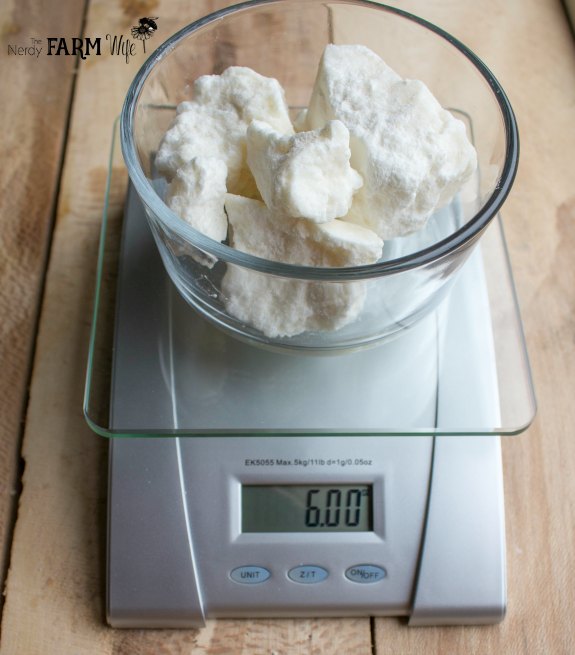
4. Weigh the water.
First, weigh out the water into a stainless steel or heavy duty polypropylene plastic (recycle symbol 5) container. [NOTE: In the past I’ve used glass or Pyrex, but it sometimes shatters, so I no longer use it for this step.] Mark this container clearly with a symbol such as a skull and crossbones and don’t put it in your fridge or on the counter where someone might mistake it for a beverage.
Use a Scale, NOT Measuring Cups
All soap ingredients should be weighed with a digital scale. You must use an exact ratio of oils and lye. Measuring cups just aren’t accurate enough and if you use them you may end up with a soap that’s too crumbly, or too soft.
5. Weigh the lye.
(Be sure you’re wearing those gloves and goggles!)
I use an old plastic cup, labeled “Lye” in several places all over with a Sharpie. I pour slowly and carefully then immediately re-cap the lye container and place it far from the reach of children and pets. Wipe up the area with a damp paper towel to make sure you catch any stray grains that spilled when you poured.
6. Sprinkle the lye into the water.
(You should still be wearing gloves and goggles!)
I do this in my kitchen sink in order to catch any splashes, drips, or spills. Make sure you pour the lye into water that is cool or no warmer than room temp. (Never add lye to a hot liquid or it will “volcano” out of the mixing container.)
Always add the dry lye to the liquid and not the other way around. Lye + water shoots up to over 200 degrees F quickly, so use caution when handling.
Turn your face away to avoid directly breathing in the fumes. I keep the window over my kitchen sink opened during this step or work outside on my back deck. If you don’t have proper ventilation, consider wearing a mask.
Stir with a heavy duty plastic spoon or rubber spatula until fully dissolved and set in a safe place, out of reach of children and pets, until it cools to about 90 to 115 degrees F.
7. Weigh and heat the oils, butters & fats.
Do this while the lye solution is cooling.
You can either heat everything together in a stainless steel soaping pot and then let it cool to 90 to 115 degrees F.
Or, I like to melt the solids (coconut oil, babassu oil, tallow, cocoa butter, shea butter, etc), then combine them with the liquid oils. This usually warms everything up enough, but if needed you can heat the mixture a little longer until the combined oils reach 90 to 115 degrees F.
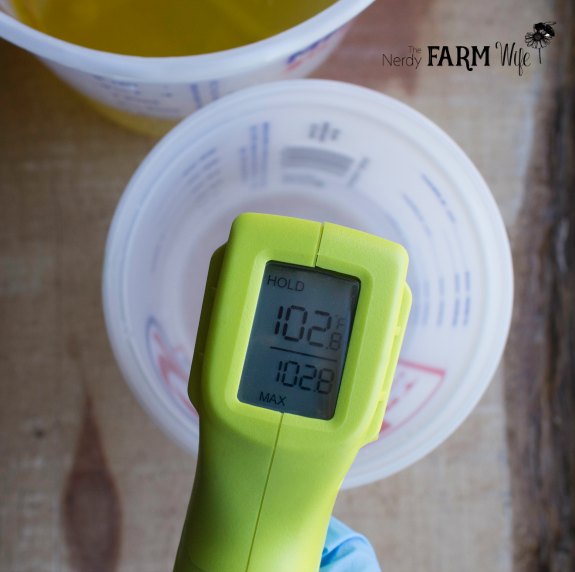
8. Monitor the temperatures & combine.
Your oils and lye solution do not have to be the same temperature. It’s completely fine if they’re 10 or even 20 degrees different from each other. I sometimes add an ice cube or two to my lye solution to cool it faster (it’s fine to adjust the water amount by this small amount) or set my pan of oil down into a sink filled with a few inches of water and ice cubes if it needs quicker cooling.
Temperature is a subjective, personal preference that varies between soap-makers. Some will only mix at higher temperatures than I list here, while others let everything sit overnight and mix the next morning at room temperature. Both ways are fine to use!
Once the desired temps are reached, slowly drizzle the lye solution into the container of oils and butters.
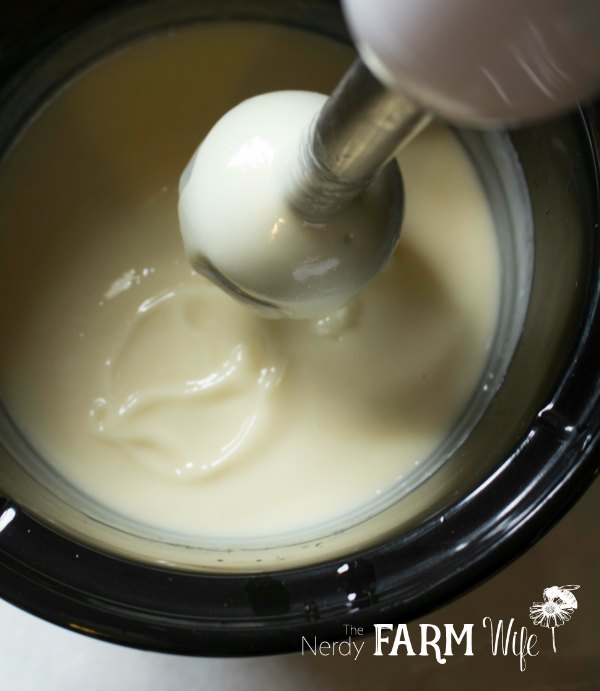
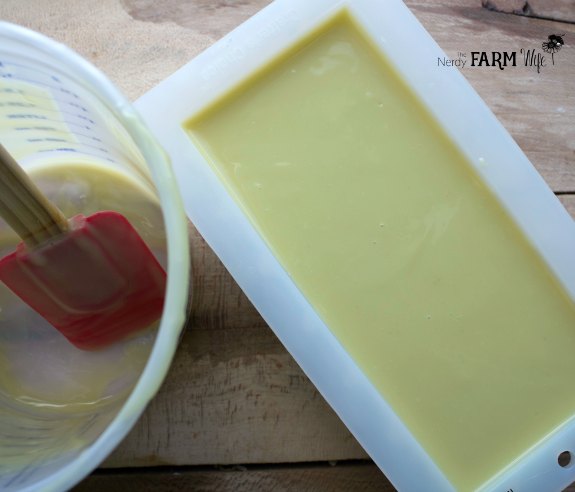
9. Blend until trace.
Using a stick blender (also called immersion blender), blend the soap in short bursts of a few seconds at a time, stirring by hand with the motor off in between times. Don’t run the stick blender continuously or you may burn out the motor and your soap will thicken up too quickly. It should only take a few minutes for most of my recipes to reach “trace”.
What is Trace?
Trace means when you drizzle a small bit of the soap mixture over the surface of itself, it will leave a faint pattern or ‘trace’ before sinking back into the mixture. The photo above demonstrates trace.
It’s a good idea to use a dedicated stick blender just for soap making and not for food use. (Not all soapmakers agree with this thought though.) Once trace is reached, add any extras such as honey, oatmeal, natural colorants, and essential oils and hand stir/blend for just a bit more until they are all incorporated.
10. Pour the soap batter into the mold.
Working quickly, pour the soap into your prepared mold, smoothing the top with a rubber spatula or wooden spoon if needed. Pick up the mold and give it a few sharp raps on the table or counter surface to help get rid of any little air bubbles that may have formed.
The soap is still caustic at this point, so keep your gloves on and be aware that raw soap batter can burn your skin. If that happens, rinse thoroughly with cold water.
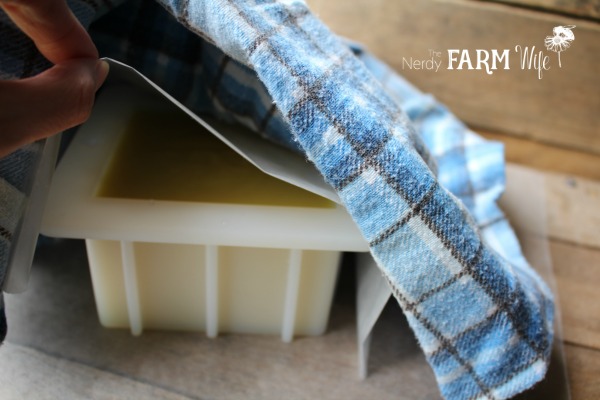
11. Cover and insulate the mold.
This keeps the soap warm so that it can go through gel phase and finish saponifying.
(If making soap with milk, it needs special treatment and won’t need covering. Read “How to Make Soap with Milk” for more information.)
Leave undisturbed for about 24 to 36 hours. (It’s okay to peek at it every now and then though. If you spot a crack forming on top, it means the soap is getting too hot and should be uncovered.)
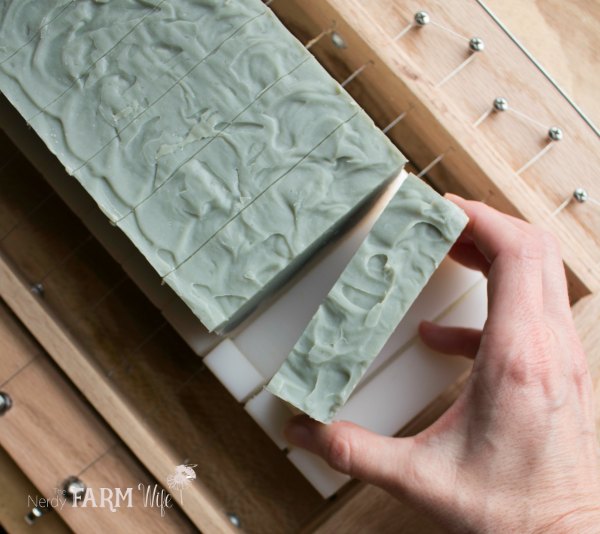
12. Unmold and slice into bars.
You can cut the soap into bars right away or later. I like to do it fairly soon after making, so that the soap is still easy to cut.
Use a knife or you can use a wire soap cutter like the one shown above. (My soap cutter is homemade, but you can buy similar wire soap cutters on Etsy.)
Let the bars of soap cure in the open air on pieces of wax paper, turning occasionally, for at least 4 weeks.
Cure time is very important so that your soap is mild and pleasant to use. This includes hot process soap too! Please read this helpful article over at Classic Bells: Curing Soap.
And that’s how to make soap, from scratch! ?

This is great! You make it sound so simple. Totally unrelated, I love the heart quilt. Did you make it? Can you share the method some time? Thanks.
Hi Debra! I’m glad you found the post helpful! My mom made that quilt for me – I’m fairly certain she just drew/copied a heart onto plain paper for a pattern, then cut as many as she needed out of fabric, appliqued them with some wonder under onto plain muslin blocks then zig zag stitched around the hearts before sewing the blocks together. She hand quilted around the hearts and the seams of the blocks. I would love to post on quilting some time – will add that to my list! :)
I so want to do this… I have so many things I want to do… I am an artist, and now that the kids are grown I am bursting with ideas…It is so hard to pick lol but this was enticing and I like the quilt as well… looking at mine right now.. thanks for posting this.. don’t ya just love the internet? C Griffin
I can definitely relate! I have sooo many things I want to make and do and learn! :)
Thank you for sharing your directions. I’ve been thinking about making my own soap for a while. Maybe your directions will help me find the courage to collect all of the tools/supplies and just go for it. And, I love the name of your website!
Hi Carol, thanks! I hope you do get to try making your own soap. It’s such a good feeling to create something so useful! Go for it and let me know how it goes! :)
Hello there! I’m vegetarian and I was wondering if there is a recipe that uses animal fat, can I substitute it for the same amount of plant fat? For example, can I substitute 100g of animal fat for 100g of cocoa butter exactly? I really want to buy your book on soap but some of the reviews say the recipes use animal fat and I’m not sure how I’d substitute it! Thank you so much in advance!
Hi Emma! If a recipe calls for tallow or lard, you can definitely substitute it for plant fats. I usually use a mixture of butters and other oils, depending on the recipe.
Here’s a guideline I start with when subbing out animal fats:
“Lard/Tallow: Replace with cocoa or kokum butter up to 15 or 20% + 5% castor oil OR use a combination of 5% castor oil + 10 to 15% cocoa butter + 10 to 15% shea butter + 10 to 15% mango butter.”
If you have a specific recipe in mind that you need help converting, use the contact form to email us and we’ll take a look at it. :)
Almost all of the recipes in my books are vegetarian, and the few that have animals fats listed always gives a vegan substitute idea, so maybe that’s another book that has those reviews? :)
This is great I love to make things by my self, thanks you for the knowledge
I’m still scared to use Lye, even with goggles and gloves. I don’t trust myself. (Super clutzy) Is there no way to make soap without lye? I’m thinking with beeswax or shay butter, ..something? Thanks though, I am bookmarking this page ;)
Hi Bridget, I am the same way, so understand your hesitation! :) You need lye to make soap from scratch, but you can try melt and pour soaps – https://thenerdyfarmwife.com/making-soap-without-lye/
I was scare to use lye to but once you do it once you will enjoy making soap and the fear will go away. try it
I put off soap making for a year because I was afraid of working with lye. If you follow the directions and take precautions there is nothing to it. I make soap all the time now. Wish I had done it years ago. Try it, you will be fine.
Ooo great stuff there, thank you! I’m liking the “melt & pour” idea. Glycerin, hmm..=) Thank you again!
I make all of my soaps from a melt and pour method using different glycerin blocks. I use essential oils, oatmeals, blueberry seeds, eucalyptus leaves etc for exfoliates, coconut oil, olive oil, Shea butter, even almond oils and goats milk, then pick your essential oils and any colors. You can make great soaps and they lather and they sell quickly too:) I as well don’t like using the lye:)
This is brilliantly laid out and precisely detailed, Jan. Well worth the wait! Thanks for sharing…and I trust all your assignments went well for you, too. Best regards, FD @ Ladybug’s Mew.
Thanks Farmer Doug! So far, so good as far as my homework. I’m putting a project off this week so I can get a post or two up then I’m likely to disappear again into a state of confused muttering and head scratching for another week or two. :)
What happens if you pour the mixture if it’s not “traced” enough or if it’s “over-traced”? If it’s not thick enough when you pour the soap in the mold, what will happen? Likewise, if it is too thick how to you fix that? Can you tell, I’m not a risk taker? Actually, I just hate wasting my time & money-I don’t have a lot of either :)
Hi Christi, I know exactly what you mean about time and money! :) I know for sure what happens when you pour it too thin – it will leak out of your molds and all over your table and floor. (Assuming you use molds with seams vulnerable to this.) This happened to me the first several batches. We stirred and stirred and got tired of stirring so thought it was enough (it wasn’t.) Using a stick blender however, will speed things up considerably. You’ll quickly see the mixture turn thicker and it will be somewhat like a thin pudding by the time it’s ready. If it’s too thick… you would just have to work as fast as you can to scoop it into your molds and you might have a few pockets where it’s not completely smooth & pretty, but it will be perfectly fine to use. In fact, for my camo soaps, I like it on the thick side so the colors won’t run together.
Thanks for the information, next step will be to find a recipe using oils & butters I have on hand. I look forward to reading your future posts-let the soap games begin!
Very interesting, can you also use essential oils on them?
Yes, you can essential oils to them at trace, right before pouring into the molds. (They can sometimes make your soap suddenly set up faster, so you want to add, stir and pour quickly.)
Here’s my chart on essential oils for soapmaking with more essential oil info:
https://thenerdyfarmwife.com/essential-oils-for-soapmaking-chart/
I thought they will quickly evaporate which will defeat the objective but glad to hear it can be done ;) Thanks
A friend and I have been making soap with goat milk as our liquid and a combination of coconut, olive,and palm kernel oil and shea butter as our fats. We’re cautious when mixing the lye with the milk and now we feel like pros. I love this soap so much I can’t imagine using anything else. It’s so creamy, moisturizing and the alpha hydroxy acids in the milk make it a great exfoliant. Once our PKO is gone though I’ll try some of the suggestions for using other fats.
That sounds like a lovely soap! :) I know what you mean about not wanting to use anything else – I hope to never have to go back to store bought again!
I have always wanted to try this, but, like you said, the lye always scares me away.
It can be scary thinking about it at first! It helped me to approach it somewhat like I would bleach; it’s also a super strong chemical that requires a lot of respect in handling, but something we’re all so familiar in dealing with, that it’s kind of old hat. I hope you do get to try one day – it’s a really fun hobby! :)
Enjoyed the post!
Making soap is on my to do list this year.
I have talked about it for yearas and decided this is the year for doing!
I have a few goats I milk so plan on making goats milk soap.
Thanks again for the good read. Definately going to make a copy :)
Hi Sandra, thank you so much! I hope you enjoy your soap making fun!! :)
I have always wanted to try soap making and now can’t wait to give it a go. I am just starting to dig up various sections of my yard to plant herb and edible garden beds around the place. the biggest challenges I see will be Kikuyu (evil stuff that comes up everywhere!) and my 1 year old fur baby getting his paws coated in lovely lush and smelly soil! Whilst looking for herbs to plant that were also going to be useable I stumbled upon your website… it is AWESOME!! Thank you so much for sharing all of your experience and recipes… My mum is a naturopath and my grandmother was a real greenthumb , and so I have grown up hearing about the uses for different herbs but have sadly waited until my late 30’s to get into it . Please keep adding to your recipes, I am fascinated! And seccretly hoping I can work out how to make most herbs grow in our Perth Climate – Western Australia (its Autumn and still 37 degrees) I seem to do real well with oregano… Do you have some balms, salves etc that use that? LOL. Thanks again! Ness
Hi Ness and thanks for the kind words! You sound like you have a great herbal heritage and a wonderful place to get your herb gardens started! I have an abundance of oregano as well, but don’t use it that often – I need to come up with some new ideas for it! :)
Hi there, I used to make my own soap, but haven’t in quite awhile. Your post has me excited to do it again! It is so satisfying to use your own soap, and it makes a wonderful gift. One thing…you mention that lye can be hard to find. The person I learned from used Drano and it worked beautifully. Is there a reason why this isn’t the best method? Thank you!!
I’m glad to hear you’re going to restart your soap making! :)
Drano isn’t recommended because it isn’t pure sodium hydroxide and has other ingredients harmful to your health, including shards of aluminum. Here’s the full list from the maker:
made soap for the 1st time used a silacone mold, let set for 24 hours covered, used 24oz coconut oil, 24 oz olive oil, 15ml of each lemon, lime and tea tree oil 16oz of distilled water, 7.7 oz of lye when i cut it it cracked was not able to get a nice even cut bar. What do you think I did wrong?????
Hi Tawn, I’m so sorry to hear that! When I run your recipe through the lye calculator at Majestic Mountain Sage,
It says for a recipe containing 24 ounces coconut oil and 24 ounces of olive oil, you should have 7.21 ounces of lye. (Using the 6% extra oils allowance that I normally use.)
Is there another oil that you forgot to type in here or did you use that much extra lye? If so, your bar is going to be really lye heavy so dry, hard and/or crumbly plus too caustic to use.
If you try this recipe again, I’d use the 7.21 ounces of lye. Your water is spot on though. Also, make sure you measure the oils by weight on a scale and not fluid ounce.
I’m sorry your first batch did that! I know my first several failed as well and it was discouraging, but don’t give up! I hope your next batch is perfect! :)
I am so sorry it has taken so long for me to reply. I just wanted to say thank you so much for the info. I tried a second batch and it turned out great. I have been using my soap for about a month now. I also cut my batch in half just in case. I will definitely be making more. Thanks again for your help and also for responding back to my question so fast. :0)
That’s wonderful to hear!! So happy that your second batch turned out great! :)
We used to make soap in a cast iron pot. We put the water in them added lye. Waited a bit for it to cool and then carefully opened the lard and let it fall slowly into the pot. We mixed it with a long stick until it was creamy like hot cereal and then pored it out to finish. This was the best thing we could do with the lard since we never would use lard for cooking. That was a long time ago so more than 45 years has made the details a bit fussy. My scale does 2 grams at a time so I can’t get exact grams. I would rather make soap outside so if it splatters I don’t have a mess in my house. Looks like recycling an old barbecue grill would make a good soap making station especially if it had side stations on it. I would just be able too close the lid and not have to worry. you could ever lock it so no one would mess with your stuff when you were making it. Thanks for a more scientific way to make soap so you get a better soap. I don’t remember how it turned out but I am sure we used it and were OK.
Hi Renee’! What great memories! My husband’s grandpa’s family made soap in such a way and he grew up strong and sturdy too. :) I like your barbecue grill idea as well!!
I like coldpressed soaps but the lye drys out my skin so bad. I now understand when I’ve read stories from the early centuries and they mentioned their hands looking so bad with hangnails etc from washing with lye soap. So I use glycerin, coconut or others to make my soap.
You’re right – too much lye in a batch of soap can certainly dry out your skin! That’s why I like to superfat my soaps so that they are very gentle and moisturizing. :)
Is it possible to make a soap without lye? It’s seems it would irritate sensitive skin. Any recipes or ideas for people that are sensitive to traditional soaps that contain lye?
Hi Kami, That’s a very common question – all soaps are made with lye or a chemically equivalent strong alkaline solution. It’s what makes the oil turn into soap. Even store bought soaps have lye in them, they just don’t say “lye” – they say “saponified” or list the ingredients in a way like: “sodium palminate” – which just means palm oil reacted with sodium hydroxide (lye.) Many people like melt and pour soap bases because the producer has already done the step that requires handling lye so you can have “homemade” soap without directly dealing with lye. Often though, there’s added chemicals, so you really have to read labels.
The great thing about homemade soaps is that they still have the glycerine (the part that really moisturizes your skin) in them so they are extra beneficial for your skin. Most big soap makers will separate out the glycerine and sell it for profit. The reason that some people still think lye soap is irritating to the skin goes back to a few generations ago when people made it without properly measuring the lye to oil ratio so the resulting batches were often too heavy on the lye, so harsh. Modern day soap makers do not have that issue, which is exactly why I make our own soap for own super sensitive skin. :)
Looking forward to being able to do some of the crafts after I heal from knee surgery. Your site looks GREAT!!!!
Di
Thanks Di! I hope your knee heals up quickly! :)
Thanks so much for the recipe :)
so many people have commented on the article and its great to see them all interested in making soap! Rest assured I’ve read every single one of them and enjoyed doing so!
Hi Peter, So glad you enjoyed reading through the post and comments. I love seeing people interested in soap making as well! :)
what is a safe source to buy lye? I have been wanting to make soap for my family for a while…. Looking for a natural product since we strive to do only natural and organic products and wasn’t sure if lye had become a victim of the make it cheap by adding unnecessary ingredients…
Hi Vanessa! That’s a good question. I haven’t heard of any adulteration in pure lye, but that’s an important thing to keep an eye out for.
I don’t believe that there’s a natural source, per se, because sodium hydroxide is a man-made chemical. I have seen a few places around the internet where you can make lye from wood ashes though, here’s one such article:
http://www.motherearthnews.com/homesteading-and-livestock/how-to-make-soap-from-ashes-zmaz72jfzfre.aspx#axzz2Yq6RJCto
I buy mine from my local Tractor Supply (farm type) store. I’ve also gotten some from my local small hardware type store. The main thing to look for is that the label only says “sodium hydroxide.”
I hope you enjoy making your own soap! :)
I have been reading everything within my reach to prepare for my soap making chapters of life. Thank you for for sharing your knowledge. Inspiration from your name, my own skin troubles and cleanliness provoke me to take the next step to start sooner than later. Thanks thenerdyfarmwife!
That’s awesome! Good luck with your soap making – it’s such a fun (and useful!) activity. :)
hi,
i would like to ask what happens if we pour the soap into the mold and leave it there for more than a day? usually instructions will mention to remove from mold and cut after a day. i’d like to know if we leave the soap in the mold for more than a day, say a week? will anything happen?
also, what happens if we do not mix the lye and the oil at the same temperature? what if we do not measure the temperature and just mix them?
thank u
regards,shia
Hi Shia,
I’ve left my soap in a mold for up to four days without any problem. It’s just that after the first day or two, the soap has set up as much as it is going to by that point, so you might as well remove it and let it start curing in the air. If you did have to leave it in the mold for a week, perhaps uncover it so that it can “breathe.” As the bar cures in the air, it hardens and lightens in weight. You definitely don’t have to cut after a day – I sometimes keep my soap in large blocks and only cut a bar off as I need one. (In fact, I have a batch of violet soap from April and rose soap from May that’s still sitting mostly uncut right now.)
I try to get my lye and oil in the same ballpark range of temperature before mixing, but you don’t have to be extremely precise. One can even be about ten to twenty degrees cooler or warmer than the other and you’ll be fine.
thank u so much for your reply! :)
You’re welcome! :)
How do you clean the utensils after using them. Is it ok for stuff to go down the drain? I have always wondered about that. Thanks in advance.
Hi Janice! That is a great question that I need to address in a post one day! You don’t want it to go down the drain, because it’s not soap yet – it’s akin to pouring grease down the drain when it’s freshly made.
What I used to do, was to put everything in the dishwasher once I poured the mixture into the molds. Eventually, my dishwasher stopped draining correctly, so we got another one. That one shortly broke too. Turned out that I had clogged the pipes with the soap mixture and had to get a plumber in to fix everything. He told me to NEVER put raw soap in my dishwasher/sink again!
Now, I have two ways to clean up the pan & utensils: First way – I will immediately wipe out the pan and clean the utensils with paper towels or old rags. (no water.) Make sure to wear rubber gloves because the mixture is still caustic at this stage. You also want to bag up the dirty soap rags well so that no kid or pet accidentally comes across them. I tie them up in a grocery bag before tossing in the trash. A second alternative – I just set the pot & utensils aside and out of the way for about a week. This gives any soap on them a chance to harden and be more soap-like & less caustic. I take a spoon and scrape off most of the soap layer and then I can easily rinse any extra layer of residue off in my sink. At this point, it’s no longer raw soap that will clog the drain. It foams up and washes off nicely with warm water and some elbow grease. Method one is the easiest way! But, both options work & will preserve your pipes! :)
You mentioned placing the top on your soap mold and covering with blankets for it to saponify. If I’m making my own soap mold, can the mold top be any hard surface to lay over the mold? I’m thinking maybe a baking sheet?
Thank You
Hi Talia! The top can be a plastic lid or a piece of cardboard or plywood… anything kind of hard to protect it. You want to avoid anything metal though, especially aluminum, since it can react with the remaining lye in your uncured soap.
Thanks Jan! One other question…how do both the lye solution and the oil mixture reach the same temp when mixed at different times? I’m guessing even if they were mixed at the same time, each mix would have their own rate at reaching just the right temp. Just trying to figure out how this works before combining the two.
They don’t have to be exact. Some people like to use them when about ten degrees different. I’ve found by trial and error that if I mix the lye into the water first then let it be cooling while I get everything else together, it works best. It gets MUCH hotter than the oils will (which only need a short time heating on your stove and are easier to modulate with the burner controls.) Depending on the weather, I’ll let the lye water sit outside for a bit to cool it further (making sure no pets, kids, or wildlife can get to it – my area is a separate back porch they can’t reach.) I also sometimes add a few ice cubes to the water to speed up cooling too. I hope that helped! :)
Thanks! I appreciate your advice! =)
Thanks for the great post! I will be making my first batch of soap this weekend. I have all the stuff now I’m waiting on the courage. ha ha.
You can do it! :) I hope you have lots of success with your first batch!
I want to Thank You for this post!!!!
This post is the best I have ever read about making soap! I have bought books but they have had too much chemistry in them and they have not made sense to me. You have given easy to understand instructions to make this a pleasure! The others post I’ve read have just been too complicated.
I understand that it is probably better to understand the chemistry but you have made it sound like you can learn a Loy just by doing, which is how I learn!
Thank You!!!
Yay! I’m so happy to hear that you found it helpful! :)
sighing…………you are sooo very talented! I’m very impressed with your site. I was initially drawn to it because of the beautiful images and then found myself reading through a lot of it. I don’t know if I will ever be able to make soap though.
Thanks for the kind words! I didn’t think I could ever make soap either – but you never know until you try! :)
My husband and I are just beginning to discover the great fun of making our own soap together. We’ve made a coconut and olive oil soap that we really love and gave as gifts, even in the past. I absolutely love the creative process involved and hope to one day have a small online shop or something similar, so I can earn a living doing something I love doing. :-)
What a wonderful activity to do together! :) Best wishes that you will soon be able to have that shop!
I don’t make this type of soap because of the lye handling. I am too accident prone since I am somewhat disabled and the last thing I need is more burns. However I stick strictly to making liquid soaps because they do NOT require handling lye.
I remember reading an article many years ago about a plant called the Yucca or yew something like that anyway but that the fluid from the plant makes a great liquid soap and many native Americans used it as a shampoo back in the day. Still trying to find something more about that so I can make the soaps and shampoos.
Hi Alexis, I’ve read that about yucca before too and it’s on my list of things I want to try out! This recipe looks especially easy since you wouldn’t have to dig up the root: http://sensiblesurvival.org/2011/12/14/make-soap-from-yucca-leaves/?relatedposts_exclude=1193 I use Soap Nuts for laundry and I’ve read you can make shampoos and liquid soaps from them as well. I also have some soapwort seeds I’d like to plant and try. Thanks for reminding me about yucca and all of the other great options that nature provides! :)
I’m making my soap now and it just won’t reach trace (too much water?) and it’s in a soft gooy stage. (I’m using an electric mixer) what would happen if I just pour it in my plastic mold anyway? :S
Hi Katie! What recipe did you use? I can look at it and see what the water looks like. For my first few batches of soap, I poured my untraced mixture into molds only to have the caustic soap ooze out EVERYWHERE. Was quite a mess! I do hope yours set up for you though! You might also want to read this about stick blenders versus electric mixers for stirring soap: http://millersoap.com/SoapFAQs.html#8
oops looks like I bought the wrong type of mixer. I used your honey and oatmeal recipe and added about 20mL extra for water. It did reach trace after I left it to sit for half an hour and mixed for another half an hour :)
Ohh okay. Yes, the stick blender does an excellent job of reaching trace much more quickly. The extra water probably wasn’t needed either. However, it did reach trace so yay!! Great job making it work! :)
I remember my grandmother making soap in a large cast iron tub. Hers was made with lard rendered from hog fat. She used it for washing .
What a great memory; thanks for sharing! :) It’s amazing how much our grandmothers accomplished in the same 24 hours we all have. I’m always in awe and inspired when I think of it!
Thank you, Jan. Could you give me more info about the “soap nuts” you spoke of. Where to find them, or how to make them, etc.
Hi Alexis, I buy my soap nuts from MountainRoseHerbs.com. I take about 5 at a time and tie them in a sock and throw them in the bottom of the washer while it starts filling with water. For best results you need to use warm or hot water. You can reuse them several times before throwing in your compost pile.
Here’s a list of other ways to use them you might find helpful!
http://www.crunchybetty.com/the-mother-of-all-soap-nuts-recipe-resources
Just came across this site, and really enjoyed reading it and all the wonderful comments. A great book for beginning soapmakers is Country Living’s (as in the magazine) Handmade Soap. I have tried every recipe in it, and they have all worked perfectly.
Hi Carol! Thanks for the kind words and book recommendation. I’m always looking for new books for my collection and will definitely add that one to my wish list. I love Country Living magazine so I bet it’s fantastic!
HOW DO YOU ATTANE A neutral Ph in your soap witch is very good to have for the elderly or anyone with diabetes who may have compromised skin, and are there any good bactericidal natural additives so the soap can be used on wound ? even dove has acid base and even nivia I remember mom soaking wood ashes for lye and we used beef tallow or pork fat ( dad always insisted store soap didn’t do a good job) he kept all his hair until he died and it didn’t turn grey
Hi Nick! This won’t be a neutral pH, it’s more alkaline. As long as you don’t put too much lye, it’s super gentle on your skin. My dad with diabetes and several lderly people I know, use homemade soap and love it!
Hey Jan! I’ve just started my soap career, thank you for all your tips, they always come very much handy. Chocolate/cocoa soap is my next challenge. Since I’d like to keep a cocoa scent, I was thinking of adding cocoa butter (10% of all oils) only at trace and not at the beginning together with other oils. But I’m quite sure this will not work since the quantity of oils mixed together with lye solution will be too weak for the saponification process to start. Am I wrong? What do you suggest? Should I put the wanted amount of coca butter to all the other oils at the beginning and only add an extra spoon or two of cocoa butter at trace (I’m making a small batch of 1 lb). Thank you for your answer. Best, Mandy
Hi Mandy! I think you could mix in all of the other oils first, stir just a minute, if that, (with the stick blender), then stir in the rest of the cocoa butter, maybe saving a spoonful for adding as soon as you hit trace. This is just a guess though – just how I would try it out first! :) I’ve made soap with cocoa powder and mint before and it smelled just like a peppermint patty. (Yum!) The cocoa powder gives some chocolate scent too. Good luck with your soap!
Hey I am new at this soap making. I am so nervous with getting started but I have everything I need. When people say use the lye calculator to create your recipe. I was wondering how to you create a recipe and know what kind of oils to use and oz of each. It might be a silly questions but being new at this I have no clue. Thanks!!!
Amy, that is an excellent question and one that I plan to write a post about. (It’s a big long answer!) :) In short though, I search online and in my soap books for charts that tell you recommended amounts of certain oils to use, for their various qualities. So, for example, this chart at Nature’s Garden:
http://www.naturesgardencandles.com/mas_assets/pdf/soapoils.pdf it says Avocado Oil use 5 to 30% and gives its properties and so forth. Then you can scroll down and see not to use more than 30% coconut oil or it can be drying (though extra superfatting can counter that, so it’s not a steadfast rule). So, you can either take an existing recipe and change it all up or start from scratch and plug in amounts of the oils you want in the calculator and see what percentages it tells you you have then keep adjusting until they all seem good ratios. You can put together a nice soap that has lather and moisturizing properties that way. It’s like a puzzle of sorts! :) If in doubt though, you can always fill in with olive oil, because that is the one oil that you can make a soap with 100% of it. (though it won’t lather as well, so it’s good to combine several oils.) For starters though, it’s always good to use a tried and true really basic recipe. I’m pretty sure there are a few good ones at soapqueen.com that are pure, no frills soap. Once you get that down, you’ll quickly see how many zillions of ways that you can change that one recipe to get more colors and scents… it’s kind of addictive! :) I hope that bit of information helps and I hope to get a much lengthier and more informative post in the near future!
Jan, Thank you so much that will get me started. Cant wait to see the post you do on it!!! Thanks again Amy
I learned to make soap from Susan Miller Cavich’s soap making books. I make goat’s milk soap (which you do not insulate during cure) as well as soap from lard (rendered from my homegrown pigs). I don’t buy any soap products. As for cleanup, I put everything in the sink to soak overnight then hand wash using plenty of HOT water to rinse. Have had no plumbing problems. But never ever dump a batch of raw soap down the drain. Leftovers that won’t fit the mold are scraped into a covered soup mug and allowed to cure. I use them next to the bathroom and kitchen sink.
Hi Laurel, thanks for sharing all of those great tips with us! :)
I want to make goat milk soap, so are you saying, I don’t cover it up with blankets.
Do I put it in frig??? Please send some pointers
Hi Susie, Milk soap will heat up a lot on its own, so you don’t have to cover it up with blankets. Some people want to keep their milk soaps cool to prevent them from going through gel phase and turning darker so will put the soap mold in their refrigerator. I like mine to go through gel phase so just leave them sitting out. That’s really a personal preference thing and if you try one batch one way, and then another batch the other way, you can see what method you like best.
Hello,
My husband and I have decided to try soap making as a hobby together after falling in love with homemade soaps. I think your site it WONDERFUL and we plan to follow many of your recipes. One that we will be trying first is the Oatmeal & Honey Soap. I have your ingredients list, but was wondering what size mold this amount would be suitable for. I am worried to but too small of a mold and then have too much soap for it.
Thank you! Your site I spires me ;)
Hi Shelby! That will be a wonderful hobby to do together! :) The oatmeal & honey soap is one of my older recipes, when I used box molds more often than loaf molds. It makes quite a bit of soap – about 18 bars! It calls for 82 ounces of oils compared to the 2 lb loaf mold I currently use most which only takes about 30 oz of oil and makes 7 or 8 bars. If you reply here with the measurements of your mold, I can help you figure out how to resize the batch to fit. This site will also be helpful to read – to help you figure out how much soap a mold will hold in the first place.
(Edit: oops forgot the link!) http://candleandsoap.about.com/od/suppliers/tp/Calculating-The-Size-Amount-Of-Soap-To-Fill-A-Soap-Mold.htm
Nice site you have here, very informative. Many people have trouble calculating oil amounts for mold sizes. To determine that use, Length X Width X Depth X .4 = amount of oil to be used. Then decide how much of each oil you want to use. Don’t forget to use your lye calculator.
Hi Bill, Thanks for the kind words and for sharing that calculation with us! It does get quite confusing figuring out mold sizes!
When I first started making soap (using hot process) I was putting crushed up herb leaves as an additive, but it never turned out smelling like at all like the herb. I was wondering if I used cold process with crushed up herb leaves if it would smell like it, or how I would go about making herbal soap (without using essential oil) to make it smell like the herbs. Help!
Hi Cay, Unfortunately, herbal scents don’t seem to make it through the saponification process. The only reliable way I’ve found to scent cold process soaps is by using essential oils. I’m always experimenting though, so there might be a way I haven’t discovered yet. If so, I’ll surely update this comment to let you know!
Jan, I have been making cold processed soap for about a year now and that is the only kind I use anymore. I add dried herbs to mine as well as essential oils. Also for molds I find the silicon molds at thrift stores and use them and they work great the soap pops right out and you can find all kinds of shapes. I have 3 mifin pans and 2 bread loaves that I use.
That’s a great tip for finding affordable silicone molds Krista – thanks for sharing!
Hi Jan,
I bought Sandy Maine’s book about 10 years ago and was scared away by the lye. This winter I took a class, and now am not so scared. I’ve decided to try it on my own and found your blog. Am going to read a lot before I get started. I was wondering why your preference for wood molds. Is it that the soap looks more rustic? Also, wondering is that parchment paper you line it with? Thanks for all your tips and recipes.
Hi Bridget,
That’s great that you’re going to get into soap making! I do use parchment paper to line wooden molds. Waxed paper is a little too flimsy and the moisture goes through and is hard on the wood. The main reason I use wooden molds is because that’s all I had to work with for a long time. My dad and brothers are wood workers & my hubby is in construction, so they would make me molds from wood scraps. A few months ago though, I was finally able to squeeze a silicone mold out of the budget and I have to say that I love it! This is the one I’ve been using a lot of lately:
http://www.brambleberry.com/Silicone-Column-Mold-P5619.aspx
It holds recipes that have about 27 or 28 ounces total of oil in them. I also decrease the water by an ounce (usually 8 ounces instead of 9 ounces) so that it firms up faster in there. I did have one problem with it the first time I used it. I tried rapping it firmly on the table to get out air bubbles after I filled it. That was a mistake! The sides came loose and raw soap came out everywhere! That was complete user error though. It’s really secure and won’t leak as long as you have it thoroughly sealed up and avoid moving and jostling it around until the soap firms up.
Good luck with your soap making! :)
Jan, Thanks for the tip and website link. I’ve seen round soap and I like those shapes. I also like the raw look of rectangular bars. I’m reading up lots before I make my first attempt. I’ll let you know how my soap turns out!
Sounds great – I’d love to hear how it goes!
How do you determine the amount of soap you need to make for a specific mold?
Hi Lisa! This great article has all of the information you’ll need to calculate that:
http://candleandsoap.about.com/od/suppliers/tp/Calculating-The-Size-Amount-Of-Soap-To-Fill-A-Soap-Mold.htm
I was wondering about add-ins with soap making. I see a lot of lavender buds, rose petals, even cut lemon slices made into the soap bar. I was wondering how that works when you use the soap. Are you in the shower picking the stuff out as it works it’s way to the soap edge.? Have a trash next to your shower to throw these things in? Stuff seems too big to go down the drain. I understand the ingredients that are supposed to exfoliate, but I don’t understand big hunks of things that don’t.
Hi Christina, The larger add-ins are generally added for looks and market appeal. They’re pretty to look at, but you’re right – they aren’t very practical for use! If you make soap and want to stir in dried herbs or flowers, it’s a good idea to powder them in a coffee grinder first and then sift them through a fine mesh sieve. This way the soap isn’t all gunky or scratchy when you wash with it. Still, most add-ins like that will eventually discolor to a brown or black shade, so it’s good to be sparing with amounts.
I have a problem. I started making soap today and I’m using a melting soap kettle. I can not keep my soap hot long enough to stir in the fragrance and coloring. It say not to put coloring or fragrance into the kettle. I’ve been using a bowl to scoop it into to add the other things before I put it in the molds. Any suggestions for keeping it warm while I’m adding the other things?
Hi Ellie!
I’ve not used a melting soap kettle before, but when I make melt and pour soap, I deal with small amounts at a time and use a pyrex measuring pitcher in the microwave to melt the base. It turns into a liquid and has a reasonable window of time where you can add in extras before it starts to set up. Is your soap base melting completely? Maybe it’s not warm enough to start? Or perhaps it’s the type of soap base you bought? One thing that might work to keep the soap base warm longer would be to place it in a heat proof bowl that could nestle down over a pot of steaming water. (making a double boiler of sorts)
This is a link to a melt & pour guide on the Soap Queen blog that might have some helpful ideas:
http://www.soapqueen.com/bath-and-body-tutorials/melt-and-pour-soap/free-beginners-guide-to-soapmaking-melt-and-pour/
(If anyone else reading this has more experience with a melting soap kettle & better tips for using one, feel free to chime in!) :)
Thank you. I’m going to try the double boiler. :) I also thought of using a measuring cup on a candle warmer to keep it from turning fast.
That’s a great idea too! :)
Is cold process soap prepared with neem oil as one of the soap making oil safe to use for small kids/toddlers?
Also I have an another query,
Are these Essential Oil safe to use as fragrance in cold process soap preparation for kid (3 year old)
ylang ylang
grape fruit
orange
Hi Akila! From what I understand, neem oil is generally recognized as safe when used topically. In fact, when my son was kindergarten age, his doctor had him rotate several natural antibiotics for his stomach issues, and neem powder was one of them. He did very well with it. If you’re still concerned though, you can double check with your family health care provider for their opinion.
As far as essential oils – I don’t use them a ton to have them memorized, and don’t have a guidebook on hand, so what I always do is google the name of the oil along with the word safety. When I do that for: ylang ylang safety – I picked the site webmd (versus those who sell essential oils who might embellish their claims a bit.) It says: “Ylang ylang oil seems safe for children and adults in the amounts found in foods. It also appears to be safe when applied to the scalp in combination with other herbs…” Then I would read a few more sites to make sure. My first thoughts are that unless you have a citrus allergy, grapefruit and orange should be fine as well, but it’s always good to research and read around or double check with your nurse/pediatrician first.
Hi Jan,
The other day I was at my local pharmacy and saw some handmade soap but it didn’t list lye or sodium hydroxide in the ingredients. So, I were to buy that bar of soap, how would I know I am buying “soap made from scratch” or melt n pour, can I tell the difference when using them?
About the calculator, after inputting all the oil, will the result show me how much water I should add also? Or I just estimate the water, oil to get the lye calculation?
Thank you so much here again.
regards,
Magdalene
Hi Magdalene,
Some people list the oils as being “saponified” which is another way of saying that they have been reacted with lye. You might also find something like sodium tallowate or palmitate – which is another way to say the sodium part of sodium hydroxide (lye) mixed with tallow or palm oil respectively. If the label is 100% truthful, then if it’s melt and pour, you will also see ingredients listed such as: sorbitol or soy bean protein or sorbitan oleate. If it just lists oils (saponified or what have you) and water and perhaps color/fragrance, then it was probably truly made from scratch. You may or may not be able to tell a difference when using. I find melt and pour makes my skin feel dry, but others love it. It’s a personal preference thing probably. :)
For the lye calculator question: The results will show you how much water you should use after you input the oil amounts and hit the “calculate lye” button. If you look on page 69 of your book, on the left hand side, you’ll see a photo where it lists the water range. I’ve also put the photo here, for your convenience: https://thenerdyfarmwife.com/wp-content/uploads/2014/07/Liquids-as-shown-on-lye-calculator.jpg You don’t need to estimate the water or lye. The calculator will give you numbers for those, once you input your oil numbers.
These instructions apply to the lye calculator at Majestic Mountain Sage; I like it because it’s pretty straightforward. You might find other calculators online with extra bells and whistles that might be confusing to someone just starting to make soap.
I hope that helped answer your questions! :)
Jan,
Thank you heaps and I really enjoy chatting with you here. Good news, my supplier has already shipped out the soap cutters to me and I can’t wait to get them in hands and now looking for a digital scale, other essential soap making items, ingredients. Will definitely let you know here how the soap making goes!
best regards,
Magdalene
How exciting! :)
Jan,
When do you think you release your 2nd e-book? I am looking forward to it!
regards,
Magdalene
Hi Magdalene, Hopefully by the end of August! :)
Hi jan!! I really hope you don’t mind, but my uncle and I are trying to make a soap mold similar to yours so to the recipes will fit better, and it’s less expensive :). Your mold is 16×11.5×2 with a divider down the width, correct? Also, with your permission. I don’t know if you want more molds out there like yours, since your was a gift. Thanks!
Hi Rachel, That’s completely fine to make one the same! I have no idea where they got those measurements from in the first place – I just said, “I need a soap mold!” And that’s what I got! :) So, I kept adjusting my recipe until it fit. The divider is a just an extra board I can pop in and out, so I could make half batches too. I’ve currently moved to making smaller batches, since I don’t sell soap anymore and am using a mold with inner dimensions of 8” x 3.5” x 3.5”. I took photos of my hubby making them and planned to put up a tutorial on how, so people could make their own. I just haven’t gotten to it yet! All of my newer recipes from my new soap book on out are sized for that. (It holds a batch that has around 30 ounces of oil, give or take a few. So almost a 3 pound mold.)
Thank you so much! I’m looking forward to the tutorial!
Hi Jan!
My dad has very sensitive (often dry) skin as well a very sensitive nose. Flowery or strong scents tend to irritate him and make it difficult to breath. I want to make him a soap that will help his skin but is either scentless or has very little scent at all. I’ve considered something dandelion and/or maybe honey and oatmeal. Do you have any advice/suggestions?
Hi Anna! Most cold process soaps (like the ones on this site) will naturally turn out unscented. The lye process “eats up” the natural scents from the ingredients you add. Oatmeal & honey will have a slight oaty/honey scent to it, but it will be barely noticeable and will fade with time. The dandelion bar has a small bit of honey scent, but is otherwise unscented. I have relatives who are the same way with strong smells and they do fine with both types. I would avoid all artificial fragrance oils and most essential oils for him though. (My dad with severe asthma does okay with peppermint essential oil, but otherwise I keep his unscented as well.)
Thank you so much for replying ! This will be the first soap I venture into and I’m very excited. I’ve found your site so very helpful and informative. I hope it comes out even close to yours !
How exciting! Good luck with your first batch!
Hi Jan,
In the past week I’ve tried making soap for the first time. I made a honey oatmeal soap and a mint soap. But i’m afraid they didn’t come out right. I used your recipes as guidance and they seem oily and sort of smell like fatty oils. Will this dissipate as they cure? Or did I not blend them enough? They’re heavy in olive oil as the recipes call for and they seem to just be solid blocks of olive oil. How do I keep this from happening again?
Hi Anna! When you say that you used the recipes as guidance, does that mean you changed parts of them? If so, what amounts of which ingredients did you end up with? If you type the new versions up here, I can help you troubleshoot better. Finished soap batter shouldn’t be visibly oily & shouldn’t smell like that. My first thought is that you didn’t blend them long enough. My second guess could be your lye wasn’t effective. (Was it clumpy at all?) Also, did you use a digital scale? Did you insulate your soap or keep it cool? (Sorry for the 20 questions – but that helps me figure out a why!) :) There’s a chance that you can still rescue those batches: http://www.soapqueen.com/bath-and-body-tutorials/tips-and-tricks/hot-process-hero-2/ The first ones are always tough to figure out when it’s ready to pour into molds or not. I went through about five batches before I had a success! So, I’m glad to see that you’re already looking ahead towards your next batches instead of giving up!
I’m so sorry I wasn’t able to reply sooner!
I made exactly 3/5s of the ingredients in the garden mint soap recipe. So for a 3 lb batch. And instead of manga butter I used shea and instead of avocado and castor oil I used sunflower and sweet almond (those were what I had). and I put all of the ingredients into a Lye calculator to readjust the lye with the different ingredients to about 5.4 oz.
The oiliness has gone down since I’ve let them sit and cure for a few days but I still think I need to remelt them and blend them a bit more. The mint one isn’t very creamy looking (it’s very dark possibly from the olive oil)and a bit soft. The honey oat one is still a little oily. Any advice would be great!
I am a beginner too, I really nervous dealing with lye but I needed to do it. About 3 day ago I did my first soap it’s a complicated shampoo bar, then I did as well the same day is a luxury soap and I did a Castile soap next day. Honestly I love it. I am a crafter it’s suit me well. Just careful with lye.
That’s wonderful Luzvi! Sounds like you are doing a great job making soap! :)
Do you have a tutorial on rebatching soap? I have a bunch of commercially made soap that I would like to scent and maybe color, and would like to know how to do it.
Hi Linda, I sure don’t, but here are two that might help!
http://candleandsoap.about.com/od/soapmakingbasics/ss/rebatchingsoap.htm
https://www.fromnaturewithlove.com/library/rebatch.asp
Hi there. Just wondering if you can use a plastic stemmed stick blender or is the soap too hot for that.
Hi Simone! I’m not really sure, but I think it should be okay to use. Your stick blender might have some information in the booklet/box that came with it, as far as how temperature safe it is, or you can ask the manufacturer, but since one is often used to puree hot soups, my thought is that it should work.
I am new to soap making. Stumbled upon your blog. I have enjoyed reading it. Can I sub goats milk for the water in your recipes?
Hi Jane, You sure can! Make sure your goat’s milk is frozen or icy cold first though.
I bought your eBook-Natural Soap Making yesterday and am over-excited start making cold process soap. I went some thrift stores yesterday and found a large and small ceramic crock pot insert. Will these be OK for “cooking” the soap on the stove, or should I just buy an enamel pot? Also, what kind of cooking thermometer do you suggest? I have a very expensive one from Williams and Sonoma, but that is for candy making only. I was looking at a $5 one on Amazon.
Thanks-Can’t wait to start!
Hi Courtney! I use ceramic crock pot inserts all the time for mixing up soaps. I don’t think you can put them directly on a stove burner though. You can heat your oils in a regular pot, like you’d use for heating up soup or what-have-you, and then pour those warm oils into the crock pot liner and then mix them up that way. (I do that method quite often in fact!) You can use a cheap-o thermometer for soap making. You don’t have to be precise like candy making – as long as you’re in a general range of not-too-hot or not-too-cold then you’ll be good to go!
PS: Good luck & have fun making your soap! :)
Thank you! I will send you pictures when my first batch is done.
I would love to see those!!
nerdy wife, i am attempting to make some pumpkin soap bc i have a ton leftover from halloween, thanksgving, etc. do you need the vanilla absolute for the soap receipe?
thanks’
Hi Aaron! You don’t have to use the vanilla absolute. It just adds some scent to the finished bar.
Hi, thank you for helping out with all these wonderful things. I have a question, I just received an expensive slow cooker for Christmas and I don’t want to ruin it making soaps, so can I use a slow cooker liner to protect it while making the soaps? Thank you.
Hi Manila! That’s a great question. I’ve seen this discussed before and it seems like people that use the same crock pot for both soap making and cooking sometimes use a liner, but they use the liner when making food. Soap cleans up very easily from a crock pot – you just soak and rinse. No lye or anything is left behind (unless you use a particularly strong fragrance oil perhaps.) Here’s a forum post that might give you a little more information:
http://www.soapmakingforum.com/showthread.php?t=41405
Thank you Jan. I think I might just buy a cheap slow cooker for the soap making so I’m sure not to damage the ceramic on the super dooper one I just got for Christmas.
;-) Soap making sounds clean enough but I’ve read that Lye can eat up a bit after a while. I wasn’t sure of using a liner for soap making could be helpful since it might not be so easy to stir I guess. I’ll let you know how I started the soaps after all.
What do you use as as colorants? I love those subtle green brown and pink colors in your soap.
Hi Leslie! For the green I used chlorella powder (from MountainRoseHerbs.com), the light brown one is oatmeal, and the pink is from rose clay (you can find that at BrambleBerry.com)
I’m a newby at soap making but this time I had a batch crumble. Anyone know what happen?
Hi Bknight! From this link: http://www.soapqueen.com/bath-and-body-tutorials/tips-and-tricks/soap-behaving-badly/ there’s a few suggestions – “If you have found that your soap is crumbly, it could be caused by a few things. It could be that not enough liquid was used, or too much dry ingredients were added (things like oatmeal, or clay).” Did you use a recipe from this site? If so, which one and what changes did you make and I can help you troubleshoot more.
Hi!
If I make a non-scented castil soap and another lavender scented soap can I have them cure next to each other? Will the castil soap take on the lavender scent?
Hi Nicole! For the most part you can cure various soaps together, unless they have a really strong scent. I usually cure something like mint off by itself (and pine tar soap in a room all on its own!), but lavender, I’ve cured next to plain before without a problem. I scent my soaps very lightly though and still give a little gap or buffer area between each type.
in the cold process soap,well lye effect essential oils
Hi Ron! I think this article will help answer your question: http://roberttisserand.com/2011/06/essential-oils-in-soap-interview-with-kevin-dunn/
I was the one that had a Pyrex cup shatter. Please don’t use glass or Pyrex unless you are weighing your fragrance or essential oil.
Thanks for sharing your experience Irena! I agree, I no longer use Pyrex or glass for the lye solution, but an old Tupperware pitcher instead.
Jan
Have you tried honeysuckle? If I were to try the honeysuckle how do I know how much oil infused honeysuckle I would need I noticed each recipe it’s a different amount.
Hi Kathy! You sure can use honeysuckle. You can use flower/herbal infused oil in any recipe that you’d like.
So, if you have a favorite recipe that calls for 15 oz of olive oil, you can infuse the olive oil with honeysuckle and use it and then call it a “honeysuckle soap”, though you’d probably also want to use a honeysuckle tea and some type of fragrance that compliments it.
If you only have a little supply of a flower/herb and can only make 5 oz of honeysuckle oil, then that’s okay too.
In that theoretical recipe that needs 15 oz olive oil – just use your 5 oz honeysuckle oil and 10 oz plain olive oil.
In honeysuckle’s case, it’s a good anti-viral, so I like to use it in the place of (or along with) lemon balm in soaps/salves/remedies.
Can anyone tell me if you do not cut in to bars, how long an loaf of about 85 ounces has to age and cure. I want to send a loaf as a gift. I have seen big chunks in the commercial sites.
Hi Janet, That’s a great idea! I’ve kept large batches of soap in whole loaves before and just cut off chunks as I needed. It worked really well. I would let it cure a minimum of 4 weeks, but for that size of a batch, probably go with at least 6 weeks.
I know you highly recommend a stick blender but would a handheld blender work as well?
Hi Heidi! Do you mean handheld blender like this: https://www.google.com/search?q=handheld+blender&source=lnms&tbm=isch&sa=X&ei=r7FlVcHLNszOsAX1qIDgBQ&ved=0CAgQ_AUoAg&biw=1366&bih=597 (which is what I call a stick blender)
or like this: https://www.google.com/search?q=handheld+blender&source=lnms&tbm=isch&sa=X&ei=r7FlVcHLNszOsAX1qIDgBQ&ved=0CAgQ_AUoAg&biw=1366&bih=597#tbm=isch&q=handheld+mixer ? (which I call a hand mixer)
I haven’t tried a hand mixer for soap making before, but I have had to help people troubleshoot quite a few times who did use a hand mixer and found it just didn’t work for them.
Now, having said all that – there is a technique for whipped soap that I’ve been wanting to try for ages:
http://nizzymoulds.com/Whipped/index.htm
so, in that case, the extra air that the handheld mixer whips in, is a benefit.
For regular soap making though, I think a stick blender makes the process so much easier and really increases your odds for a good outcome.
hey! i need to make a soap which can be used by people as a school project, and i want to ask this, is this recipie okay for using in school? :)
Hi Niharika! I’m not sure what your teacher or school’s guidelines are, so you’ll have to ask them – but if they’re okay with it, you can use the recipes on this site however you’d like! Good luck with your project! :)
Hi Jan, I have been experiencing an issue with an “off” fragrance in my soap. I make a Rosemary soap; it turns out great and smells great. The issue is once I get about mid-way if a bar, I notice it smells “off”, an odd smell. I notice it usually after rubbing it on a washcloth. Once the bar dries off, it smells ok. Can you think of anything that would cause this? I appreciate your time.
Hi Kathy! Does it smell off, like old oil? I’ve sometimes had a bar go rancid on me, when I use oil from my grocery store. Sometimes local oil is good, but sometimes it’s been sitting on a shelf for a long time and is already past its prime.
Usually though, that smell is around whether the bar is wet or dry. Another thing that makes for an odd smell is witch hazel in soap. (Or at least I think so, my family doesn’t so much!)
Are you putting fresh rosemary in your soap? Or dried? Ground pieces? Or large pieces? If so, perhaps they’re spoiling? If you’re using rosemary essential oil though, that wouldn’t be a problem…
That’s pretty puzzling! I’ll brainstorm some more and see if I can think of any other reasons soap could do that.
Hi Jan, thank you for your reply. I am not using fresh rosemary, just essential oil. The smell is a hint of ammonia, (and I hesitate to use this example) almost a urine-like smell. The recipe I use includes palm oil and I did read something that stated to be sure you mix the palm oil well and not use it off the top only (which I did). I don’t know if that could be the issue but I’m going to try again. I didn’t know if this is common with a Rosemary EO. Again, I appreciate your time.
That is very puzzling! I’ve smelled that ammonia type smell before, with milk soaps, since they sometimes do that for the first several days or so, but don’t recall it otherwise. This sounds like a good question to submit to the Soap Queen for her soap box questions series! (And if she answers, I’d love to know too!) :)
http://www.soapqueen.com/bath-and-body-tutorials/tips-and-tricks/soap-box-questions-can-i-add-melt-and-pour-to-bath-bombs/
Hi Jan, I forgot to mention that I do put fine-ground oatmeal in my Rosemary soap. Thanks again ~
I love the sounds of that combination of oatmeal and rosemary! I hope you’re able to pinpoint the smell source!
Hi Jan, I appreciate your website and I am learning a lot, thanks! I do have a question about a batch of CP soap I just un-molded… I noticed that while cooling it started having oily pools on top. While cutting after 24hrs the soap texture is very slick and oily. What do you think happened? And can I still use it? Here is my recipe…
10oz coconut oil
2oz jojoba oil
12oz olive oil
12oz palm oil
14oz distilled water
5.05 Lye
2oz molasses added at light trace
1 1/2 T EO blend (cinnamon, clove, ginger, vanilla) added at light trace
I was afraid it would accelerate quickly because of the EO’s and molasses so I worked really fast… maybe I didn’t mix it enough??
Hi Amanda! It looks like your lye amount is spot on. That’s a full amount of water, but still within range, and since you’re using the EOs and molasses, probably a good idea! So, your recipe looks all good.
It’s possible that you reached a false trace and poured it in a bit too soon. You can still save it by rebatching:
http://www.soapqueen.com/bath-and-body-tutorials/tips-and-tricks/hot-process-hero-2/
I’ve also had that happen when I apparently bought a bad bottle of lye locally. For several batches in a row, my soaps wouldn’t turn out and did that same oily thing! I couldn’t figure it out because I had made those same recipes with not a bit of trouble before, so I knew it was one of my ingredients. (I also suspected my olive oil, since it wasn’t my tried & true Bramble Berry kind, but a store brand instead.) I bought a new bottle of lye through Amazon and everything worked beautifully after that, so that was apparently the culprit!
Can I make hot processed soap using the hot processed method. I’m gathering up my supplies to make soaps for Christmas, and I love your cold processed soaps, but of course, I need to try it first. Make sure they’ll live it.
Thanks Jan
Hi Lisa! Yes, you can use most cold process soap recipes and make them hot process instead. Everything is the same up until trace. At that time, if you want cold process, you add any extras then pour it into the mold. If you want hot process, you wait on adding extras, cook the soap for around 1 hour in your crockpot on low, then stir in the extras after cook time. Spoon into a mold and let it stay for 24 hours, then slice and they’re ready to go! Hot process soap still benefits from some cure time to evaporate the water so they’re harder and last longer, so you could use one and let the other ones cure in the open air a while longer.
Sorry for last typo. I meant can I make cold processed soap using hot processed method.
Again, thanks
Hi, have you ever tried adding fresh pomegranate seeds to cold pressed soap? Just wondering if they would be ok to add. Thanks!
Hi Gillian! Adding anything fresh – like pieces of fruit, veggies or flowers – will end up spoiling in soap. They also turn to tend black. I’ve seen a few people try pomegranate juice instead of water, but sadly it seems to just turn brown. I’m afraid I haven’t found a really great way to incorporate fresh pomegranate into soap. (Though perhaps someone out there has and will see this and let us know!) :)
Hi there, I have found a lot of recipes that say to add things at light trace, such as colorants. They’ll say, “Blend with stick mixer, add xyz at light trace, pour into moulds.” Does that mean you never bring the whole batch to a full trace? Will the soap still set at light trace? Or does it mean add at light trace, then keep blending for a little bit more? Thanks :)
Hi Meg! “Light trace” means that the soap is just starting to thicken enough so if you drizzle some of it across the surface, it will leave a faint tracing before sinking in. This is the perfect time to stir in colorants and such, because as you stir them in, the soap will only thicken more and more. Sometimes, with items like clays or some essential oils, they will make your soap thicken up a lot faster. So, if you waited until you had a really thick and full trace when you stirred in things, everything might set up far too fast and you could end up with “soap-on-a-stick”! You’re exactly right when you say that they mean to add at light trace, then keep blending for a little bit more in order to incorporate everything. Then stop before it thickens too much. I hope that helped! Trace is a very confusing subject – it took me ages to figure it out too! :)
Hi, I have a question regarding lye. I have a stainless steel sink and wondered if cleaning my lye pots or bowls would damage the sink. I have used a stainless steel pot and don’t see any damage but I just wanted to ask your opinion before I make soap here at home instead of a friends house. Thanks
Hi Lisa! I have a stainless steel sink too and have made soap in it for about 12ish years now and it’s still in great shape, so I think you should be good to go! :)
Great article! I don`t let my son help me when I prepare soap with lye. I was afraid at first, too. Later I realize that I could cope with it. Thank you for sharing your post! Keep posting!
Hi Miriam, I’m glad you liked the article!
Do I need to use distilled water or will well water be ok?
Hi Sandra! Many soapers recommend distilled water because it’s free of minerals or additives that could potentially react with something in your soap. I used my well water for many years and made soap just fine, but I do think that using distilled water makes a difference as far as less soda ash (at least in my personal experience). So, yes, you can use well water, but if you suspect it throws your soap recipe off a little, then you can find distilled water in the grocery store for usually around $1.00 a gallon (which will make several batches of soap for you).
I downloaded your book and really love your ideas and the creativity you have put into the recipes. I am on my fifth batch of soap and made my first “adjustment” by resizing the batch. Piece of cake with the link to the calculators you have provided.
My question is on coloring the soap. What are your thoughts on mica?
Also, are the colors in the clay more prevalent when you infuse the oil?
Hi Lynda! I’m so happy that you’re enjoying the soap making ebook! I used a blue mica (blended with indigo powder) in soap several years ago when making a custom recipe for someone and it turned out very pretty!
I don’t have much experience with them otherwise, but this post has some good info on using them in soap:
http://www.soapqueen.com/bath-and-body-tutorials/tips-and-tricks/sunday-night-spotlight-mica-colorants/
Since clays are water soluble, I’m not sure you can infuse them in oil so I usually dilute them in water & stir thoroughly before adding at trace. You could try adding them to your lye water first or stick blending them into your oils before adding the lye solution, but since they suck up water like a sponge, your soap batter might thicken up a lot quicker because of them. What really helps bring out their colors best is when you let them go through gel phase.
Hi,
Could I please ask if it matters whether I pour the lye solution into the oil, or if I pour the oil solution to the lye?
Hi Karen! I usually pour the lye solution into the oil and think almost everyone else does the same. However, I don’t recall reading anything about whether it HAS to be done that way or not.
So, I’m afraid I’m not much help since I’m just not sure one way or the other. Wish I could be more help!
I’ve been hesitating about making soap for the last six months and reading through your website has made me really tempted to give it a try.
I was trying out the calculator you used to calculate the lye value so as to get an idea of how to use it. Now, if we use the Lye value at 6% … should we additionally put a 5% lye discount on the amount of lye so as to superfat the mixture.
Do we have to account for the amount of essential oils/fragrance oils that we add to the mixture?
Also, is it alright to use a stainless steel bowl to mix the lye and water or should it just be a glass jar?
Lastly, say I would want to make a tea smelling or lemonade smelling bar, should I add lye to the prepared tea or lemonade (and should I prepare these drinks with distilled water)?
So sorry for asking so many Questions, but I’m a total newbie and I’m quite intimidated by the entire process.
Thanks so much :)
Hi Bisma!
The lye calculator figures account for the lye discount, so you only have to use the lye value at 6% and not worry about adding or subtracting anything else.
The amount of essential oils and fragrance oils don’t have to be calculated in the recipe.
Stainless steel is a great option, as is heavy duty plastic. I used glass in the past, but heard quite a few stories about the lye etching the glass over time until it shattered. So, to be on the safe side, don’t use glass for the lye solution, even if it’s heavy duty and heat proof.
The sad thing about the soap making process is that most scents won’t make it through to the end. You can add teas and such, but your soap almost always ends up unscented unless you add essential oils (or fragrance oils.)
Lemon juice & citrus is a tricky thing to use with soap – since it’s acidic, mixing it with lye the wrong way could result in a reaction much like when vinegar mixed with baking soda.
This site has some information on using citrus in soaps:
http://www.annelwatson.com/soapmaking/creative/July/citrussoap.html
but you should consider trying out a more basic soap recipe first, maybe something like one of these:
https://thenerdyfarmwife.com/calendula-soap/ or https://thenerdyfarmwife.com/oatmeal-honey-soap-recipe-palm-free-gluten-free/
Doing your research first is an excellent thing to do! So keep reading and asking until you feel comfortable and then give it a go!
Happy soap making! :)
Thank you so much dear Jan for replying and with the great advice.
I love that your recipe books are all Palm oil free as this oil is not easily available in India and now that I have read it can have a negative effect on the environment, I’m all for leaving it out.
I love the soap calculator (link) you use as it is so simple and I love that your recipes and methods are so easy to follow.
Thank you. :)
Hi Bisma! I’m so happy to help! :)
Oooh, I hope I can get up the courage to make soap! The lye sounds scary, but the soap making sounds so fun! Were do you get your lye?
Hi Grace! I usually buy the Essential Depot brand from Amazon. In the past I bought some from my local Tractor Supply store as well. Local hardware stores sometimes carry it, but check the bottle well before buying. If you shake it and hear clumps rattling around, it means it’s old and won’t measure out properly. I hope you do get a chance to try out soapmaking! It’s such a fun and rewarding hobby! :)
The instructions are great. I would love to have the opportunity to print the instructions so I can have them close-by when making soap. Do you offer a printable version? Maybe without photos even. Much thanks!
Hi Christine! If you scroll down to near the bottom of the post, there’s a green “Print Friendly” button. It will also let you simplify the parts you print, if you’d like to omit the photos. :)
Hello
Is it possible soap with 3 oils
Such as coconut oil , olive oil and caster oil
Hi again Alopl! I also have a recipe here that has those three oils you might enjoy:
https://thenerdyfarmwife.com/how-to-make-a-simple-natural-homemade-soap/
Hello
Would u help me?
Do you think it is possible soap with the three oils for cold process
Coconut oil, olive oil and castor oil
My suggestion is :
Coconut oil 15.8%
Olive oil 78.9%
Caster oil 5.3%
What is your suggestion for a percentage of the three oil ?
Hi Alopl!
Yes, you can make a recipe with those 3 oils.
I really like the percentages you have listed! :)
It will make a bastille style soap that will be very gentle. Because of the higher olive oil, it might start off on the softer side, but you can let it cure for at least 6 weeks or longer to firm up more.
Bastille soaps improve as they age too.
Hi. I m new to soap making. N m about to make my first batch. I wanted to know since my oils are in liquid form already do I still need to heat them? N the only oil that I may need to melt is palm oli. So what do I do? Only heat the palm oil n mix with others or heat all olis? Kindly help.
Hi Sarita! How exciting to make your first batch of soap! You do need to melt and stir your palm oil before measuring (it has solids in it that need to be mixed well before using). After you add the melted palm oil to the other oils, you may find that they’re warm enough to go ahead and mix with your lye solution to make soap. Sometimes I heat my oils to around 110 degrees F, but sometimes I go ahead and mix when they’re cooler, or even at room temperature. You have quite a bit of flexibility when it comes to temperature and you can try several ways to see which way you like best! :) Happy soapmaking!
Hello, I read where it takes your soaps several minutes to reach trace mine reach trace in less than 20 sec. Its to firm for me to pour in my molds. What am I doing wrong?
Hi Mike! My soaps sometimes reach trace faster too. It depends on several factors – how much water you’re using, types of oils/butters and also temperature. To slow down trace, you can increase the amount of water in a recipe, and also mix when temperatures are on the cooler side (under 110 degrees F.) Soaps that have lots of solid fats in them (like tallow, lard, butters, palm) tend to thicken up faster than soaps with lots of liquid oils like olive, sunflower, etc. Also, try handstirring more than using the immersion blender & that might help too. :)
Hi, I really love your tutorial on soap making.
I made my carrot soap yesternite and put the mixture in a plastic container and covered it (I don’t have a mold). I checked this morning it has solidify to an extent but it has trickle of liquid on it. I touch the liquid and put it on my face…it burned my face I had to quickly wash off & put shea butter. Do you know why that happen and how long should I wait to start using it. Should I remove it from the air tight container and allow fresh air on it. Please help
Hi Aisha! Soap takes up to 48 hours before all of the lye is reacted, so you definitely don’t want to use it on your face right after making. Once your soap is able to be removed from the plastic container, it should be allowed to get plenty of fresh air. You can cut it into bars and let them stay in the air for about 4 weeks before using. I think you’ll find it’s a lot more gentle on your face after it’s had time to cure. :)
Hi! I love your tutorial. First time making soap. Woohoo! Looks good!
I have one question…it might be dumb and it might have been answered already, but here it is:
If a ceramic bowl is used only once for soap making, is it condemned to that? If I choose to use another one, can I use first one (only used once) for preparation?
Hi Charron! Hooray for making your first soap! No question is dumb; it’s a great way to learn! :) If you used a ceramic bowl only once, then I’d personally just wash it up really well (maybe 2 runs through the dishwasher) and use it again for kitchen use. Over time, the lye and raw soap will etch away at the surface, but for a single use, I think it would be fine.
Hi!
I want to make the sunflower shampoo bar from your book this weekend, and I was wondering if I could use mint or rosemary infused olive oil instead of sunflowers. And could I use a mint tea instead of regular water?
Thanks so much :) I’ve already made 3 successful batches of soap from your book and I’m hooked!
Hi Lis! Yes, you could use both mint or rosemary infused olive oil instead of sunflowers, and mint tea can be used as well.
One thing to note about mint and rosemary infusions are that they tend to turn your soap tan or brownish. I’ve even talked to someone who used a mint infusion and her soap turned orange-brown!
So, be prepared for a color change & if you want a green toned soap, you’d need to add a colorant to it.
Happy soapmaking! :)
My soap is not retaining it’s scent. I’m adding scened oild at trace, ut after curing the scent is almost completely gone. Should I wrap up the bars during the curing time?
Hi Albert! What type of scent are you using & how much? You might be using a wrong type or perhaps not enough. If you let me know some more details about your recipe I might be able to pinpoint a cause. Just let me know! :)
Also, you don’t want to wrap the bars while they cure since they need to “breathe” to allow the water to evaporate out.
Hi, I’m interested in buying your ebooks but I do not use lard or tallow because I live in a vegetarian community. Do you have recipes that don’t use these? Thanks
Hi Leah! Yes, virtually all of my recipes are made without lard or tallow. On the rare occasion I do share one with one of those ingredients, I always give a vegan option as well. :)
I live in the country. Is it ok to use the kitchen sink and the possible drips going into a septic tank. Or should I mix somewhere else. Thanks
Hi Bobbi! It’s fine to mix the lye in your sink. The main thing I avoid is getting raw soap batter in my sink/pipes. It acts like a plug of grease in your drains, so I wipe out the containers before washing, or I let them sit for a day or two to fully turn into soap & then they can soak and be easily rinsed. :)
If you don’t have a pot that isn’t non-stick, can you heat and mix the ingredients using a crock pot? I’m concerned the non stick coating will leech into the soap especially if using a stick blender.
Hi Aileen! You never want to use non-stick pots when making soap; the lye will react negatively with it. If your crockpot is ceramic then you can heat and mix with that, or if you have stainless steel or enamel lines pots, those work too!
I am interested in making my own soapmold box and noticed yours has a hinge. However, I couldn’t find any Instructions for a similar mold. Suggestions?
Hi Rene! My husband made that mold and just looked at some different ones available on Etsy and some different web sites and came up with his own thing. One day I hope he’ll make me another and record the steps this time; when/if he ever does that, I will definitely share them on this site! :)
Hi Jan,
How are you? I am wondering if i am able to make soap without the use of olive oil? Its just that I have run out of olive oil and dont really wanna go out and buy just that. I do have plenty of palm oil, coconut oil, cocoa butter, avocado oil , almond oil and castor oil. I really have a difficult time using the lye calculator. I ussually just follow recipes. Any way you can help me with this? Thank you much
Hi Oona! Yes, you can definitely make soap without olive oil! Modern Soapmaking has a good article about that:
https://www.modernsoapmaking.com/replace-an-oil-in-a-soap-recipe/
Whenever you change a recipe, it really does need to be ran through a lye calculator to make sure the lye amount stays safe.
So it’s going to depend a lot on the particular recipe you have in mind and how much olive oil is in it, to know what changes you make.
Have you tried Majestic Mountain Sage’s lye calculator. It is so user friendly!
When I first started making soap, SoapCalc was so confusing to me too!
The Sage calculator is very straightforward, but if you have trouble using it to adapt your recipe, let me know & I’m happy to help! :)
Hi Jan, thanks for a great post – lots to learn about making soap!
I’m trying to help my daughter with a science experiment for school. We decided to make lye in 3 ways – using ash and water, using a combo of hydrgen peroxide and baking soda, and then the store bought lye.
The plan is to test our soaps oil cleaning power according to the different lyes we’ve made.
My question is, how do we measure the lye if its in liquid form? I guess we remove some of the water from the recipe, but is there a way to know the strength of the liquid lye (made from ashes)? Or does it simply reflect in the time it takes the soap to saponify and cure?
Would appreciate any suggestions, thanks so much.
Hi Heidi, That sounds like such a fun experiment!
That’s a great question too. I’m not exactly sure how you would do that since it’s not something I have firsthand experience with.
I found this information which might be useful??
http://journeytoforever.org/biodiesel_ashlye.html
Good luck with your project! :)
Hello,
Thanks for this lesson. Please can I add tumeric, rice powder, puree, carrot, alongside the essential oils to the soap, after pouring the lye into the oils?
Hi Laura! Yes, you could add all of those things when you add essential oil to the recipe, though you might want to add the puree earlier. (Mix that with the warmed oils, before adding the lye solution.)
If you add carrot puree, you also need to reduce the water amount of the recipe by the same weight.
For example, if your recipe requires 9 ounces of water and you want to add carrot puree:
Make the lye solution with 7 ounces of water, and add 2 ounces of carrot puree with the warmed oils.
This way, you keep the same amount of liquid and don’t end up with a too-soft soap from too much overall liquid in the recipe. (Purees count as a liquid.)
Is this a good set of essential oils to buy for the soap. They seem kinda cool, but I don’t know if they will work. https://www.amazon.com/Healing-Solutions-Best-Blends-Essential/dp/B00SA5UWW8/
Hi Cliff! In general, you want to watch essential oils found on Amazon. Many are actually cheap fragrance oils or adulterated products – Healing Solutions is included in the list of ones to watch for that.
Here are some test results:
https://drive.google.com/drive/folders/1z04P7U73_wXob3u0gvu0BUiMb6IwvHZP
For soapmaking – check out Bramble Berry, Bulk Apothecary, or Wholesale Supplies Plus. :)
Hi Jan!
This is my second time doing your recipe for the aloe soap (about a year apart) and I just realized that we are supposed to be digitally weighing the supplies. I just finished and definitely didn’t do that, I just used the OZ on a measuring cup… Will this mean my soap isn’t safe to use? Because of the Lye, water and oil balance?
Also, if the lye doesn’t completely dissolve is that a bad thing? Or is it just preferred that it completely dissolves before mixing with oils?
Thanks for everything!
Hi Paola! How did your first soap batch turn out? Did you use it after it cured? If so, did it feel too soft, or was it scratchy or drying?
You’re exactly right – you definitely want to weigh the ingredients for accuracy!
It’s hard to know how much it was thrown off by using measuring cups:
– In the most common scenario, you used too much oil and the soap will just be too superfatted – in that case it may be softer, and maybe have a lower lather, or it might leave kind of an oilier feel on your skin.
– In the worst case, you’d have too much lye and then the soap would feel drying, might leave your skin red and chapped feeling.
– In a perfect world, you might have inadvertently hit on a ratio of oils and lye that are still in a usable and safe range. (It doesn’t happen often, but sometimes it does!)
So if you made the first soap batch the same way you made the second soap batch, then that will give you an idea of how this batch will turn out.
You do want the lye to completely dissolve into the water before adding to the oils. If it doesn’t, you may find a crusty layer of lye left on the bottom of your lye container that doesn’t get added to the soap, then your soap might be short on lye.
Hey ! great recipe.
I’m relatively new to this but I have a few questions.
The only difference I see between hot and cold process soap is the use of an external heat source to heat up the soap thus increasing saponification faster, and that it can be ready as soon as the next day.
My question with that- I recently made this soap recipe, and was going to give them as gifts next weekend (Feb 25 weekend) but now im afraid.
Should they be safe by then? I used the cold process recipe and followed it to the T. I don’t want to give out a caustic/harmful product.
Hi Joe! Yes, the main difference between cold process and hot process, is that hot process has the extra step of applying heat to speed up the initial saponification.
However, it’s a common misconception that hot process is ready to go immediately after that.
The heat only speeds up the day or two that cold process would normally be going through gel phase in the mold.
Cure time is still really important for both kinds of soap – to make it milder and improve the feel.
Classic Bells (written by a super knowledgeable & experienced soapmaker/chemist) has an excellent article all about how soap cures:
https://classicbells.com/soap/cure.asp
Some soapmakers give out soap that hasn’t cured yet, and tell the recipient not to use it until a certain date.
However, that would make me nervous to do – I don’t like to give out a soap until it’s cured and I’ve tested it on myself to make sure it feels nice.
You can start testing cold process soap on yourself at about 2 1/2 or 3 weeks though. If it feels good on your hands at 3 weeks, it should only feel better as it cures!
So for example: if your soap would be almost 3 weeks old, say by Feb 22 or 23 and you test it on yourself then and it feels great, then you know it would fine for others to use in case they use it right away on the 25th, even if you include a note that it’s ready for use after March 4. (Because there will always be someone who forgets or just ignores the suggested date.)
Cold process is only caustic in the first 48 hours or so, so if your recipe is balanced & the lye amount correct, you don’t have to worry about burning anyone’s skin on the 25th, you just want to make sure you’re giving out a top notch product that bubbles nicely and feels good to use. (which is where cure time comes into play)
I hope that helps with your decision, but let me know if you have any other questions or ways I can help!
Hi! Thank you for the article. I’m new to this and have been reading a few books. I’m confused about how to measure the solids. Some books say to measure your solids, while other books say to melt the solids first and then measure. For example, if a recipe calls for 14oz of coconut oil do I use the solid measurement for the recipe or do I need to melt it first and use that measurement for the recipe? I hope I explained this right, but any help is appreciated. :)
Hi Traci! With soapmaking, you want to use weight (using an accurate digital scale) for the oils – never measuring cups.
So it doesn’t matter if the coconut oil is melted or solid.
14 ounces of coconut oil in the solid state, will still weigh 14 ounces when it’s melted, because you’re not adding or taking away from it. It’s only changing its state (from solid to liquid).