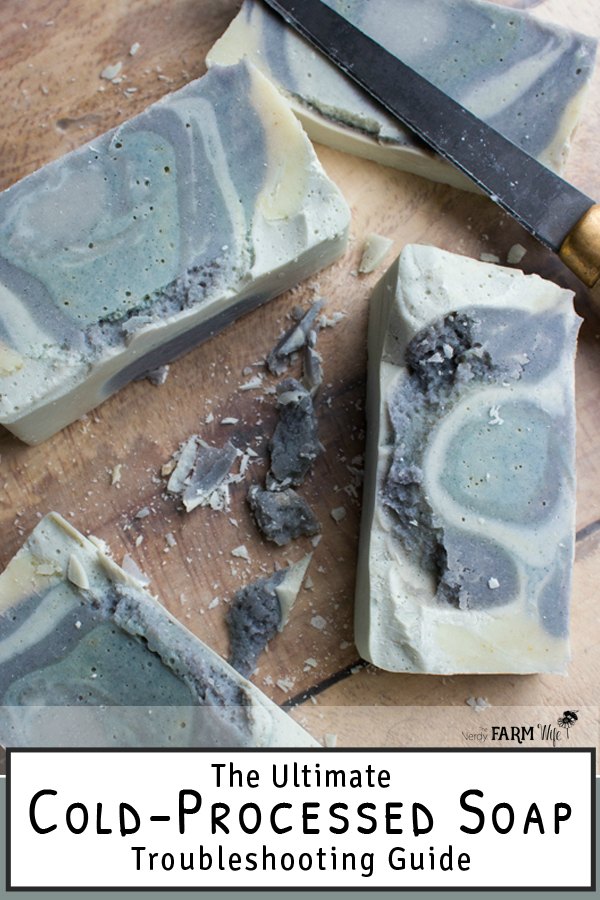
What’s Wrong With My Soap? {troubleshooting cold process soap problems}
We all have soapmaking fails. This ultimate troubleshooting guide breaks down the reasons and solutions for 30+ common cold process soap problems.
On a daily basis I receive emails from readers about problems and questions encountered while making soap. (Currently, I have 70+ of those emails in the queue to answer!)
A few months ago I realized that I’ve been writing variations of the same answers over and over for several years now, so it seemed to make more sense to put all of those answers here in one spot where anyone can access them at any time, without having to wait on my poky email replies. This in turn should free up my inbox to a more manageable level while helping others more easily find the information they need. It’s a win-win for all! :)

What’s the problem with your cold process soap?
Because this is a massively long post (8,800+ words!), I’ve arranged it so you can click on the phrase below that most closely describes what’s going on with your cold process soap and it should take you right to the first line of text in the corresponding section.
(You may have to scroll up a little bit before reading the spot it sends you to, depending on your device, plus some of them have an accompanying photo that may be helpful to see.)
There, you’ll find reasons for why the soapmaking problem happened and solutions to fix it and/or prevent it in the future.
Mixing Problems
Soap batter thickened up too quickly to make a swirl or design.
Soap batter suddenly seizes up and becomes impossible to stir. (“Soap-on-a-stick”)
Soap batter has little hard rice-like pieces in it.
The lye solution turned a really weird and unexpected color.
The lye solution has little floaty bits or flakes in it.
The lye solution has a hard crust of lye on the bottom of the container.
In the Mold Problems
Soap made a few hours ago is turning darker in the middle and looking funny.
Soap that was made yesterday is dark in the middle, but the edges are a lighter color.
Soap top is weepy or slightly oozy looking.
Soap is developing a crack on top.
Soap batter has expanded out of the mold (soap volcano).
The top of the soap loaf has a weird wrinkly look.
Soap won’t easily release from the mold.
Problems After Cutting Into Bars
Soap is darker in the middle and the outside edges are lighter colored.
Soap has a dark ring or rind around the outside and the middle is lighter.
Soap has hard and soft places when you slice into bars.
Soap has a tunnel inside when you cut into it.
Soap has uneven colored streaks or spots in it.
Soap has grooves or drag lines.
Soap has dark spots that are oozy and sticky.
Soap has small visible white spots all throughout.
Soap has flat white spots on top of the soap.
Soap has a weird texture with raised lines, or veins, running throughout.
Soap is soft and squishy, like playdough.
Soap has a thin white ashy layer on top.
Problems with Cured Soaps
Soap is not the color or scent you expected.
Soap doesn’t have a good lather.
Soap isn’t hard or long lasting.
Soap has weird orange or brown spots on it and/or smells bad.

Mixing Problems
Soap batter thickened up too quickly to make a swirl or design:
1. Overmixing
Reason: Using your immersion (or stick) blender too much.
Solution: Don’t run the stick blender continuously, try alternating hand stirring for 15 to 20 seconds, then just a short burst of the blender, then hand stir some more.
2. Water Amount
Reason: Too steep of a water discount.
Solution: Check the recipe with a lye calculator and see what the recommended water amount is. For palm-free soaps, high olive oil soaps, and silicone molds, it’s often helpful to reduce the water from the default 38% “Water as % of Oils” given in lye calculators to something lower like 30 to 33%, but if you have a swirl or intricate design in mind, you should consider using the full water amount, or perhaps 35%.
3. Temperature Issues
Reason: If your oils & lye are too cold, then the hard fats in the recipe (cocoa butter, kokum butter, lard, tallow, palm, etc) will start cooling and begin returning to their solid form, causing the soap batter to have a thicker texture.
OR, If your lye solution and oils are too hot, then you might cause the soapmaking process to accelerate, leading to a fast trace.
Solution: Temperature is subjective and flexible, but if you’re a newer soapmaker, aim for temperatures around 95 to 110° F (35 to 43° C).
4. Misbehaving Fragrance or Essential Oil
Reason: Some essential oils (EO) and fragrance oils (FO) can accelerate trace. This means that your soap batter gets very thick, very fast. Read reviews before purchasing a fragrance oil to see if it’s known to do so, especially if it’s a floral or spice scent.
Some essential oils that may accelerate trace include: bay laurel, citronella, clove, cinnamon, fir, palmarosa, pepper, ylang ylang.
Solution: There are a few suggested workarounds to try. You can save some of the warm soapmaking oils from the recipe, mix with the fragrance or essential oil, and blend it in at light trace. Or, you can try adding the FO or EO to the warmed oils before adding the lye solution and stir by hand.
5. Oil Types
Reason: Some oils are known to slow down trace, which means it takes more stirring and time for them to form a trace. Conversely, recipes with high percentage of “hard oils/fats” will reach trace sooner.
Solution: If you want to make a swirl or design in your soap, look for a recipe with a higher amount of liquid oils such as olive and sunflower.
More information:
Modern Soapmaking has an excellent article about Controlling Trace in Cold Process Soap that I recommend for further reading.

Soap won’t reach trace:
First, double check that you didn’t forget to add the lye when making soap. It sounds silly, but it does happen sometimes! Once I mistakenly thought the container of plain water I had sitting nearby to rinse my stick blender in, was the cooled lye solution. It was not! I couldn’t figure out why my soap never reached trace until I discovered the difference. (Oops!) If your soap doesn’t reach trace within 10 to 12 minutes, see if one of the situations below applies.
1. Too Much Water
Reason: Especially for palm free soaps, or recipes that are high in olive oil, you don’t need the full amount of water given on a standard lye calculator.
Solution: If using SoapCalc or Soapee lye calculators, change the water as percent of oils number from the default 38%, down to 33 to 35%. (I often go even lower, to around 28% for some recipes.)
2. Weak or Inactive Lye
Reason: Check the bottle of lye you used. Does it have any lumps or clumps in it? Have you had it for a long while? Is it past its expiration date? Over time, lye will absorb moisture and humidity from the air. This is most evident when you see hard clumpy lye. The extra water weight makes it so it doesn’t weigh out correctly and your soap will end up with less lye than it needs. You may notice that a weak lye solution doesn’t get very hot, the soap batter takes too long to reach trace, and the final soap feels oily or soft.
Solution: Buy a fresh bottle of lye from a reputable vendor. (Make sure it’s labeled sodium hydroxide and not potassium hydroxide.) Store it tightly sealed in the original plastic container. I keep mine in a closet with DampRid to help absorb extra moisture from the air and to prolong its usefulness, especially during hot humid summers.
3. No Immersion Blender
Reason: While you can stir soap by hand, in most cases it takes a very long time to reach trace. (Possibly hours.)
Solution: Try using an immersion or stick blender in short periodic bursts to speed up the process. Don’t use a hand mixer like you use for making cakes or whipping cream.
Soap batter suddenly seizes up and becomes impossible to stir: (“Soap-on-a-stick”)
1. Essential or Fragrance Oil Issues
Reason: Some fragrance oils (FO) or essential oils (EO), especially florals and spices, are notorious for speeding up the saponification process rapidly. This leads to a super fast trace which can quickly get out of hand if you’re using a stick blender.
Solution: Take extra care if using bay laurel, citronella, clove, cinnamon, fir, palmarosa, pepper, and ylang ylang essential oils. If working with a new fragrance oil, read descriptions and reviews carefully to see if other soapmakers have experienced issues with it in soap. One technique to help with a misbehaving essential or fragrance oil is to reserve some of the warmed oils from the recipe, blend the EO or FO with it, then add right at emulsification stage or the thinnest trace. Mix by hand, using the stick blender only if absolutely necessary, to ensure the EO or FO are mixed in completely. Some soapers also have good luck adding the misbehaving EO or FO to the warmed oils before adding the lye solution.
2. Overmixing
Reason: Soapmakers sometime get overly enthusiastic with the immersion blender.
Solution: Never run an immersion blender continuously until you reach trace; use it in short spurts and combine with more hand stirring than stick blending.
Soap batter has little hard rice-like pieces in it: (“Ricing”)
Reason: This is primarily a problem with fragrance oils. Some don’t do well when combined with raw soap and will bind with bits of hard fats in the recipe causing those solid lumps.
Solution: Carefully read reviews before purchasing and using a fragrance oil. Try using your immersion blender to smooth the lumps out. This will result in a very thick trace, but it might help save the batch. If you can’t blend the majority of them out, then I suggest rebatching the soap.
If an essential oil causes ricing check the brand that you’re using since it’s likely cut with synthetics. Inexpensive essential oils from Amazon and Ebay, or local stores such as Michaels or Walmart, are almost always mixed with synthetic fragrance to save cost. Pure essential oil should not cause ricing in soap. Here are a few places to research your essential oil’s purity:

The lye solution turned a really weird and unexpected color:
Reason: If you used an herbal tea or alternative liquid such as milk, beer, apple cider, aloe, carrot juice, etc, this is perfectly normal!
Solution: Don’t be alarmed. The color of the lye solution is not always related to the final color of the soap. If the lye solution is a strong dark brown though, then you can likely expect some type of tan or brownish color in the final soap. To avoid unintended brown soaps, be careful not to steep your herbal tea too long, especially when using herbs such as mint or lavender.
The lye solution has little floaty bits or flakes in it:
Reason: Sometimes your container might have a small amount of residue left on it from your last batch or a previous use. This can interact with the lye solution and form small floaty bits.
Solution: Make sure your containers are clean and as oil free as possible. This happens to me from time to time and I don’t worry about it. Some people like to strain out the floaty bits (I don’t), but if you do this, be very very careful working with straight lye solution.
The lye solution has a hard crust of lye on the bottom of the container:
Reason: You didn’t stir the lye until it completely dissolved.
Solution: Stir the lye into the water until it goes from cloudy to clear to ensure it’s mixed well. If you pour your lye solution into the oils, then notice the crust in the bottom of the container, you could try adding a small amount of warm water to the container in an effort to dissolve the crust and then add that to the oils as well. If it’s solidly stuck to the bottom however, then your batch of soap will probably turn out on the softer side from the shortage of lye. (Don’t throw it out, just be aware that it may need a long time to firm up, if it ever does, and will be extra superfatted/oil-heavy. It will be one to keep for personal use, not gift giving.)
CLICK TO RETURN TO THE BEGINNING OF THE LIST
In the Mold Problems
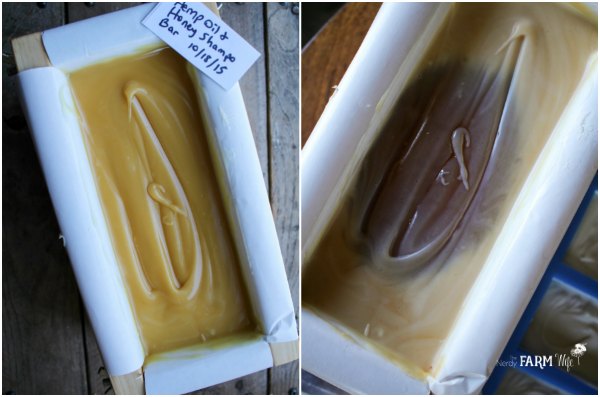
Soap made a few hours ago is turning darker in the middle and looking funny:
Reason: This is a normal part of the soapmaking process called gel phase, which is when the chemical reaction between the lye and oils causes the soap to heat up hotter than it was when you first started mixing it. Gel phase is especially beneficial if you’re using natural colorants, since it helps them show up better in soap.
Solution: Just wait and let the soap go through this natural stage. Peek at your soap every now and then. If it’s developing a crack down the middle, it’s getting too warm and should be uncovered. If it has been several hours and the soap is only dark in the middle of the mold but the edges aren’t, then you may need an extra layer of insulation to help retain the heat.

Soap that was made yesterday is dark in the middle, but the edges are a lighter color:
Reason: The soap has a partial gel. This means it started getting hot and going through gel phase, but cooled down too quickly before it could reach the edges.
Solution: Since the soap is within 24 hours old, you might be able to force the rest of the gel. (This sometimes works, sometimes doesn’t.) To do so, preheat your oven to the very lowest temperature. Place the soap mold in the oven and monitor it very closely. It may take anywhere from 10 minutes to an hour but you should hopefully notice an even gel across the top. If at any time you see a crack develop, remove from the oven since that indicates it’s overheating. Don’t leave the soap unattended and keep an eye on it at all times.
Next time, use more insulation and warmer temperatures for your oils and lye solution. (Try 115 to 120°F , which is 46 to 49°C.) Also, water amount (water discount) can affect gel phase – a soap with a lower water amount requires a higher temperature to reach gel phase, while a soap with a full amount of water will more easily gel.
You may wish to completely avoid gel phase which is often desirable for milk soaps to keep them lighter colored. In this case, use individual molds, cooler soaping temperatures, and place in the fridge or freezer for 24 hours after pouring.
More information:
For further reading you may enjoy “To Gel of Not to Gel” by Kevin Dunn and “Jazzed About Gel Phase” by the Soap Queen.
Soap is separating & layers or puddles of oil are visible:
1. Not Enough Stirring or False Trace
Reason: Sometimes a false trace happens where the soap looks like it has emulsified, but it’s really because a solid ingredient in the soap has gotten cool enough to start thickening the soap batter. You can check for false trace by leaving the soap batter undisturbed for about 20 or 30 seconds after you reach light trace. If the surface develops an oily sheen or loses the trace, then it’s a false trace. If it still shows the trace after 30 seconds then it’s a true one.
Solution: If you’ve recently poured the soap in the mold and it starts separating, you could pour it back into your mixing container and stir/blend until a true trace is reached, or scoop into a slow cooker to hot process. If the soap has been in the mold several hours and then starts separating, scoop it into a crockpot and cook on low heat for around 1 hour (hot process), then spoon into a soap mold. The soap will have a rougher “rustic” look to it, but it will be salvaged.
2. Fragrance Oil (FO) Problems
Reason: Some fragrance oils don’t behave well in soap and will cause separation.
Solution: There are a few suggested workarounds to try. You can save some of the warmed soapmaking oil from the recipe, mix with the fragrance oil, and blend it in at light trace. Or, you can try adding the FO to the warmed oils before adding the lye solution and stir by hand. Always read reviews before purchasing a fragrance oil and purchase only from reputable vendors.
Soap top is weepy or slightly oozy looking:
1. Humidity
Reason: The soapmaking process naturally produces glycerin, a humectant which is great for your skin. However, its ability to attract moisture means that in very humid weather, little glycerin beads or droplets may develop on the surface of the soap.
Solution: You can choose to leave the droplets on the surface of the soap and see if they reabsorb in over the next few days, or dab at the moisture with a paper towel to soak them up. Place the soap in front of a fan to help with air circulation. Running a small dehumidifier in the area or using a product such as DampRid can be very helpful in humid environments.
2. Fragrance Oil
Reason: Some fragrance oils (FO) may separate from the soap batter and form bead or pools of fragrant oil in the surface of the soap.
Solution: Be sure to research fragrance oils before use and purchase from a reputable vendor who thoroughly tests their oils in soap. Rebatching the soap is recommended.
Soap is developing a crack on top:
1. Temperature
Reason: This means that the soap is getting too hot.
Solution: If you’ve insulated or covered the mold, remove the layers. Try placing the mold on a baking rack so cool air can circulate underneath. Move it to a cooler room if you have one available. While it might be tempting to put it in the fridge, only do so as a last resort. Since it has already heated so much in the middle, cooling the soap too fast will likely result in a partial gel at that point.
2. Alcohol
Reason: Spritzing too much alcohol on top of your soap (in an attempt to reduce soda ash) may cause cracking.
Solution: Use a lighter hand when spritzing soap tops with alcohol, or cover with an alternative method such as plastic wrap.
3. Clay or Zinc Oxide
Reason: In my soapmaking experiments, I’ve found that adding too much zinc oxide to lighten a soap color creates a soap with a chalky texture that cracks on top. Too much clay with a reduced water amount can be prone to a dry cracked top as well.
Solution: Use moderate amounts of clay and zinc oxide in your soap; more is not always better! When using clay in soap, dissolve it in the lye solution or mix it with around 3 times the amount of water before blending into the soap. (Example: 1 tablespoon clay dissolved in 3 tablespoons water.)
Soap batter has expanded out of the mold (soap volcano):
This isn’t a common occurrence for cold process soap; you’re more likely to get soap cracks. In 14+ years of soaping, I’ve never had a soap volcano and when I tried to force one for a photo for my print book, Simple & Natural Soapmaking, I still ended up having to fake the look. (Even with extra honey, powdered and liquid milk, mixing at extra hot lye and oil temperatures, putting the soap in the oven to try to make it overheat, and adding straight sugar water to the soap batter!) Still, it’s good to be prepared in case it does happen.
Reason: Soap has extremely overheated. This could be from working at high temperatures, high natural sugar ingredients (beer, pumpkin, honey, milk, etc), or a misbehaving fragrance oil.
Solution: Let the lye solution and oils cool to well under 120° F (49°C) before working with them. (An exception to this is beeswax soap.) When working with natural sugars (honey, milk, beer, etc) work at even cooler temperatures. Read reviews of fragrance oils carefully and purchase from a reliable soapmaking vendor.
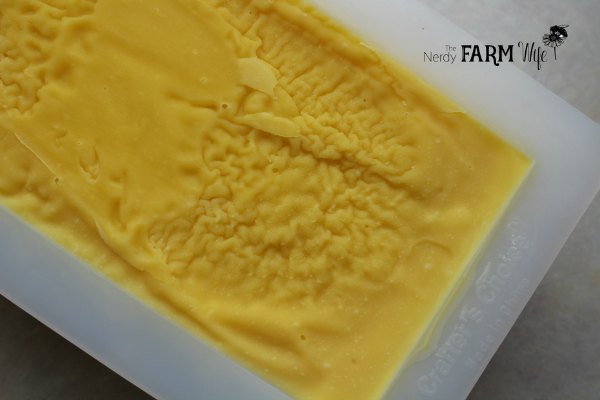
The top of the soap loaf has a weird wrinkly look: (“Alien Brains”)
Reason: This means the soap has overheated at some point. It’s just a cosmetic issue & the cured bars will be perfectly fine to use. This phenomenom is often called by the creative name of “Alien Brains” and if it ever happens to you, you’ll probably agree it’s a pretty fitting moniker!
Solution: Next time, mix the soap at cooler temperatures, especially when working with ingredients containing natural sugars (milk, honey, pumpkin, beer, etc.). Monitor freshly poured soap for signs of overheating and move to a cooler place if needed.

Soap won’t easily release from the mold:
1. Silicone Molds
Reason: Silicone molds tend to form air tight seals on the sides and bottom that hold on to moisture.
Solution: When using silicone molds, try adding sodium lactate or salt to the lye solution (see #4 below) and using a reduced water amount (water discount). Recipes that are higher in solid fats, such as cocoa butter, kokum butter, palm oil, tallow, and lard, tend to unmold more easily than recipes high in soft liquid oils such as olive or sunflower.
If the soap won’t release after several days in the mold, place it in the freezer for a couple of hours until solid enough to pop out of the mold more easily. Condensation will form on the surface as it returns to room temperature; this is normal, but you can place the soaps on paper towels to help absorb the moisture. Leave undisturbed for 24 hours or until solid enough to handle.
2. Clear Plastic Molds
Reason: These molds behave similarly to silicone molds, but are even worse at holding onto cold process soap.
Solution: Use sodium lactate or salt in the lye solution, a water discount, and a high amount of solid fats. Even then, clear plastic molds aren’t always reliable. I’ve had soap stuck in them for 1+ month more than once, so avoid them unless I absolutely love the design.
Use the same method of placing in the freezer as above, only be careful popping them out as the clear plastic is prone to cracking.
3. Palm Free or High Olive Oil Recipe
Reason: Soaps that are high in olive oil or other soft oils such as sunflower, rice bran, sweet almond, etc, start out softer than soaps high in “hard oils” and sometimes need a longer time to firm up in a soap mold.
Solution: Use patience with these types of recipes. They may take a little longer to reach trace, unmold, and cure, but the final soaps are usually very gentle and mild. Add sodium lactate or salt to the lye solution and use a reduced water amount to decrease time spent in the soap mold. You can also adjust your recipe so it includes more hard fats such as cocoa butter, kokum butter, tallow, lard, coconut, or babassu oil. Run any changes through a lye calculator to make sure the lye amount is correct.
4. Didn’t Use Sodium Lactate or Salt
Reason: Sodium lactate (a liquid salt derived from sugars in beets & corn) and table salt can both be used to harden soap so it’s ready to unmold sooner.
Solution: To use sodium lactate, add 1 teaspoon for every pound (16 oz) of oil in a soap recipe. Stir it into the lye solution once it has cooled.
To use salt, add 1/2 teaspoon for every pound (16 oz) of oil in a soap recipe. Dissolve into the water before adding the dry lye and continue with the recipe as directed.
5. Too Much Water
Reason: Especially for palm free soaps, or recipes that are high in olive oil, you don’t need the full amount of water given on a standard lye calculator.
Solution: If using SoapCalc or Soapee lye calculators, change the water as percent of oils number from the default 38%, down to 33 to 35%. (I often go even lower, to around 28% for some recipes.)
CLICK TO RETURN TO THE BEGINNING OF THE LIST

Problems After Cutting Into Bars
Soap is darker in the middle and the outside edges are lighter colored:
Reason: You got a partial gel. This means the soap started getting hot and going through gel phase, but cooled down too quickly before the heat could reach the edges.
Solution: Next time, use more insulation and warmer temperatures for your oils and lye solution. (Try 115 to 120°F , which is 46 to 49°C.) Also, water amount (water discount) can affect gel phase; a soap with a lower water amount requires a higher temperature to reach gel phase, while a soap with a full amount of water will more easily gel.
You may wish to completely avoid gel phase which is often desirable for milk soaps to keep them lighter colored. In this case, use individual molds, cooler soaping temperatures, and place in the fridge or freezer for 24 hours after pouring.

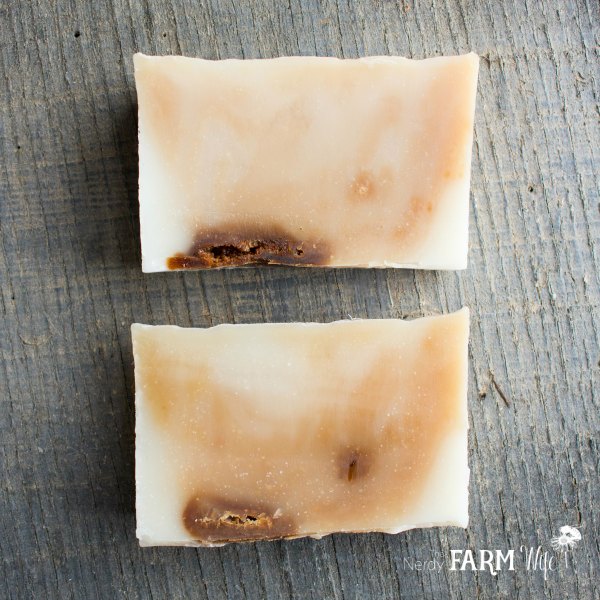
Soap has a dark ring or rind around the outside and the middle is lighter:
Reason: This often happens with coffee soaps, or soaps with vanilla in them. I’ve even had it happen to carrot soap before! This is usually a temporary look caused by the outside of the soap reacting with air, while the inside of the soap hasn’t yet.
Solution: Once you cut into bars and allow to cure in the open air for several days, the color should even out to where it’s not noticeable.
Soap has hard and soft places when you slice into bars:
Reason: This could be because your soap didn’t completely emulsify; you stopped mixing too soon. Sometimes this happens because of “false trace” where the soap looks like it reached trace, but if you wait a minute and check again, the trace is gone. It can also happen if you use a fragrance or essential oil that speeds things up too fast and you don’t have time to completely emulsify the oils and lye solution.
Solution: Make sure the soap is completely blended to a light trace. (When you’re more experienced, you can stop at emulsion stage.) This soap should be discarded or you can try to rebatch since the hard spots will have too much lye in them, while the soft spots won’t have enough.
Soap has a tunnel inside when you cut into it:
1. Hollow Tunnel (Heat)
Reason: This sometimes happens when the soap overheats. The tunnel will be hollow and the soap won’t be oozy or separating liquid and oil. (See #2 below for that scenario.)
Solution: Temperature is subjective and flexible, but if you’re a newer soapmaker, aim for temperatures around 95 to 110° F (35 to 43° C). If working in a warm room, or with ingredients containing natural sugars such as honey, milk, beer, etc, you may not need to insulate your soap.
2. Tunnels Filled With Caustic Liquid
Reason: Sometimes a false trace happens where the soap looks like it has emulsified, but it’s really because a solid ingredient in the soap has gotten cool enough to start thickening the soap batter. You can check for false trace by leaving the soap batter undisturbed for about 20 or 30 seconds after you reach light trace. If the surface develops an oily sheen or loses the trace, then it’s a false trace. If it still shows the trace after 30 seconds then it’s a true one.
Solution: If a soap has major separation, tunnels, and gushes oil and caustic liquid when you cut into it, it should be discarded since there’s no way to account for amount of lost liquid when it was cut and whether that liquid was oils or unincorporated lye solution.

Soap has uneven colored streaks or spots in it:
Reason: These are usually caused by colorants that weren’t completely mixed into the soap batter.
Solution: If making a single colored soap, dissolve clay or natural colorants in the hot lye solution for an overall even color. Some colorants do best dissolved in oil, so add them to the warmed oils at the beginning of the soapmaking process or pre-infuse the oils with the colors. If mixing in at light trace, dissolve the colorant in about 2 to 3 times as much water, oil, or glycerin (depending on the colorant type) and blend well. Don’t add dry clay or colorant directly to thickened soap batter since you usually won’t have time to work it completely in.
More Information:
Jo Haslauer has an excellent series of 4 articles on natural colorants that every soapmaker should read for information on infusions and there’s also a unit on natural soap colorants in my Soapmaking Success Video Course.
Soap has grooves or drag lines:
Reason: If you have dried flowers or other decorations on top of your soap, they can get caught up in the knife or soap cutter wire when cutting into bars.
Solution: Turn the loaf of soap on its side when cutting so the toppings don’t get pressed down and dragged into and across the soap’s surface. If this happens to your soap, cut off the worst affected places. The soap may not be the prettiest, but it’s still usable.
Soap has dark spots that are oozy and sticky:
Reason: This is caused by not completely mixing honey into your soap.
Solution: Dilute honey with an equal part of warm water before adding to the soap batter. Make sure it’s completely blended in before pouring into the mold.

Soap has small visible white spots all throughout:
1. Stearic Acid Spots (feel solid, smooth, waxy)
Reason: Hard fats such as palm, tallow, lard, butters, etc contain solid fatty acids (like stearic acid & palmitic acid) that need a higher temperature to melt, while other components of the fat melt more easily.
Solution: If your temperatures get too cold, the fatty acids in solid fats can start solidifying before they can react with the lye, and you can end up with stearic acid spots. Working with warmer temperatures can help in that case. If using palm oil, it’s recommended to completely melt and stir the oil every time you use it or you might have an uneven balance of fatty acids, leading to more spots in some batches.
2. Air Bubbles
Reason: Overmixing with an immersion blender, or using an immersion blender that’s very old and incorporates in air. Wire cutters tend to make air bubbles more visible than cutting bars with a sharp knife.
Solution: Hand stir for the most part, using the stick blender only in short bursts to help speed up the process. Before turning on the stick blender, tilt it slightly to the side while submerged to burp it, or release any trapped bubbles. Return it to regular position before turning on. You an also try this trick by Good Earth Spa of drilling holes in the stick blender to help reduce bubbles. (I tried it and it worked for me & my 10+ year old Cuisinart!)
3. Lye Crystals (feel sharp, crystal-like, scratchy)
Reason: The lye didn’t completely dissolve and is now in crystalline form throughout the soap.
Solution: Be sure to stir the lye into the lye solution until it’s completely dissolved. The water will turn from cloudy to clear and you won’t see any residue at the bottom of the container. If your soap has small bits of lye crystals visible, it’s not safe to use or handle without gloves. Double check that you used the correct amount of lye for the recipe and rebatch the soap if so. If the wrong amount of lye was used, it should be discarded.
4. Zinc Oxide or Titanium Dioxide
Reason: Zinc oxide or titanium dioxide wasn’t completely blended into the soap batter, leaving little white flecks in the soap.
Solution: Before adding to soap, mix thoroughly with vegetable glycerin, oil, or water, depending on vendor’s instructions and your recipe directions. Use the stick blender to incorporate into soap until the color is smooth. Use moderate amounts to prevent a chalky look.
Soap has flat white spots just on the surface of the soap and aren’t visible inside the cut bars:
Reason: This is a strange occurrence that sometimes appears on soap as smooth white spots that are only on the surface of the soap. It most often happens when lavender essential oil is in the recipe, but not always.
Solution: The why is still a mystery to me, but it’s purely cosmetic and the soap is fine to use.
Soap has a weird texture with raised lines, or veins, running throughout:
Reason: These are called glycerin rivers, which are formed when the natural glycerin in soap overheats and forms clear veins or marbling throughout the soap. Sometimes the veins may have a translucent white look to them. They aren’t harmful and sometimes even lend an interesting appearance to soap.
Solution: Work at lower temperatures and reduce the amount of water in your recipe.
Soap is soft and squishy, like playdough:
1. Water Amount
Reason: Palm free soaps and recipes high in olive oil (or other soft oils) sometimes take longer to firm up. To speed things along, don’t use the full amount of water given on a standard lye calculator.
Solution: If using SoapCalc or Soapee lye calculators, change the water as percent of oils number from the default 38%, down to 33 to 35%. (I often go even lower, to around 28% for some recipes.) Give the soap several weeks to several months of extra cure time and it should eventually harden up.
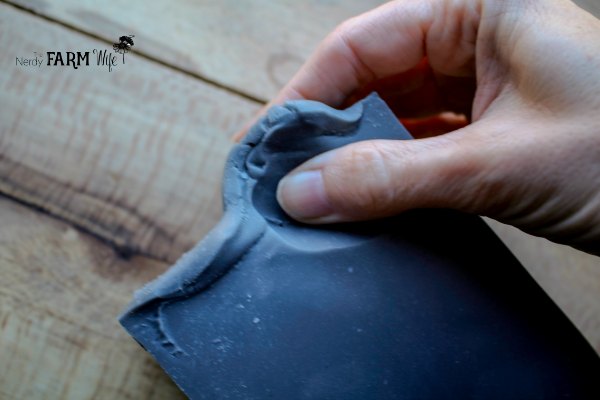
2. Weak or Inactive Lye
Reason: Check the bottle of lye you used. Does it have any lumps or clumps in it? Have you had it for a long while? Is it past its expiration date? Over time, lye will absorb moisture and humidity from the air. This is most evident when you see hard clumpy lye. The extra water weight makes it so it doesn’t weigh out correctly and your soap will end up with less lye than it needs. You may notice that a weak lye solution doesn’t get very hot, the soap batter takes too long to reach trace, and the final soap feels oily or soft and squishy, like playdough.
Solution: Buy a fresh bottle of lye from a reputable vendor. (Make sure it’s labeled sodium hydroxide and not potassium hydroxide.) Store it tightly sealed in the original plastic container. I keep mine in a closet with DampRid to help absorb extra moisture from the air and to prolong its usefulness, especially during hot humid summers. If your soap is overly soft because of weak lye, don’t give up on it quite yet. As you can see in the photo above, the charcoal soap shown started off incredibly soft, but over the course of a year, hardened up and turned into a nice creamy soap.
3. Honey
Reason: Too much honey can make a soap overly soft.
Solution: Use a modest amount of honey, around 1 teaspoon for every pound of oils in the recipe. Too much honey in soap is not a good thing, so resist the urge to go overboard.
Soap is hard and crumbly:
1. Sodium Lactate
Reason: Too much sodium lactate can cause the soap to become hard and crumbly.
Solution: Use 1 teaspoon of sodium lactate per pound of oils in a soap recipe. Add to the lye solution once it has cooled.
2. Too Much Lye
Reason: The recipe has an incorrect lye amount.
Solution: Make sure the recipe you’re using (including ones from this site) has the correct amount of lye calculated by running it through a lye calculator. I like using Soapee or Majestic Mountain Sage’s lye calculators, but there are several other good ones online. Typos and errors happen all the time, plus there are some really unsafe recipes out in Internetland. Do not use recipes that measure by volume (cups, tablespoons, etc). Lye and oils must always be weighed with an accurate scale.
Reason: Your scale is incorrect.
Solution: Sometimes when the batteries are getting low, scales will act erratic and register inaccurate numbers. Make sure to keep fresh batteries in your scale. Also be sure you’re using a quality digital scale. Early in my soapmaking days I tried using a cheapo mechanical scale and the weights were wildly varying when I later tested against a digital scale.
3. Avoided Gel Phase with Fridge/Freezer
Reason: Soap that doesn’t go through gel phase may have texture issues at first. It may be crumbly at the edges, or too soft.
Solution: After removing soap from the fridge or freezer, allow it to come to room temperature and stay undisturbed for another 24 to 48 hours. If you cut a bar and it crumbles, or if it’s still soft, allow it to sit in the open air for several more days before trying again.
4. Salt Bars
Reason: Salt bars are special soaps made mostly or completely with coconut oil and high amounts of sea salt. They set up quickly so if you cut them into bars too late, they’ll be very crumbly.
Solution: Use individual silicone molds instead of a loaf mold for ease of unmolding. If you must use a loaf mold, keep a close eye on the soap after pouring it into the mold. Cut into bars as soon as it firms up – this will happen within just a few hours from time of pouring. Wear gloves since the soap is still caustic at this point.

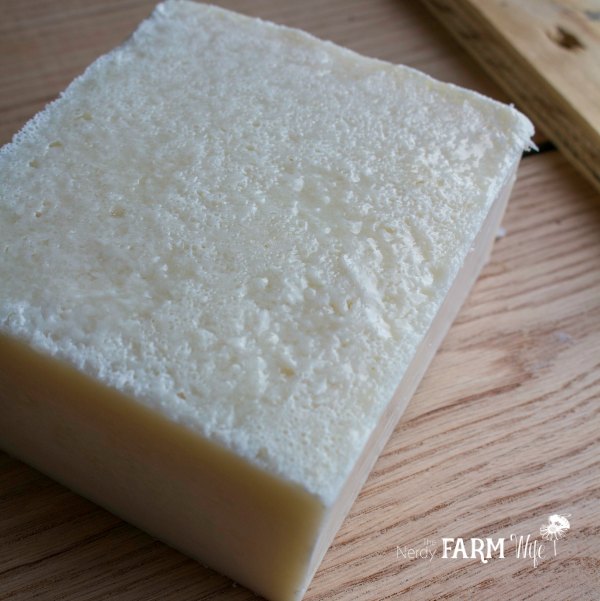
Soap has a thin white ashy layer on top:
1. Exposure to Air
Reason: Soda ash, or sodium carbonate, forms when the lye in raw soap batter meets carbon dioxide in the air around it.
Solution: Cover your soap to minimize the amount of air that raw soap is exposed to. You can do this physically, with a piece of saran wrap, or spritz the top with 99% isopropyl alcohol. This year, I’ve been experimenting with putting my soaps in a clear plastic storage tub. It keeps the air off of the soap and I can still peek through and see how it’s doing.
2. Cold Temperatures
Reason: Soda ash is more likely to occur when using colder soaping temperatures (oils and lye solution) or working in a cold area. I’ve had many readers write to me struggling with soda ash and in mulitiple cases, they’d been making soap in very cold areas, such as 50°F (10°C). Cold work rooms will increase risk of soda ash.
Solution: Temperature is subjective and flexible, but if you’re a newer soapmaker, aim for oil and lye temperatures around 95 to 110° F (35 to 43° C)
3. Tap Water
Reason: Tap water contains impurities that can react negatively in the soapmaking process, increasing risk for soda ash and DOS (dreaded orange spots indicating early rancidity).
Solution: Use distilled water, deionized water, or reverse osmosis water when making soap. If using a speciality water in your recipe (rainwater, snow, ocean water), be sure to follow the other tips in this section to reduce soda ash.
Tips to Remove Soda Ash
- Use a handheld garment steamer to steam the ash from the soap.
- If a steamer isn’t available, carefully try the steam from a tea kettle or pot of boiling water. (I’m too klutzy for this method, but am told it works.)
- Try dipping in water, as instructed by this tutorial on removing soda ash at Modern Soapmaking.
CLICK TO RETURN TO THE BEGINNING OF THE LIST

Problems with Cured Soaps
Soap is not the color or scent you expected:
1. Wrong Oil Types for Colorants
Reason: When working with natural colorants such as pink and purple, avoid using green or green-yellow oils such as extra virgin olive oil or unrefined hemp and avocado oil since they can muddy up the final color of your soap. (Pink/purple colorant + green oil = generally a brownish color.)
Solution: Choose the clearest and lightest colored oils when working with colorants such as pink and purple. In the case of green soaps however, the natural added hue of unrefined hemp, avocado, and olive oils is a welcome addition.
2. Wrong Type or Amount of Soap Colorant
Reason: Some colorants just don’t do well in soap, or you may be using the wrong amount or adding them at the wrong time. Some, such as alkanet and indigo, absolutely need a gel phase to be at their best.
Solution: For more information on natural colorants, Jo Haslauer has a highly recommended series of 4 articles filled with loads of information. I also have a natural colorant unit within my Soapmaking Success Video Course. For tips on using synthetic colorants such as micas and LabColors, check out this article on How to Color Handmade Soap by the Soap Queen.
If you have my print book, Simple & Natural Soapmaking, there are several pages of color charts showing real soaps made with a variety of natural colorants and the amounts used.
3. Wrong Oil/Fat Types for Scent
Reason: A few oils/fats tend to impart their odor into the final soap.
Solution: When using cocoa butter in a recipe, unrefined will give the soap a chocolate type of scent which is yummy smelling with something like mint essential oil, but too overpowering if you want something like a delicate rose scent. Refined cocoa butter is available that won’t add scent to your soaps. In some cases, tallow and lard can add an unwanted aroma to your soap. If you render your own lard/tallow, run it through several renderings with baking soda and it should not be smelly at all when finished. (I have a tutorial coming to the site soon!) Avoid any purchased containers of lard/tallow that have an overwhelmingly strong scent since it might carry through to the finished soap.
4. Wrong Type or Amount of Essential or Fragrance Oil
Reason: Some essential oils (EO) and fragrance oils (FO) don’t hold up well in soap. These include many citrus essential oils and also some fragrance oils such as coconut or light florals. Some need to be used at higher amounts, while others need to be used more sparingly to avoid skin irritation.
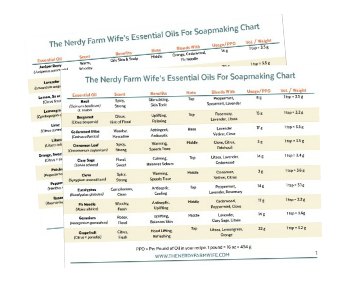
Solution: Folded versions of lemon and orange are stronger and longer lasting in soap than their regular counterparts. Look for labels such as “Folded Orange”, “10x Orange”, “5x Lemon”, and so forth. When working with citrus essential oils, combine them with an anchor such as lemongrass or litsea to help them stick around longer. For fragrance oils, be sure to read through product descriptions and reviews to see what other soapers have to say about them. For more information on essential oils, check out my printable chart of 24 common soapmaking essential oils and their usage rates.
More Information:
Helpful article – Simple Secrets: Anchoring Fragrances In CP Soap
Essential Oil Calculator – EOCALC
Bramble Berry’s Fragrance Calculator
Soap doesn’t have a good lather:
1. Castile or Bastile – High Olive Oil Soap
Reason: Olive oil doesn’t lather very well on its own. Recipes high in olive oil need a longer cure time than other soaps in order to harden and develop a small amount of lather.
Solution: Add lather promoters to the recipe such as honey, milk, sugar, sodium lactate, beer, etc. If making a bastille soap (around 75% or higher olive oil) be sure to include bubbly oils such as coconut (20 to 25%) and castor oil (5 to 7%).
2, No or Low Coconut Oil in Soap
Reason: Some skin types are sensitive to coconut oil and require soaps that are low in coconut oil or that completely leaves it out.
Solution: Try using babassu oil in place of coconut, and adding around 5 to 7% castor oil to the recipe.
3. Too Much Beeswax
Reason: Beeswax is added to harden soap and add label appeal, but can diminish lather in higher amounts.
Solution: Use 0.5 to 3% beeswax in a recipe. Higher amounts can feel draggy across your skin and reduce lather.
More Information:
There’s an amazing list of lather boosters to play with in Modern Soapmaking’s article, Lather Lovers Additive Tests, One Year Later! that’s very informative.
Soap isn’t hard or long lasting:
1. Oil Types in Recipe
Reason: If your soap recipe contains more soft or liquid oils (olive, sunflower, rice bran, sweet almond, etc) than hard oils (lard, tallow, palm, coconut oil, cocoa butter, kokum butter, etc) it will usually result in a softer soap.
Solution: Increase the amount of hard oils in your recipe. A caveat of this is that soaps high in soft oils are often extremely gentle and lovely for your skin, so don’t rule out making soaps that are high in soft oils! Reduced water amounts, longer cure time, and certain additives can help them be harder and longer lasting.
2. Water Amount & Cure Time
Reason: The more water in a recipe, the longer it takes to evaporate out over cure time. Cure time is often rushed, but is necessary for a harder and better soap.
Solution: Use a water discount. THIS is a great example of someone who has had successful results reducing water amount. Also, be sure to give your soaps plenty of cure time. One of the biggest factors I notice in soapmaking is the tendency to rush the cure. Everyone wants their soap ready faster, but handmade soap requires a certain amount of time and patience. (This applies to hot process soap too.) I know it’s hard for me to wait too! But, giving soap a full 4 to 6 weeks cure time, at minimum, is important. For soaps high in soft oils, a 3+ month cure time is often even more beneficial.
Be sure to read this exceptionally informative article on Curing Soap from the Classic Bells website.
3. Additives
Reason: Consider additives such as beeswax and sodium lactate to increase soap hardness.
Solution: If adding beeswax to soap, use at a rate of 0.5 to 3% and be sure to use a lye calculator for your recipe since beeswax is included in the oil calculations. As a bonus, beeswax also reduces the chance of soda ash! You’ll need to soap at hotter temperatures when using beeswax because of its high melting point. Aim for oils around 145°F (63°C) and lye around 125°F (52°C).
When using sodium lactate, add around 1 teaspoon for every pound (16 oz) of oils in a recipe, stirred into the cooled lye solution. For example, if your soap recipe has 32 oz (907 g) of oil, then use 2 tsp of sodium lactate.
Soap feels slimy:
1. Olive Oil or Soft Oils
Reason: Olive oil and other soft oils like canola, sunflower, safflower, etc are extra conditioning but can feel slimy if used in high amounts and not cured for an extra long time.
Solution: You can either increase the amount of hard oils in your recipe (lard, tallow, palm, cocoa butter, kokum butter, coconut oil, babassu oil, etc) or you can keep the amount of olive and other soft oils high (so the bar is extra conditioning), just be sure to give the soaps a sufficient amount of cure time too. (4 to 6 weeks at absolute minimum, 3+ months is even better)
2. Type of Soap Dish
Reason: Homemade soap melts easily if left in water.
Solution: Use a well draining soap dish and keep the bars as dry as possible between use.
3. Additives & Superfat
Reason: Consider adding lather boosting additives such as milk, honey, beer, fruit/veggie juice & purees, etc to high olive oil soaps to help with lather.
Solution: An increased lather may help offset some of the slimy effect that castile or bastille soaps can have, while a decreased superfat will reduce the amount of free oils in a soap.
What to do with a “slimy” soap?
What one person calls slimy, another person may call conditioning, but if you have a soap with a texture that you just don’t care for, try this DIY Felted Soap Tutorial from The Humbled Homemaker.
Soap dries my skin out:
1. Coconut Oil Amount
Reason: Coconut oil is very cleansing when turned into soap and can be drying for some skin types.
Solution: Try reducing the amount of coconut oil down to 17 to 22% of the oils in the recipe. To offset loss of lather, add castor oil at 5 to 7%.
2. Lye Amount
Reason: A higher amount of lye can cause dryness.
Solution: Try increasing the superfat to 6, 7 or even 8%. This increases the amount of free oils in the soap, making it more conditioning. Double check that you used the correct amount of lye and that your scale is accurate. (Don’t ever measure lye by cups or tablespoons as it’s highly inaccurate.)
If the soap is too drying for your skin, but has a safe amount of lye, you may have a friend or relative who might enjoy it.
Soap has weird orange or brown spots on it and/or smells bad: (DOS)
Reason: These are called DOS, or Dreaded Orange Spots, which indicate that oils in your soap are going rancid.
Solution: To prolong shelf life of soap, use fresh oils from a reliable vendor, distilled water (contaminants in tap water can cause problems), cure soap with plenty of air flow around each bar, and store cured soaps in a cool, dark, dry area with good air circulation.
Kevin Dunn, a soapy scientist and author of Scientific Soapmaking: The Chemistry of the Cold Process, recommends using Rosemary Oleoresin Extract at 0.1% of the oil weight. (Most of my recipes work out to requiring 1 grams per batch.)
Be sure to read his paper on Dreaded Orange Spots for more information and options.


So so helpful. Thank you for your time and your work.
Hi Chloe, So glad you found it helpful! :)
Hello! Thank you very much for all the information from your article. I’ve made my soaps recently, but one of my soap still a bit soft, it feels hard and soft in the mean time. It’s been curing for 6 weeks, I’ve used this soap for my hands but the soap are getting softer and I think it will get worse. What do you think is happening with my soap? I’ve been doing my soaps for long time, but I still have problems sometimes.
Thank you!
Hi Jeannina! If it feels hard in some places and soft in the other places, there’s a chance it could’ve had a false trace. The hard spots could have too much lye & the soft spots not enough. You could try rebatching it & see if that helps! Here’s a great article on that: https://www.thesprucecrafts.com/how-to-rebatch-soap-517103
Hello – Thank you for all the information. Can I use Theraputic essential oils in soap making?
Hi Theresa! Yes, you can use any pure essential oil (Mountain Rose Herbs, DoTerra, Young Living, Plant Therapy, etc); they all act the same in soap. :)
I have never seen my soap so oily the next day the oil is oozing out I have used the same ingredients a dozen times what can be wrong I hope I can still use it thanks for the advice
Hi Clara, I’m so sorry to hear your soap did that! It could be that your lye has gotten old, or you possibly had a false trace:
https://thenerdyfarmwife.com/troubleshooting-cold-process-soap-problems/#section10
I would rebatch it and then see how it does over the next few days. Here’s a great site on rebatching your soap:
https://www.thesprucecrafts.com/how-to-rebatch-soap-517103
I love your website and have learned so much! Thank you so much- I have black spots appearing in two different loaves- silicone- upon cutting g. I had not even unfolded them and noticed. Can you share your thoughts on this?
Hi Tara, I’m so sorry to hear that! Can you write us at [email protected] and send along a picture or two, and also what recipe you used?
That will help us troubleshoot better! :)
Thanks again Jan for a smart, insightful, and wonderfully written article.
All the best?Cheers!!
Warmly,
Michelle
Hi Michelle, Thanks for the kind words & so happy you enjoyed the article! :)
wonderful!
Hi Denise! Glad you like it! :)
Hi, just read your article on what’s wrong with my soap. Super great article. I’ve been soaping for 3 yrs. and I still learned lots of new things. Love it, Love it. Thank you Diana W.
Hi Diana, I’m so glad you enjoyed the article! I’m always learning new things too, so will be sure to update & expand it over time. :)
Hi Jan
Wonderful post, thank you.
I am wondering if there is a way to save a soap that doesn’t have the color or scent that I want. Can I remelt it, then add some other color and scent? It is a full milk soap.
Thanks!
Melody
Hi Melody! Yes, you can grate or chop it, then melt it down in your crockpot with a tablespoon or two of water if needed. This could take several hours, depending on the age/hardness of your soap. Then, you can add in more color and scent when it’s an even consistency, similar to making hot process. One drawback about rebatching milk soap is that it may turn darker with the heat, so you want to use a darker colorant rather than try for something like pale pink or lavender. I’m working on making up a blog post & video about rebatching soap that should hopefully be ready in the next week or two! :)
Very helpful and well written. Thank you
Hi ET, I’m happy to hear it was helpful!
Hi Jan, thanks for another great post. Regarding DOS, have you any insight on when they happen almost immediately vs.over months? I’m thinking it’s based on ages of oils, but maybe there are other factors? Infused oils may impact it?
Hi Jen! If they happen soon after making your soap, it could be something like spots of scorched milk or honey, or a fragrance oil, or bit of colorant/clay not mixed in. How old is your soap & what are some of the additives? That might help us troubleshoot a few ideas! :)
Thank you so much for this helpful treasure found! Now there is again light at the end of this tunnel!
Hi Susan, So glad you found the troubleshooting guide helpful! :)
Hi, so much info. You’ve been a great help.
I’ve been making soap for my self and friends but find it slightly drying. My recipe is: 5% super fat
200g olive oil
200g coconut oil
100g cocoa butter
I put that into bramble berry soap calc to find lye and water and add 15g if essential oils at trace.
Am i putting too much coconut oil in ? Should I super fat more ?
I do appreciate any help you can give.
Hi Pennytoes! That works out to 40% olive oil, 40% coconut oil, and 20% cocoa butter. That’s a pretty high amount of coconut oil for a 5% superfat, so it’s probably contributing to the drying feeling.
I would do a combination of less coconut oil and higher superfat. So you could try decreasing the coconut oil to 125 grams (25%) or 150 grams (30%) and use a 6 or 7% superfat. You can add more olive oil to replace the reduced coconut oil amount, or use another oil such as sunflower or sweet almond. Another idea is to also reduce the cocoa butter down to 75 grams (15%) and replace the 25 grams (5%) with something extra nourishing for your skin like shea butter, or avocado oil. It looks like the makings of a really great recipe! :)
Hi, thank you, this post is amazing and I’m sure took a ton of time! What can I do to prevent my soap from heaving in the middle of the mold? It is a plastic mold (16 bar) I love the size and quantity in one batch but they are always uneven!
Thank you!
Hi Sigrid! That could come from overheating. Is it forming sort of a hill in the middle of the soap? Do you see any cracks in the top? If you get a chance to post a photo on my Facebook page, I’d love to see more details & I might have a better idea for you: :)
https://www.facebook.com/pg/TheNerdyFarmWife/posts
Hi Jan. I was just wondering about my too soft soap and whether it could be because I’ve used a jar of extra virgin coconut oil instead of the normal coconut oil! Thanks, Debbie
Hi Debbie! Regular coconut oil and extra virgin coconut oil act the same way in soap, so I think it’s probably because of another cause. Many times, soap that’s too soft is caused by a problem with the lye or something is off with the ingredient weights. If you want to share the recipe here, I can double check that for you too. :)
Hello, l have a question about cold processed soap preservatives. Can anyone recommend a natural preservative that l can safely add to my natural soaps that l will be selling in retail shops over summer? Really appreciate some feedback. Janet
Hi Janet! Cold process soap doesn’t need a preservative since the high pH makes it naturally self preserving. The oils will eventually go rancid though, so to extend shelf life that way, you can add ROE (rosemary oleoresin extract or rosemary antioxidants) to your soap. Kevin Dunn, a soapy scientist, says:
“If your client base is heavily tilted toward natural ingredients, using 0.1% of your oil weight in ROE is very likely to significantly extend your shelf life.”
http://cavemanchemistry.com/DreadedOrangeSpot-Dunn.pdf
Would like to make Lavender/Lemongrass soap, but can’t find a recipe. Can I halve the lavender in a recipe and make up the other half with lemongrass?
Many thanks
Hi Patricia! That sounds like a great combination! Yes, you could use 1/2 lavender and 1/2 lemongrass. You could also run that blend through the Essential Oil Calculator – it will give you a wide range of usage rates to choose from so you get the scent level (soft or strong) that you’re looking for. :)
https://www.eocalc.com/
Thank you, this is so helpful. I just made soap and it has oil floating on top. Is this soap safe to use?
Appreciate if you can please respond.
Thank you!
Hi Bindu! Can you tell me more about the soap and the recipe you used? It will be easier to troubleshoot with more details. Thanks! :)
Hi.i make soap with 3% superfat and 33% lye concentrate.( 70% tallow 10% coconut oil 10% castor oil and 10% olive oil). but after a month ، when i washing my hands my soap cracked during use . what am i doing for prevent crack during use?
Hi Vahid! The soap could’ve cracked because of the high amount of tallow and lower superfat. It should be a nice hard bar of soap!
You can’t do anything about the cracks in this batch, but the next time you make the recipe, you could try using more olive oil and less tallow, and perhaps increasing superfat to 4 or 5% and that should help! :)
Hello, i made a cucumber, ginger and punk salt soap. Yes i used actual items not scents and two my bars turned yellow and dont smell anything like the rest. They are in there third week sof curing … what should i do?
Hi Krystal, I’m so sorry to hear that! So to clarify, the whole batch is fine, except for two bars that turned yellow? It could be that an ingredient didn’t get mixed in well and it got more heavily distributed in that part of the mold. Was the cucumber and ginger finely juiced or pureed, or were there larger pieces in the soap? Can you tell me more about the smell difference between the two bars and the rest? Do they smell like old oil, or unpleasant? Or a good smell each, just different from each other? If you can give me more details about your recipe and how they’re looking/smelling now, that might help us pinpoint the problem further! :)
some of my soap “sweat” slightly brown beads. They smell and work fine. I tested the PH is all around 7. They are stored in a dry place with ventilation. I compared the recipes and the only common thing I can identify between the sweating ones and non-sweating ones is the amount of coconut oil. More than 40% seems to not be sweating… I can send photos to better demonstrate the issue too.
Hi Asmin! I think you have a good idea of what could be the reason! Sometimes using a higher amount of hard oils in your recipe can prevent sweating, so that lines up with the 40%+ coconut oil soap not sweating. For the recipes that aren’t high in coconut oil, are they higher in soft oils (such as olive) instead? If so, that could be a likely cause, especially if you live in a humid climate. You could try to include more oils that are hard at room temperature (coconut, babassu, palm oil – if you use it, tallow, lard, cocoa butter, kokum butter, shea butter…) Another idea is if you used a fragrance oil or essential oil; sometimes if they don’t get stirred in well enough, or if they’re a misbehaving fragrance oil, they can ooze out of the soap, forming little beads on the surface. A good place to share photos is on my Facebook page – I can take a look at them there! :) https://www.facebook.com/TheNerdyFarmWife
(super fat soap question) Hi! I have your book, 101 Easy Homemade Products. Bought it after my good friend, Carmen, showed me how to make soap the hot-processed way using this book. Whew! First step complete. This is a super book, simple, East and the photos are very helpful and beautiful.
Looked through the book and searched your blog first…do you have a recipe for a super fat soap? Can I follow one of your recipes, and add additional fats willy-nilly (a little bit of this and a little bit of that)? After trace?
Reason: discovered an awesome homemade soap in Nova Scotia. It has 12 different fats in it. I would like to recreate it (perhaps with just half of the fats). Yes, I can buy it, however, the woman used bitcoin and I don’t do that. If you’d like, I am going th NS this summer, and can send you a bar of it.
A there a rule of thumb, for super fat soaps?
(I have searched and seen many different soap makers videos and blogs. All of them made soap in their kitchens, with kids around, and seemed to be unsafe. I finally found you… a trustworthy soap maker.)
“East” = “Easy”
“used bitcoin” = “uses bitcoin”
And forgot to add “THANK YOU VERY MUCH for your book and blog!”
Hi Claudine! So happy to hear you like the book! :)
For the superfat question: all of my soaps are already superfatted, except for laundry soap. (Virtually all of the recipes on the internet & in books should already be superfatted as well.)
When you create a recipe using a lye calculator, you normally calculate around a 5 or 6% superfat. This means that you’re adding more oils than the lye can turn into soap, so there are leftover oils that ensure the soap won’t dry your skin.
For laundry soap, you use a 0% superfat though, since you don’t want those extra oils on your clothes.
The lady in Nova Scotia may have just used the words ‘superfat’ to help with marketing & to show that it was nice and nourishing for your skin.
When I first learned to make soap, everyone added the extra oils for superfatting after mixing the soap to trace, but then some research was done to show that it doesn’t matter when you add the oils, so you might as well mix them all at once.
If you want to add extra oils, you can definitely do so, but you’d want to include them in the list when creating a recipe with a lye calculator to make sure you have enough lye.
If you you just add extra oils randomly, then you’ll end up with a really soft and oily soap that doesn’t lather well. It’s a balancing act for sure!
I hope that helps! :)
Thanks, Jan! That helps a lot! Thank you for getting back to me so quickly. Have a love summer!
“Lovely” summer?
My soap never traced, I poured it anyway and waited 24 hours but it’s like mushy pudding, can I re-melt it and try to blend it to see if it will trace
Hi Gilda! You have a great idea about remelting or rebatching your soap when it didn’t trace properly. Here’s a great article that tells how! :) https://www.thesprucecrafts.com/how-to-rebatch-soap-517103
Hi Jan,
I’m a beginner in soap making. Thanks for your great sharing.
About “Soap has a dark ring or rind around the outside and the middle is lighter”.
Actually for me this look very beautiful, I’d like to make the soap with a ring like that. Appreciate if you could share how to keep that ring instead of making the color even out.
Thanks a lot.
Hi Nga! That’s a great question! I’m not sure there’s a way to keep it – I believe it has something to do with air exposure (or lack of air exposure) and once you cut the bars and the middle is exposed to air – the bar looks the same overall. At least that’s my best guess so far! If I ever find a way to make it stay, then I’ll definitely update the post! :)
good day! I have a question. I tried to make your recipe Lavender shampoo and bar soap the total of my oils is 750grams and i run it thru the soapcalc before making. i made it yesterday and checked on it this morning. the oils did not become soap and only the surface harden. the problem i think lies in the lye that i used. i suspect that the lye is already expired since it is already hard. at that time i did not know that it could no longer be used. could i rebatch the soap? but i don’t know how, how much lye should i add. if it could no longer be salvaged how should i disposed it? thank you
Hi Elyang! Sorry to hear that happened! If the lye was expired, then the soap could be oily or soft. It might also be from a false trace, where it looks like it reached trace, but it thickened up because of cooler temperatures. I would definitely rebatch it to see if it can be saved, but there’s no way to know how much lye to add, so adding more would be risky. If it’s still soft after rebatching, then you could still let it sit and cure for many months. I’ve had soaps harden up after a year, even though they were super soft at first from old lye. So there is still hope before throwing it away! :)
First batch ever. Everything went well, but it is winter here, inside temp maybe 50 degrees. It cooled too quickly. I’m trying to reheat it, but doubt that will work. (in the same warm oven where I am raising a batch of bread dough) how do you ‘rebatch’? just put it back in a bowl, add more water and lye, and beat it to trace again?
Hi Sandi! I’m so sorry to hear that happened! This article has some excellent rebatching options: https://www.thesprucecrafts.com/how-to-rebatch-soap-517103
wow – what a fantastic article and so much to learn here. I’m not sure if you will be able to help me …. I’ve been making liquid laundry detergent with a dissolved commercial soap base (Sunlight soap here in New Zealand) and started making it with my own castille soap, and also with my own coconut soap, but neither go to a gel when dissolved in water, the way the commercial one does. What am I missing here?? Is it that the commercial one has something else added … my homemade soaps (oil, lye and water) are missing something??? As a result the liquid laundry detergent is runny like water, instead of having a thicker, more viscous texture. Many thanks, Anna in NZ
Hi Anna! That’s a great question! I’m not sure since I haven’t tried making laundry soap with my homemade coconut laundry soap – instead I make a dry detergent with it:
https://thenerdyfarmwife.com/coconut-laundry-soap-stain-stick-laundry-detergent-recipe/
Hi your tips on if the mixture doesn’t reach trace seem to be put less water in at the beginning or check your lye which you have already used. Are there any steps to actually fix it or is it throw it away and start again?
Hi Andy! Yes, you can try to rebatch the soap & that can often fix problems such as false trace, or not reaching trace.
This site has some great options for rebatching: https://www.thesprucecrafts.com/how-to-rebatch-soap-517103
If it remains too soft after rebatching, then there’s still hope – you can let the bars of soap cure for several months or up to a year & it might become nice and usable.
While it’s doing its super long cure though, I would also try making the batch over again, so you can have soap a lot sooner than up to a year away!
Hi, first soap, I have your book, Simple and Natural Soapmaking, and used the palm free soap #1 Tallow lard version yesterday. Today when I tried to cut, it is crumbling, I stopped cutting, can I do anything to save it?
Hi Carol, I’m so sorry to hear it did that! It’s possible that there was too much lye. (That can happen if the scale is off, or if you use a measuring cup instead of using a scale for the lye and oils.) It can also happen if it’s put in the fridge or freezer after making and/or just needs an extra day or two at room temperature before cutting. How is it looking now? Hopefully it just needed more time! :)
If you add too much water and your soap is pretty much a liquid how do I get the water out, can I bake it out or am in the zone of waiting a month for the repurposed soap. I’ve never done this before so this whole thing is new to me.
Hi Kyptnc7! Is this after you’ve rebatched your soap? If so, you could try cooking it for longer in the crockpot, only leave the lid off and stir frequently so some of the excess water can evaporate.
Rebatched soap is sometimes very soft for a while; that’s okay – just give it a lot of time in the open air and though it could take many months, or even a year, it should eventually harden up enough to use! :)
Are steric spots bad ? Do I need to rebatch my soap ? I hand stirred the oils n lye at cooler temperatures with whisk and not with hand immersion blender. my soap has palmolein n olive oil pomace … I think I might have had oils hardening before completely dissolving…
Pl suggest what to do ?
Hi Uma! Stearic spots are more cosmetic than anything & usually the soap is fine to use. (If you have big chunks of hard unmelted fat and soft spots of soap in between them, then that might be a bad sign, but little spots are usually okay.) Next time you can melt the oils at a higher temperature & that should help! Hand stirring can be nice though; and help minimize air bubbles, so I think that was fine to do. :)
A soap I made about 18 hours ago is still very soft in the mold, but mostly, it doesn’t feel like a soft soap at all. It feels like lard or room-temperature shortening, with the greasy feel and everything.
Hi Alexa, Sorry to hear it did that! It sounds like something is wrong with the lye or the lye amount. Did the lye have any lumps or clumps in it? Was it an older or expired bottle? Also, just double checking – did you use a scale to weigh out the lye, or did you use a measuring cup? Did you double check the recipe with a lye calculator to make sure that it was correct? Those are a few ideas to start with to help us troubleshoot better!
Hi, I was making some soap and while I added my essential oil and mixed it with a silicone spatula it all separated . Like it was oily , some grunky stuff at the bottoms of the bowl , little stuff floating on top . Can anyone help ?
Hi Meme! Sorry to hear that happened! What type and brand of essential oil did you use? That might help with troubleshooting if you get a chance to let me know. :)
It sounds like the soap might need rebatching. Here’s a great how-to article: https://www.thesprucecrafts.com/how-to-rebatch-soap-517103
Holy shmolie! This is a fantastic list of cause and effect situations found in soap. A must read for all soap makers!
Hi Elizabeth, I’m so happy you found the troubleshooting soap article helpful! Thanks for commenting! :)
How can we soften a bar of Zote soap so we can cut it in pieces?????? I bought a lot of it and now it is to hard. Want cut up. Looking for answers. HELP???????
Hi Dale! I’ve never used Zote soap, so I’m unsure. Have you tried grating it instead of cutting? I wish I could be more help!
Pls can I add more foam booster to my liquid soap after making the liquid soap, cos I realized dat after making the liquid soap, it didn’t foam to my taste, so please I need ur advice, if adding foam booster will have any negative effect on the soap,or should I go ahead.. Tnks waiting 4 ur response
Hi Asiosa! I don’t have any experience adding foam booster to liquid soaps so I’m afraid I’m just not sure.
If your liquid soap recipe is made from scratch, then you might want to consider adjusting the recipe to include more coconut or castor oil, or try lather boosting additives like aloe liquid (in the lye solution, not for dilution) or sugar. That might help the lather more without needing to add detergents. I wish I could be more help, but good luck with your experiments! <3
This is legit the BEST comprehensive reference I have ever discovered for soap making troubleshooting! I can’t thank you enough for all of the details : )
Hi Natalie, I’m so happy that the article was helpful! :)
Hi,
Lovely article very well written. I tried making my first cold process soap today and failed miserably. Then I stumbled upon your write up and I’m wishing I knew all this before. However, since I’m new do guide me exactly where I have gone wrong. My batch wouldn’t trace properly to begin with. Followed by rice flake kind solution. It kimd of saperated. Was heavy blending the cause of it? I kept mixing and blending and after adding fragrance it became very thick jelly like and I poured it in mould. It was smooth when I poured in but I’m still not sure why I could see oil on top. Is it a case of false trace? I’m sharing the recipe below. Is this the right recipe at all or did I goof up in beginning itself? Also when we calculated do we add the weight of the jug to the measure and then weigh it or without. Please guide me I do want to get into soap making. I used brambleberry lye calculator with super fattening level of 5%.
The empty jug I weighed everything in was showing weight of 2.9 0z so I did add that too all weights while measuring. Is that where I goofed up?
Sodium hydroxide 4.79 +2.9 = 7.69
Distilled water 10.70 + 2.9 = 13.6
Similarly I added 2.9 to rest all too so do keep that in mind while guiding me.
Pomade olive oil 14. 45 Oz (35%)
Cocoa butter 7.85oz (15%)
Castor Oil 4.55 Oz (5%)
Coconut Oil 12.8 Oz (30%)
Shea butter 7.85 Oz (15%)
Please tell me if I used right recipe and what will become of my final product. Do I throw it n retry or is there any hope. Thanks.
Distressed Soap Lover
Hi Shilpaa, I’m so sorry to hear about your soap! You don’t want to count the weight of the jug into your recipe – I think that is where things went wrong for you.
Most scales have a “tare” button that you push to reset the scale to zero.
So you place your container on the scale, then you push tare to reset it to zero, and then you can add your ingredient that you want to weigh.
Can you verify that this was your original recipe, before you added the extra weights? I want to make sure my math is right.
4.79 oz sodium hydroxide
10.7 oz water
11.55 oz olive oil
4.95 oz cocoa butter
1.65 oz castor oil
9.9 oz coconut oil
4.95 oz shea butter
If those are the correct numbers of your recipe, when I run it through the Soapee Lye Calculator, then it says you have a superfat of 2%.
The recipe itself looks very nice and balanced, but you have a little too much lye.
For a 5% superfat, you would use the recipe above but have 4.64 oz of sodium hydroxide and I think you will have a nice soap!
Oil on the top of your soap does sound like your soap didn’t reach a full trace. Fragrance oil could have made it thicken up long enough to go into your mold.
Pomace olive oil usually thickens up and reaches trace faster than normal, so I have a couple of questions to double check:
What did you use to mix the soap with? Was it a hand mixer (with two whisk like beaters) or an immersion blender (stick blender)?
Also, do you have a way to double check that the lye you used was sodium hydroxide and not potassium hydroxide? Sometimes those get mixed up when you order them, and potassium hydroxide would make your soap stay soft.
How is your soap looking today? If you want to send photos, just send an email to [email protected] and we will be happy to take a look! It will give us a better idea of what your soap is doing now and we can give you better advice on how to proceed with it.
Hi,
Thank you so much for reverting. Yes, I did go wrong there. Had no idea regarding scales. Original recipe is just like you put it. I will use 4.64 sodium hydroxide now. Thank you so much for guiding me.
I used an immersion blender. I ordered sodium hydroxide but
now that you’ve mentioned this I’ll definitely recheck once again to be absolutely sure.
Soap remained soft and oil started to float on top. I had to throw the batch. Failed miserably but not giving up. I’ll try again and share results and pics with you.
Thank you so much for all your help and encouragement. It means a lot to me.
Warm Regards
Shilpaa
Good luck with your next batch of soap! You will get it! ❤
Let me know if you have any more questions or need more help!
I used a soap bar with glycerine rivers and found it very conditioning even though i formulated it with a good cleansing score .Do glycerine rivers increase conditioning of soap?
Hi Aisha, That’s such an interesting question! My first thought is that the glycerin amount in soap should stay the same, no matter how it’s presented (as glycerin rivers, or mixed into the soap per usual).
In soapmaking, 1 molecule of oil (fat) reacts with 3 molecules of lye which turns into 3 molecules soap + 1 molecule glycerin.
Source for that info: Kevin Dunn via https://www.wholesalesuppliesplus.com/handmade101/learn-to-make-articles/All-That-Glycerol.aspx
I believe that same ratio would be maintained, so there’s no extra glycerin being produced to make the bar feel more conditioning. However, I might be wrong!
Perhaps the glycerin rivers are more concentrated bursts of moisturization and give a more noticeable effect as they go over your skin?? (Sort of like moisture beads in a scrub product for your skin.)
I’m not sure since this is outside my scope of current knowledge – we need a chemist to chime in and help us out. :)
I made the dog shampoo recipe and I accidentally put two tablespoons instead of teaspoons of lavender. What is the best way to fix this?
Hi Amber! The amount of essential oil in that soap (7 g which is abt 2 tsp) is the equivalent of a bit over a 1% essential oil dilution rate.
That’s about the limit of what I’d use on a dog, BUT, for a human, you can safely go higher.
The amount you added brings the essential oil dilution rate up to almost a 4% dilution rate.
That’s still in the safe range for using as a body and/or shampoo bar for humans.
(Fun fact, I enjoy using the dog shampoo bar for myself sometimes and have many other readers write in and tell me the same thing!) ?
So your soap isn’t wasted, I just wouldn’t use it on a pup. ❤
Thank you so much!
Hello!
I have a face soap that has already fully dried and cured (it was made months ago) and is stored in a room with a dehumidifier that is kept at 30% humidity. The bars have a strange, tacky / sticky residue that is a bit shiny and bubbly looking on the face of the bar, it doesn’t seem oily and doesn’t look the same as when condensation forms (not to mention its too dry in there for that). I have been scouring the internet and it is difficult to find something that seems comparable and I don’t know how to fix it. Could it be glycerine? I am attaching the recipe below, the bars are kept in an oven at a higher temperature at first (~125-130ºf) and then reduced to slightly lower overnight (~120ºf). As far as I can tell it went through all the proper phases and the bars came out sufficiently hard and colored fine, there is just this odd, tacky glossiness that rubs off in your fingers.
Any help is much appreciated.
Thanks!
Adellyn
Hi Adellyn! Your recipe looks good as far as lye amount – it seems to have about a 6% superfat which is great.
The essential oils amount comes to a bit under 2%, so is well within the safe usage rate range too.
I don’t know that you need to dissolve the lye in ice water though, since you are then heating the soap in the oven.
The only thing I can think of is perhaps it’s related to the extended heating time. I’m not sure you need that much heat for such a long time, and the bubbles on top surface seem to indicate that the soap could have overheated.
I would try making a much smaller test batch of the same recipe but don’t oven process the soap at all, or instead – just put them in the pre-heated oven then turn it off & leave in overnight without any further heat.
Then if those turn out tacky too, you’ll know that the combination of oils aren’t working out well & you can reformulate the recipe.
If the soap’s not tacky, then the likely culprit was the long heating time.
Good luck finding the cause! ❤
Here is the recipe:
1369g Coconut oil
1130g distilled water Ice cubes
972g olive oil
972g grape seed oil
777g kukui nut oil
698g Sodium Hydroxide
619g illipe butter
381g avocado oil
93g salt
93g green french clay
50g star anise
14.4g peppermint
28.8g eucalyptus
Incredibly useful information. I’m brand new to this whole thing. It’s very exciting, since I love chemistry and making. But since I tend to go off-script, it’s good to learn what happens when things don’t go quite right.
Hi Desiree, I’m so happy you found the troubleshooting article helpful! :)
Hi there,
I made a batch of soap and t came out too soft. I don’t t think I added enough lye. What should I do to rebatch it?
Hi Hallie! Do you know exactly how much lye you are missing?
If you have the recipe, feel free to share it here and I can take a look at it.
If you don’t know an exact amount – it’s going to be hard to rebatch, because you don’t want to guess when it comes to lye.
What I would do is just let that soft soap cure in the open air and check it every month.
Over time, so much of the moisture will evaporate and it may help ease the softness enough so that it can be cut into bars.
Then let those bars cure another month or tow with lots of air flow around them.
Even if it takes all year, you might still end up with a usable soap.
If it hasn’t improved after a year though, then at that stage I think it’s a loss. But don’t give up on it until then! :)
Hello Madam, this is my soap recipie.
Sodium Hydroxide(145g), Water(350g), Coconut Oil(900g) and Casteroil(100g).
I put the soap batter of same batch in 2 different moulds. One is loaf silicon mould and another silicon mould of small small circles.
I put the loaf mould and covered and kept it under the bed. After few hours, the oils were separated from the loaf mould.
But the same batter in circular mould was very good, this was put on the dinning table. No oils separated.
I poured the soap batter at medium trace.
I have been using the same recepie for many batches. This never happened before.
Please help me to fix this issue.
Hi James! That is definitely a strange reaction from the same recipe!
Your recipe looks really nice – 90% coconut oil, 10% castor oil, and about an 18.5% superfat (which is great for the amount of coconut oil.)
One guess is that maybe you reached a false trace?
This can happen when solid oils harden up too quickly, such as in cold weather or working in a really cold room, but I mostly see that with things like cocoa butter or something more solid at room temperature than coconut oil.
Or, did you happen to add a new fragrance oil in the mix? Some fragrances can make your soap act very strangely!
Sometimes, at the very hottest and most humid part of summer, I will have a soap that gets a layer of glycerin on top.
This isn’t a true separation, but it’s because of so much moisture in the air, the glycerin in the soap is attracted to the surface.
In this case, you can blot off that little layer of glycerin and put the soap in front of a fan to help it dry out some.
If you can get a dehumidifier for the room it’s curing in, that can be helpful too. A full separation needs to be rebatched though.
It seems like the soaps in the smaller molds were able to set up fast enough to avoid separation, so it must be something in the differences between the two batches:
-location: what’s different under the bed than the dining room table? Is one spot colder or hotter than the other?
– covering: did you also cover the small molds, or did they stay uncovered?
– did you pour the small molds first, or the loaf mold first? Perhaps you stirred the soap between pouring the second time and that helped keep it from separating?
These are just guesses – I’m a little puzzled about this too!
Love getting your Tuesday emails. I made a batch of goats milk soap yesterday. It was pure creamy color when I pored it in the mold. This morning it is a dark brown. Where did I go wrong? I used a Vanilla scent. Could that be the problem? I have read where coconut EO will turn soap brown.
Hi Susie! Vanilla is a little bit infamous for turning soaps brown, so it’s nothing you did wrong at all. :)
Unfortunately, it’s the cost of having a vanilla scent.
However, you could try adding a little zinc oxide to your soaps to help lighten them up a bit, or you could embrace the dark coloring and maybe make a swirl or striped design with half of the soap unscented (so it will be white) and the other half scented (so it will be brown.)
I do that with honey, since it also turns soap golden brown & just make it part of the design feature. :)