How to Make A Simple Natural Homemade Soap
This simple natural soap tutorial was created for those seeking an uncomplicated basic recipe, making it perfect for beginning soap makers and those with multiple skin sensitivities.
It features:
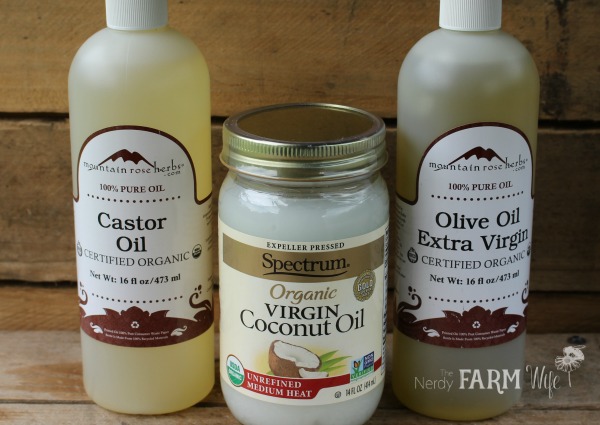
- lots of olive oil, for its gentle, skin-conditioning properties
- coconut oil (or babassu oil – if allergic), to add hardness and bubbles
- castor oil, to help promote a better lather
For this project, I used a small 4-inch silicone loaf mold that yields 4 bars of soap, so it’s sized smaller than most of the other recipes on my site.
If you’d like to adjust the recipe size, check out How to Resize a Soap Recipe to Fit Your Mold.
Ingredients Needed
Measurements of oils, lye and distilled water are by weight. An accurate scale is required to make soap.
- 12 oz (340 g) (75%) olive oil
- 2.5 oz (71 g) (15.6%) coconut oil (*see below if allergic)
- 1.5 oz (43 g) (9.4%) castor oil
- 2.14 oz (60 g) food grade lye (6% superfat) – I use and recommend ComStar, Essential Depot, or Red Crown lye
- 4.5 oz (128 g) distilled water (**see below)
Yield: 4 bars or almost 1.5 pounds of soap (16 oz oil + 2.14 oz lye + 4.5 oz water = 22.64 ounces)
* If allergic to coconut oil, substitute with 2.5 oz (71 g) of babassu oil instead.
** This recipe has a steeper water discount than usual. (That means I used less water than normal.) The reason I did that is because high olive oil soaps like this one take longer to firm up in the mold and cure than other soap recipes. Reducing the water helps speed things along faster and will help the soap release from the mold easier.
Before You Begin
If you’ve never made soap before, be sure you’re completely familiar with the process before proceeding.
My Soap Making 101 article has step by step directions, and you can also download a free printable soapmaking checklist to help you keep organized while making your batches of soap!
If you run into any trouble or questions along the way, be sure to check out my article: What’s Wrong with My Soap? (troubleshooting cold process soap problems).
Directions to Make
Step 1: Make the Lye Solution
Wearing gloves and goggles to protect your hands and eyes, weigh the water into a stainless steel or heavy duty plastic pitcher. I use an old Tupperware or Pampered Chef pitcher. (Never use aluminum utensils or pots when making soap as it will react adversely with lye.)
Next, weigh the lye into a small cup or container. Sprinkle the lye into the water (not the other way around or you might get a lye volcano) and gently stir with a heavy duty plastic or silicone spatula or spoon until the lye is completely dissolved.
The temperature will get really hot. Work near an open window, outside or under an exhaust fan. Avoid breathing in the resulting strong fumes that linger for a few moments. (If you have sensitive lungs, breathing problems, or are concerned about the fumes, consider wearing a mask such as THIS ONE.)
Set the lye solution aside in a safe place where it won’t get disturbed and allow it to cool down around 30 to 40 minutes before mixing with the oils.
Step 2: Weigh and Heat the Oils
Weigh out the coconut oil and melt it in a double boiler or over low heat until melted. While that melts, weigh out the olive and castor oils and place them in a heat-resistant soap making pot, bowl or pitcher for mixing.
Pour the hot melted coconut oil into the other oils. That should bring the temperature up to somewhere around 90 to 100°F (32 to 38° C).
Step 3: Combine and Mix Until Trace
Pour the lye solution into the warm oils. Using a stick or immersion blender (looks like THIS and is not a handheld mixer) stir the solution with the motor off for around 30 seconds. Turn the motor on and blend for half a minute to a minute or so.
Stir for another 30 or so seconds with the motor off, then again with the motor on and so forth. Don’t run the stick blender continuously so you don’t risk burning out the motor and/or causing excessive air bubbles in your finished soap.
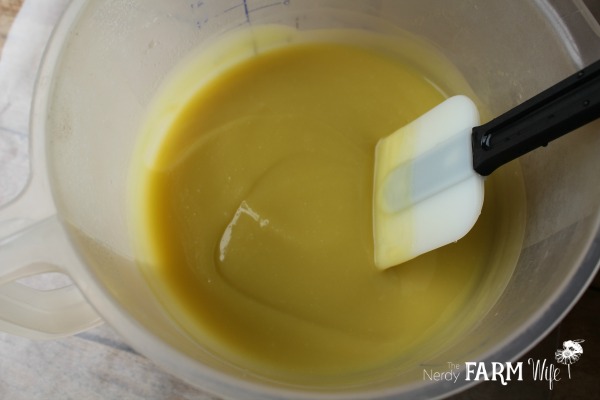
Alternate with this method until trace is reached. “Trace” is when your soap batter gets thick enough to leave an imprint or tracing, when you drizzle some of it across the surface. Above is a picture of my soap at trace.
(If you want to add essential oils to this recipe for scent, now is the time to do so. Try stirring in around 1 tablespoon (15 ml) of lavender, lemongrass, geranium (rose) or peppermint essential oil for a scent that will be on the light side after cure time.)
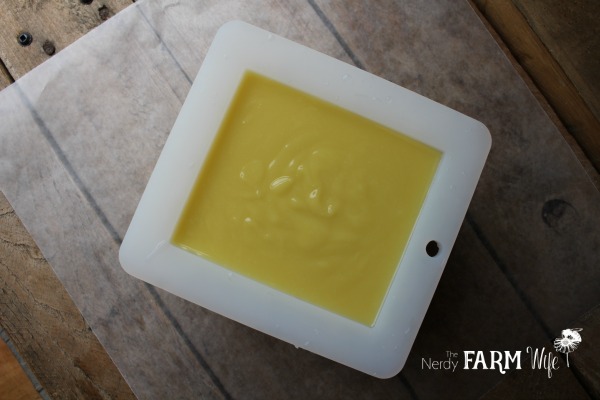
Step 4: Pour Into Mold
This is a cold process soap recipe, which means you don’t cook it or add any extra heat, so at this point it’s ready to pour into the mold.
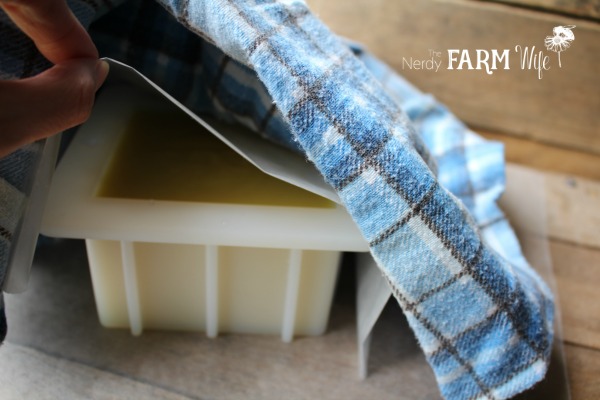
After pouring, cover gently with a sheet of freezer paper, then a blanket or towel to help hold in the heat.
Peek at your soap every so often. If you see it developing a crack down the middle, it’s getting too hot, so move it to a cooler place in your house.
You might see it change from darker to lighter colors in spots and even take on a translucent, jelly type texture, especially in the middle. That’s all perfectly normal – it just means your soap is going through gel phase.
After 24 hours, remove the freezer paper and blanket/towel, then let your soap stay uncovered in the mold for 2 to 3 days or until it’s firm enough to release fairly easily.
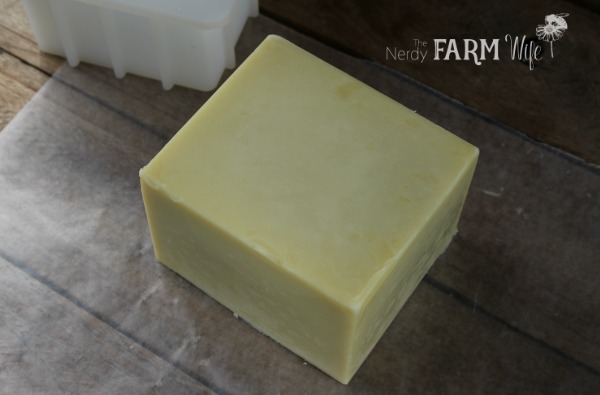
Step 5: Cure and Enjoy!
After unmolding the loaf of fresh soap, slice it into bars and allow them to cure in the open air for at least 4 to 6 weeks.
This time is needed to evaporate out excess water, making sure your finished soap is harder and lasts longer when used.
Soaps high in olive oil like this one will benefit from an even longer curing time of over 6 to 8 weeks, getting harder and milder as it ages.
Store your finished soap in a cool area away from excess heat, sunlight and humidity.


Jan, this is excellent! I’ve often wanted to make test soaps. This will do the trick! I’m off to order the mold. Thank you so very much. Have a delightful weekend.
Hi M! I plan to order several more myself for testing colors and scent blends – it’s the perfect size! Have a lovely weekend too! :)
Wonderful! I was looking in your blog for a really simple recipe to get people started, but I couldn’t find anything. I will share this one :)
Hi Liz! Thanks so much for sharing! :)
Curious to know if you can add essential oils to this blend/recipe.
Hi Rachell! Yes, your sure can! The spot where you’d want to add scent (or other extra stuff like a small amount of honey, oats, poppy seeds, etc) is down in step 3:
If you ever want to add essential oils to this recipe for scent, now is the time to do so. Try stirring in around 1 tablespoon (15 ml) of lavender, lemongrass, geranium (rose) or peppermint essential oil for a scent that will be on the light side after cure time.
Thank you for the SMALLER RECIPE . I’m just starting out and want to find out what I like and don’t like, so this smaller recipe will make things more fun and I won’t have 20 bars of soap on hand that I don’t care for. That is something I would suggest for you new book, to have a section for small batches or with each recipe, have a large recipe and a small recipe.
Hi Debra, So happy that you like the recipe! I love that little size as well – it’s perfect for trying out new recipes, colors and scents. That’s a fantastic idea for the new book about having different sizes for each recipe too – thank you! :)
Just wanted to say, “Thank you” for the soap tutorials. You have been my “soap-making teacher” for about 2 years now! Love the ideas! I’m looking forward to your second book!
Hi Heidi, Thank you for the kind words and support! It’s great to know that you’ve found the site & tutorials helpful! :)
I have a heavy duty glass bowl from pampered chef , would that work?
Hi Melissa, That sounds like it would work great! :)
Thank you for all your wonderful recipes! My sister and I tried your Lemon Balm and Rosa Rugosa recipe. It was our first time on our own and they turned out beautifully. We just have to wait one more day to get the rest out of the molds. I even used organic Lemon Balm tea and homemade rose water. My sister and I have decided never to buy soap again. Thank you for the inspiration and very clear steps!
Hi Christine, I’m so happy to hear that you and your sister enjoyed the recipes! How fun to be able to make soap together! :)