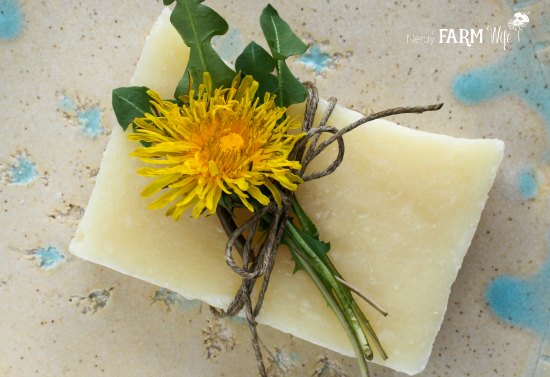
Dandelion Shampoo Bars Recipe
Here’s how to use dandelion flowers to make homemade shampoo bars!
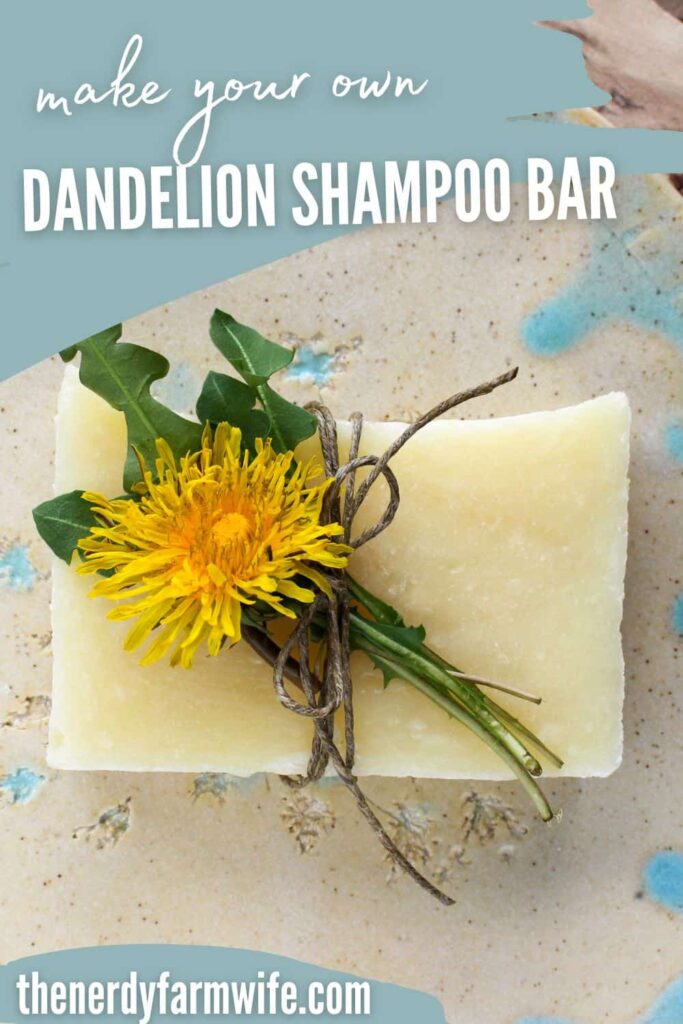
Some unseasonably warm spring-like weather, along with an extra jar of dandelion-infused olive oil I had on hand, inspired this shampoo bar recipe.
Keeping in theme with the happy sunny feelings that I associate with dandelions, I scented the soap with a cheerful blend of citrus essential oils, but you can use another scent, like lavender, or leave it fragrance-free, if you wish.
While I made the batch shown using the hot process (crock pot) method, I’ve also included directions for those who’d like to make a cold process version instead.
To Make the Dandelion Infused Oil
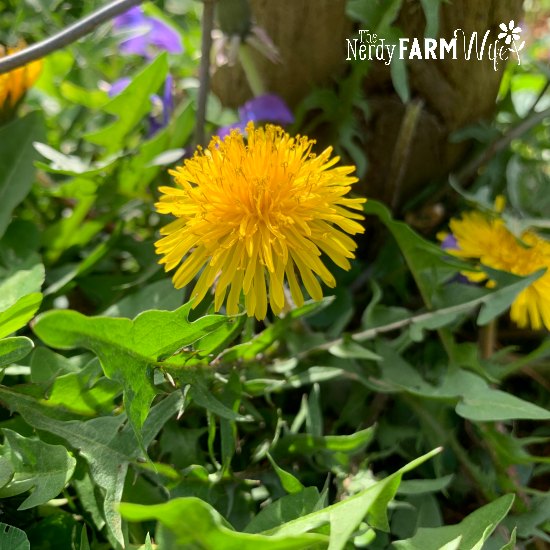
Gather flowers from places that haven’t been sprayed with chemicals or used as a bathroom site for animals. Dandelions often have bugs or ants on them, so let the container sit outside for a few hours before bringing in. They are a pretty important food source for several little critters and native pollinators in the spring, so leave 3 or 4 flowers for every one that you pick.
Since dandelions have a high water content, you should let the flowers dry for a few days before infusing in oil to avoid mold and potential spoilage.
Spread the fresh dandelions out on a clean dishtowel or paper towels in a single layer to air dry for a few days. Some blossoms might turn to fluff while they dry, but they’re still fine to use.
When you’re ready to infuse the oil, fill a pint jar about halfway with dried dandelions, then fill the rest of the way up with olive oil.
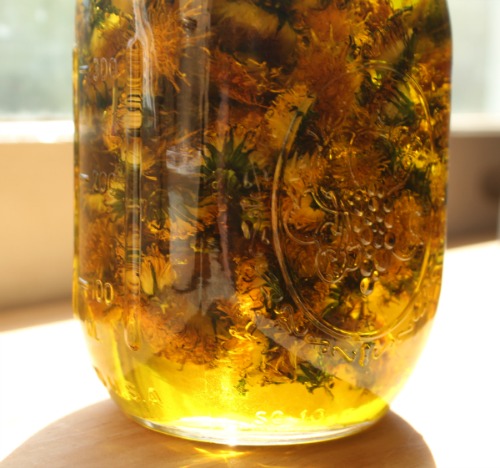
For a faster infusion: Set the oil and dandelion filled jar down into a pan of gently warmed water. Let the jar stay in the heated water, with the burner set to low, for 2 to 3 hours then remove, cool and strain. Keep a close eye on the stove during this time to make sure the oil doesn’t overheat.
For the longer method: Cover the jar and set in a warm place for about four weeks before straining. A sunny windowsill works well.
Dandelion infused oil will keep for around 1 year, if stored in a cool dark place.
Ingredients Needed For the Soap
Measurements of oils, lye and distilled water are by weight. An accurate digital scale is required make soap.
- 11 oz (312 g) dandelion infused olive oil (39.29%)
- 7 oz (198 g) coconut oil (25%)
- 4 oz (113 g) castor oil (14.29%)
- 3 oz (85 g) sweet almond oil (10.71%)
- 3 oz (85 g) cocoa butter (10.71%)
- 10 oz (283 g) distilled water (*See NOTE for reduced Cold Process amount)
- 3.9 oz (111 g) lye (sodium hydroxide)
- 0.88 oz (25 g) orange essential oil (use a folded or Valencia type)
- 0.35 oz (10 g) grapefruit essential oil
- 0.18 oz (5 g) litsea or lemongrass essential oil
- 1 tsp (5 ml) honey mixed with 1 tsp (5 ml) distilled water, optional
*NOTE: Use the full amount of distilled water (10 oz/283 g) for hot process (crock pot) soap. If making cold process soap you can reduce the amount of water to 8 oz (227 g) so that the soap ends up firmer and releases from the mold a lot faster. Reducing the water also shortens the amount of time needed to reach trace.
Yield: 7 to 9 bars, depending on mold size and type
(hot process: 28 oz oils + 10 oz water + almost 4 oz lye = 42 oz = 2 lbs, 10 oz)
(cold process: 28 oz oils + 8 oz water + almost 4 oz lye = 40 oz = 2. 5 pounds)
Before You Begin
If you’ve never made soap before, be sure you’re completely familiar with the process before proceeding. Check out my Soap Making 101 post for more in-depth details. You may also find my Handmade Natural Soaps Ebook Collection helpful.

Make the Lye Solution
Wearing gloves, goggles and long sleeves, weigh the water into a stainless steel or heavy duty plastic pitcher. I use an old Tupperware pitcher or heavy-duty plastic container from the paint section of my local DIY store. Next, weigh the lye into a small cup or container.
Sprinkle the lye into the water (not the other way around or you might get a lye volcano) and gently stir with a heavy duty plastic or silicone spatula or spoon until the lye is completely dissolved. The temperature will get really hot.
Work near an open window, outside or under an exhaust fan. Avoid breathing in the resulting strong fumes that linger for a few moments. (If you have sensitive lungs, breathing problems, or are concerned about the fumes, consider wearing a mask such as THIS ONE.)
Set the lye solution aside in a safe place where it won’t get disturbed. If you’re making hot process soap in your crock pot, then it will only need to be set aside for about ten minutes while you work with the oils. If making cold process, let the lye solution cool down around 30 to 40 minutes before mixing with the oils.
Weigh and Heat the Oils & Butters
Weigh out the solid ingredients – coconut oil and cocoa butter – and melt them in a double boiler or over low heat until melted.
While those melt, weigh out the other liquid oils and place them in your crock pot (for hot process) or soap making pot/container (for cold process).
Pour the hot melted butter and coconut oil into the other oils. That should bring the temperature up to somewhere around 90 to 100°F (32 to 38° C).

Combine and Mix Until Trace
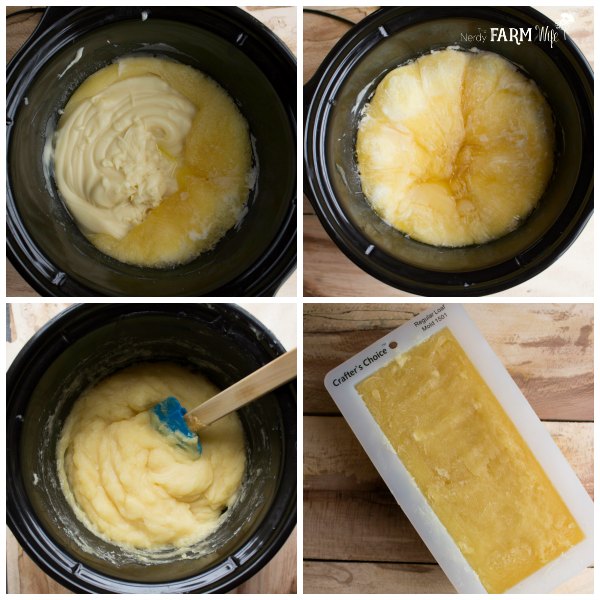
Pour the lye solution into the warm oils. Using a stick or immersion blender (looks like THIS and is not a handheld mixer) stir the solution with the motor off for around 30 seconds. Turn the motor on and blend for a minute or so. Stir for another 30 or so seconds with the motor off, then again with the motor on and so forth. Don’t run the stick blender continuously so you don’t risk burning out the motor and/or causing excessive air bubbles in your finished soap.
Alternate with this method until trace is reached. “Trace” is when your soap batter gets thick enough to leave an imprint or tracing, when you drizzle some of it across the surface. Above is a picture of my soap at trace.
Choose Cold Process or Hot Process
Up until this point, you make cold process and hot process pretty much the same. Weigh, melt/heat and stir to trace. Now though, you have to decide if you’re going to cook your soap (hot process) or pour it straight into a mold (cold process).
With cold process, you just stir to trace, add essential oil and any other extras, pour the soap batter into the mold, let it sit for 24 to 48 hours, remove from the mold and cure the bars in the open air for 4 to 6 weeks before using. It’s one step shorter than hot process and your bars will usually end up looking nicer and smoother. However, there’s that 4 to 6 week wait time for the bar to cure.
With hot process, you stir to trace, cook your soap for around an hour, add essential oil and any other extras, then scoop it into a mold, let it sit for 24 hours, remove it from the mold, cut into bars. However, it’s not as smooth looking as cold process, plus keep in mind that hot process soap still greatly benefits from at least a 3 to 4 week cure time.
The choice is completely personal. No one way is better than the other, so choose as you wish!
Cold Process Instructions
- Once trace is reached, you can stir in any extras. In this case, I just have honey, diluted with an equal portion of water, and essential oils. Stir those into the soap batter and pour the soap into a prepared mold.
- Because this soap has honey in it – the natural sugars will heat things up more than soap without – you may not need to insulate the mold. Just cover it lightly with a sheet of wax paper and let it sit for 24 to 48 hours.
- Peek at your soap a few times during the first several hours to make sure it’s not overheating. If you see a crack developing, move it to a cooler area.
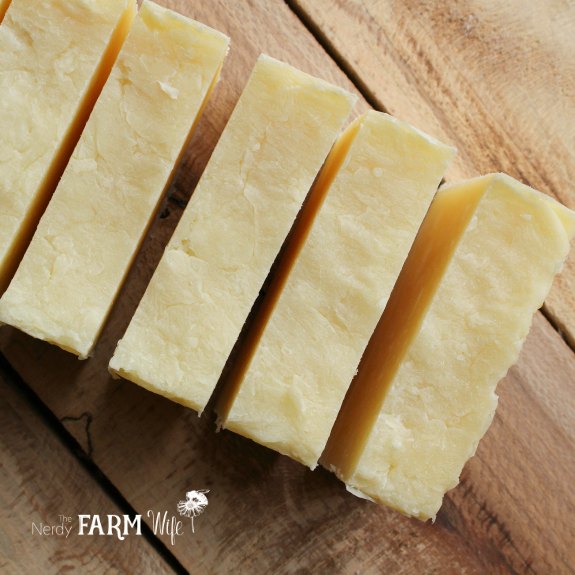
Once the soap has firmed up in the mold for a few days, remove and slice into bars. Let the bars cure on sheets of wax paper or coated cooling racks for around 4 weeks before using.
Hot Process Instructions
- Once trace is reached, turn your crock pot on low. (If you have a really old crock pot that heats slowly, you might need to preheat it sooner.)
- Cook the soap batter for 1 hour, checking every 15 minutes and stirring if needed. (Sometimes, I faithfully stir every 15 minutes. Sometimes, I completely forget to. It all works out in the end though!)
- After the soap has finished cooking, let it cool for a couple of minutes before stirring in the honey/water mixture and essential oils.
- If you add the honey while the soap is too hot, it could turn brown and start to smell and look scorched.
- Spoon the hot soap into your mold and smooth the top as best as you can.
You don’t have to cover or insulate hot process soap. Let the soap sit in the mold overnight then remove the next day and slice into bars. I sometimes cut shampoo bars in half again, to make “shampoo sticks”.
You can try a small bit of the soap right away, though the bars really benefit from curing a full 4 or more weeks to improve its structure and firmness.
And that’s it – you’re done!
Using Shampoo Bars
When using a shampoo bar to wash your hair, it will work significantly better if you follow-up with a vinegar hair rinse to help restore pH and remove any soap residue. This is especially important if you have hard water.

Any type will do, but here are a few pretty infused vinegars you might want to consider for your hair:
I usually dilute the vinegar with equal parts water to make a rinse or, for more convenience and less waste, keep a spray bottle of vinegar in the shower and spritz it over scalp and hair after shampooing. Follow with a rinse of plain water.
Shampoo Bar Notes
Not everyone’s hair type does well with shampoo bars, so if you find that you don’t care for how they work on your hair, you can still use them as a hand and body soap.
If you’d like a truly natural alternative to commercial shampoos and conditioners, I highly recommend Morrocco Method haircare products.
They’re color safe, paleo friendly, vegan, and gluten free – made in small batches with 100% pure ingredients like apple cider vinegar, aloe, essential oils and other healthy plant extracts.
I’ve especially fallen in love with their Apple Cider Vinegar Shampoo and Floating Lotus Conditioner – they leave my hair so clean and soft, even with our hard well water!
You can learn more about their products HERE or click on the banner below.


hello
love reading and sharing your site. Can you dandelion infused oil be used in the melt and pour method of soap making? Not yet comfortable using lye directly.
Thank you
Hi Peony Rose! Yes, you can put a small amount of herbal infused oils into melt and pour soap – just a bit, so you won’t throw the balance off and make it too oily.
A good usage rate is about 1 teaspoon per pound of soap base, though sometimes you can go up to 2 teaspoons. :)
Love all!
Thanks Toni! :)
I’m interested in knowing the benefits of the dandelion on the hair and scalp. I know there are many benefits of taking internally but what are they topically?
Hi Karen! Topically, dandelion flower infusions are used to treat chapped & cracked skin or for soreness & pain. So, in this shampoo bar recipe, they’re mainly there just for label appeal. Since the flowers are exceptional for treating super dry skin however, in theory that could translate over to potentially helping dry scalps as well, but that’s just conjecture on my part.
I was wondering, is it too much cocoa butter for a shampoo bar? Have you tried it? How does this feel to your hair? Thank you.
Hi Giota! I test all of my soaps on myself first, then hand out to family & friends for their additional feedback. I didn’t find it too heavy for my hair (which is longish, straight & fine), but there are so many different hair and water types it’s hard to predict how it’ll work on someone else. You could reformulate the recipe to maybe 5% cocoa butter OR leave the butter out completely and use something like rice bran or sunflower oil. You’ll lose a little hardness doing that, but with increased cure time it should balance out. You could also take a shampoo bar recipe that you’ve made before and know that you like, and include dandelion infused oil (and/or dandelion tea) in the recipe to create you own version that you know will make your hair happiest! :)