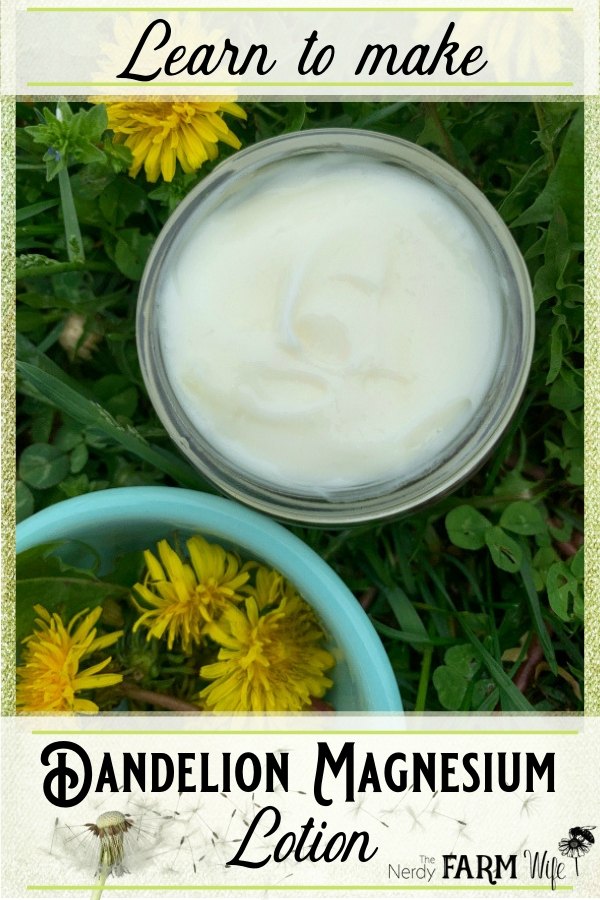
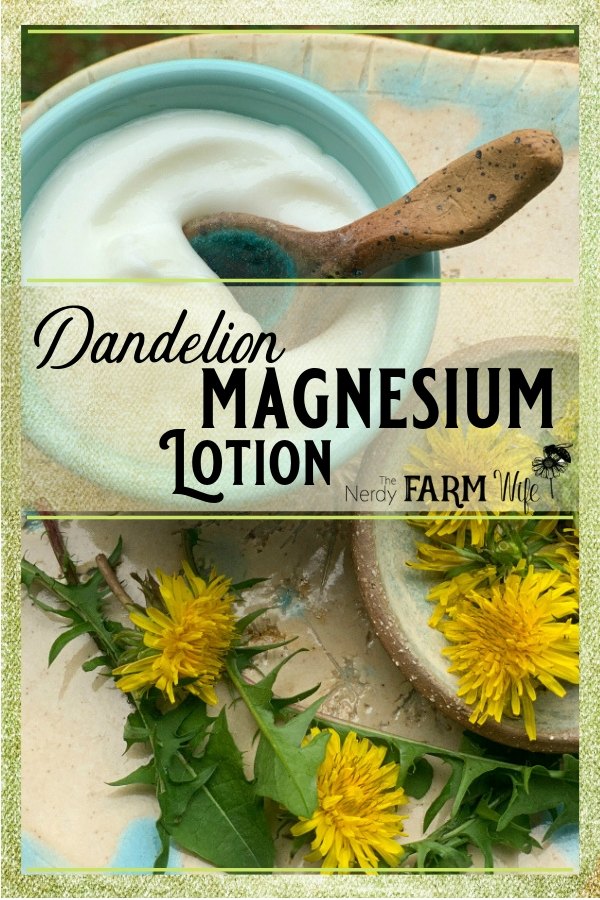
Dandelion Magnesium Lotion {relieve leg & back aches, growing pains, restless legs}
Dandelions & magnesium oil combine in this powerful dandelion magnesium lotion that helps relieve leg cramps, back aches, growing pains, restless leg syndrome, & nerve pain.
I’m so excited to share this dandelion magnesium lotion recipe with you today!
I first created it for one of my print books several years ago, but it was an instant hit with everyone who tested it, relieving leg cramps, back aches, growing pains, restless leg syndrome and various related ailments.
One relative with chronic nerve pain in her arm declared it the best thing I’d ever created!
Why dandelions?
Dandelions were chosen for this recipe because the flowers have traditionally been used for their mild analgesic (pain-relieving) properties, making them an excellent addition to products designed for sore muscles or various other external aches and pains.
Why magnesium oil?
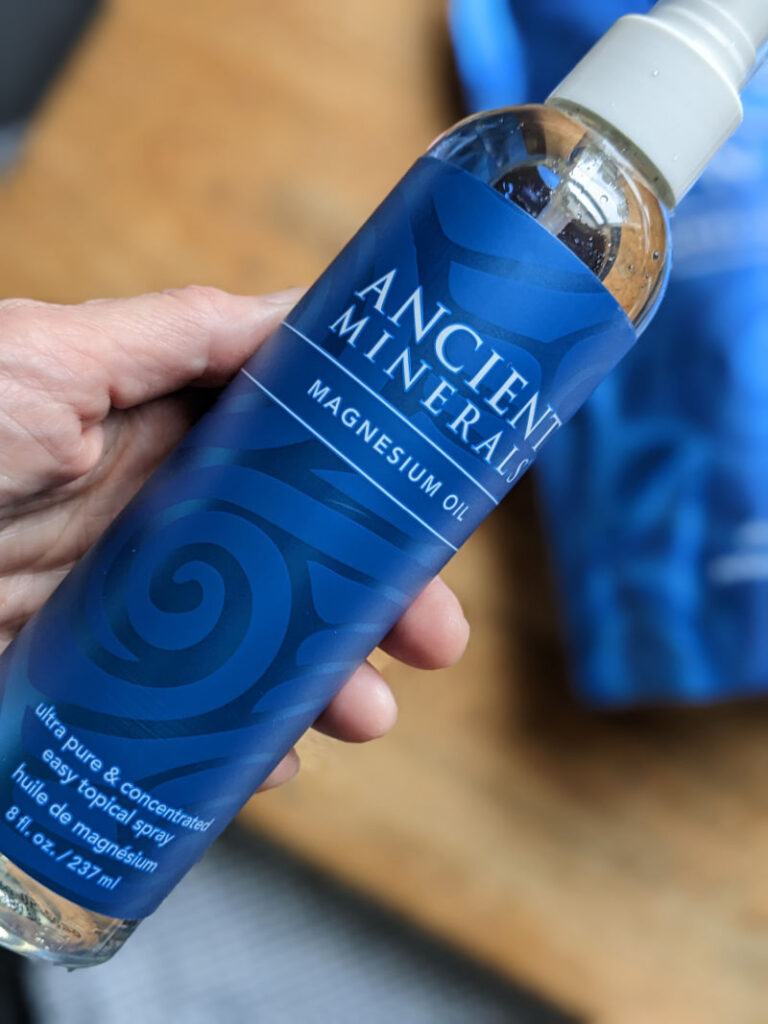
Experts posit that much of the population does not get enough magnesium in their daily diet. This can lead to headaches, leg cramps and a host of other subtle ailments. Beside baths with magnesium sulfate (Epsom salt) and magnesium supplements, another way to get more of this vital mineral is through application of magnesium oil to the skin.
Because the straight oil can be drying and irritating for some, it works well to incorporate it in a lotion or cream, especially one containing soothing aloe.
For an in-depth resource about making lotions and creams from scratch, plus loads of helpful information about the best oils, butters, essential oils, herbs, flowers, and other natural ingredients to use for your skin type and needs, be sure to check out my Handmade Lotions & Creams eBook Collection!
Dandelions + Magnesium Oil = Awesomeness
There’s something about the combination of the two ingredients that’s very synergetic, but if you’re allergic to dandelions, you could try arnica flowers, comfrey or goldenrod instead.
Step 1 – Gather & dry dandelions
First, you’ll need some dandelion flowers.
Where I live, they’ve just started popping up over the last two weeks. I like to leave most of those very first ones since they’re an important food source for many native pollinators and other tiny critters, but once other things are blooming and they’re at their peak, there are plenty enough dandelions for everyone to share!
A good rule of thumb is to leave at least 2 or 3 dandelion flowers, for every 1 that you pick. Or, if you know someone is about to mow their lawn, grab up all the flowers you can before they get chewed up by the lawn mower.
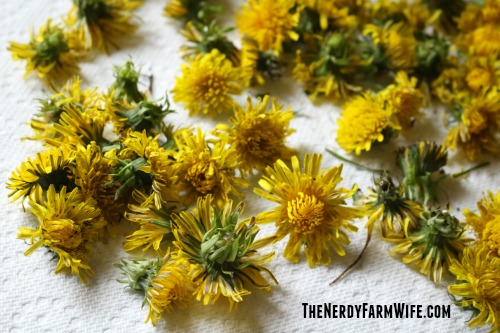
Once you gather a handful of dandelion flowers, they should be dried before infusing in oil. While some herbalists do infuse fresh dandelions, the high moisture content in them makes them more likely to spoil or grow bacteria. To be safe, I like to work with freshly dried plants in almost all cases.
Spread your dandelions in a single layer over a clean dishcloth or paper towels and allow them to air dry for a few days.
You may notice that some of your dandelions turn to fluff. That’s okay; they’re still usable.
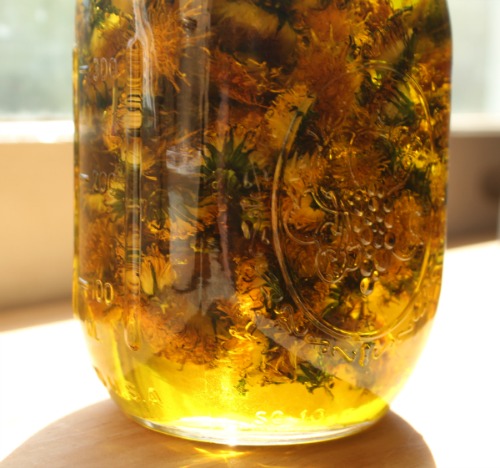
Step 2 – Create a dandelion-infused oil
Once dry, place the dandelions in a glass jar and cover with around two to three times as much light carrier oil. Some suggested carrier oils that work well include: sunflower, sweet almond, olive, avocado and jojoba.
You have a few infusing methods to choose from, depending on how big of a hurry you’re in.
Quick infusion: Set your uncovered jar of dandelions and oil down into a saucepan containing a few inches of water, forming a makeshift double boiler of sorts. Place the pan over a low burner and heat for around 2 hours. Keep an eye on things while you do this, to ensure the water doesn’t evaporate out. The water shouldn’t simmer or boil. If it does, turn the heat down lower. After 2 hours, remove the jar from the pan and set aside to cool.
Traditional, slow infusion: Cap your jar of dandelions and oil and tuck it away in a cool, dark cupboard for 4 to 6 weeks, shaking occasionally. A cool, dark area is suggested since extended exposure to heat and light may begin to degrade the quality of the herbs and oils.
Sunny window infusion: Secure a piece of cheesecloth, coffee filter, scrap of old t-shirt or something similarly breathable over your jar of dandelions and oil. This layer allows any potential condensation to escape, but will keep dust and flies from contaminating your oil. Place the jar in a warm sunny window. Depending on how hot it gets, your oil may be sufficiently infused for use within 3 to 5 days. You can use it right away, or tuck it in a cabinet for a few more weeks, for a stronger oil.
Once your oil is ready, strain it and store in a cool, dry place until ready to use. Shelf life should be around 9 months to 1 year, depending on the quality and type of oil you use.
Step 3 – Now, you’re ready to make your dandelion magnesium lotion!
- 22 g (abt 2 tbsp) dandelion-infused oil
- 6 g (abt 3 tsp) emulsifying wax NF
- 32 g (abt 2 tbsp) magnesium oil
- 25 g (abt 5 tsp) distilled water
- 14 g (abt 1 tbsp) aloe vera gel
- 2 to 3 drops lavender essential oil (optional)
- preservative of choice (see notes below)
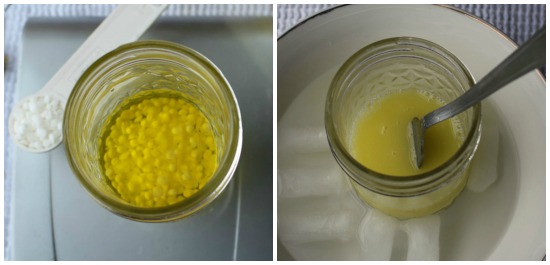
Add the dandelion-infused oil and emulsifying wax to a heatproof jar or upcycled tin can.
In spite of its name, magnesium oil is actually water based, so measure it out with the distilled water and aloe and place in a half-pint (250 ml) canning jar.
Place both containers into a saucepan containing 1 to 2 inches of water, then set the pan over a medium-low burner for 10 minutes. This gives time for the wax to fully melt while the water, aloe, and magnesium oil combination reaches a nearly matching temperature. (Around 150° F or 66° C) Remove from heat.
Carefully pour the hot contents of the two containers into a heatproof mixing bowl or measuring pitcher. As they’re poured together, the two mixtures will begin to emulsify upon contact and turn a slightly milky yellow color.
Using a fork or small whisk, stir the lotion briskly for a minute, then set aside to cool for 5 minutes, stirring frequently. To speed the cooling process, place your mixing container in a bowl of ice water. Stir occasionally, for around 30 seconds at a time, as the lotion cools and thickens.
Stir in the lavender essential oil, if using. If you’re adding a preservative to help your homemade lotion stay fresh for several months, do so now as well. If you don’t add a preservative, shelf life is only around 1 week, if stored in the refrigerator.
I use Leucidal Liquid SF Max, a preservative naturally derived from lactobacillus ferment, plus AMTicide Coconut (for extra natural mold protection) in many of my lotions. For this recipe, you need to add 4 g of the SF Max + 2 g of the AMTicide Coconut. For longer shelf life, you could use 1 g of Optiphen Plus instead. (It’s paraben-free and formaldehyde-free, though not considered strictly natural, but your lotion would still be 99% natural if you use it.)
Pour the lotion into a pump-top bottle or glass jar. The lotion may start off on the thin side, but will continue to thicken up some over the next 24 hours.
Yield is 3.5 oz (105 ml). Apply a small amount to legs, feet and back at night, or as often as needed throughout the day.
FAQS:
Do you sell this lotion? No, I no longer sell the products I write about. However, you can sometimes find a similar Dandelion Magnesium Lotion on Etsy.
Where can I buy dried dandelions? You can also sometimes find those by doing a search on Etsy.
Can I use beeswax instead of emulsifying wax NF? No, it won’t work the same. A beeswax emulsion can’t hold this much water, so you’ll end up a with a mess if you try this recipe that way. However, you might like my beeswax-based lotion for leg cramps, found HERE for similar effect.


Jan, another inspiring recipe. I am scanning my yard for bright yellow pops. I suppose it’s too early here. Sigh. Question–can stearic acid be used in place of emulsifying wax? This question shows how little I know about such things, but I am willing to learn. Thanks and have a lovely day.
Hi M,
That’s a great question!
Stearic acid is used as a thickener for lotion, while emulsifying wax actually helps bind the oils and water together on a molecular level, so they won’t separate.
If you look at my recipe for leg cramps & growing pains here:
https://thenerdyfarmwife.com/make-lotion-leg-cramps-growing-pains/
it uses a blend of beeswax & stearic acid together and relies solely on a mechanical emulsion. (Which is why beeswax based creams can be tricky to get right.)
So you could do something like that. Just sub out dandelion oil for the arnica/comfrey oil. Also note that you use a lot less water/liquid based ingredients in that recipe.
Emulsifying wax lets you incorporate a lot more water/liquids, so lotions made with them are more easily absorbed, non-greasy and lighter.
The beeswax/stearic acid combo will be a heavier (oilier), more moisturizing thick lotion (almost a cream).
I hope that helped, but let me know if you have any more questions! :)
Thanks, Jan! This cleared up for me the differences in the two thickeners. Your explanation is clear and to the point. Have a lovely weekend.
Jan, thanks for the nod for Anna Lee Herbs. I will have more dandelion flowers in the Spring. I do have plenty of comfrey and some goldenrod.
Can they sub chamomile, feverfew, calendula, or scented geraniums for the dandelions or simply the dandelion leaves? Got plenty of those herbs!
Hi Anna! Comfrey and goldenrod would both make good substitutes! The flowers themselves are what have the analgesic compounds, so I don’t think the dandelion leaves would be as effective.
A chamomile tea is relaxing and may help painful leg spasms & such internally; haven’t tried it in a magnesium lotion, but it’s an interesting possibility.
I don’t think calendula, feverfew or scented geraniums would have the same effect. (But I didn’t realize you had scented geraniums. I need to check those out!)
So, best bet is goldenrod, followed closely by comfrey.
I am so anxious to try this one, didn’t know goldenrod would be good for this-but I do use it allot for natural dyeing.
Hi Kathy! Goldenrod is a great addition to anything for aches & pains and I’d love to hear how it goes if you try it out!
I also use it in these lotion bars:
https://thenerdyfarmwife.com/herbal-intensive-lotion-bars/
and have been adding it to arthritis salves too.
It’s a wonderfully useful plant! :)
Jan does the faster heat method with the flowers in the oil hurt any of the qualities opposed to the slow method-thanks
Hi Kathy!
As long as you keep it on low, it will be fine. You just don’t want to use higher heat or you may end up with fried herbs, instead of infused. I don’t have scientific studies to back me up, but I can’t imagine that it doesn’t damage some of the properties when overheated. So, low and steady heat and you should be good to go!
Hi Jan. I was browsing the web and ur article pops-out and I’m so glad about it, I was inspired to do DIY lotion but Im confused how long it last? because I’m planning to give it as a birthday giveaways and I don’t want to end up rotten potions because Philippines has a hot weather.
Hi Wendy! If you don’t add a preservative, homemade lotion won’t last too long in hot weather. It’s really hard to say a definite time, since it depends on how hot the weather is, how sterile the lotion making environment was, whether you use distilled water or tap water, etc – but around 1, maybe 2 weeks if stored in the refrigerator is a ballpark figure, but only just a few days at room temperature.
It may still look fine, but if you look at the lotion on the microscopic level by that point, molds & bacteria will be starting to flourish.
For gift giving, it’s good to add a preservative so your friends don’t end up with moldy lotion.
I like to use more natural preservatives – like I discuss in this article:
https://thenerdyfarmwife.com/natural-preservatives-for-homemade-lotion-and-cream/
But some people prefer stronger options, like this article discusses:
https://www.soapqueen.com/bath-and-body-tutorials/lotion/talk-it-out-tuesday-preservatives/
thank you Jan, I just ordered what I need-I want to thank you for this excellent post-as I did not know about a preservative for oil and water and I am having allot of pain issues now and just learned about magnesium oil. I am anxious to make this salve-so I did order the goldenrod from the etsy link you suggested she has seaside goldenrod. too early for her dandelion flowers and I don’t have enough here in my woods so I searched and searched and found a etsy shop that sells organic flowers including dandelion-didn’t realize she was from Australia lol but am happy to have found them. I think I will do both ways slow method and try the heat method so I can make up a batch right away. I also though of mixing the dandelion, goldenrod, and arnica flowers together, perhaps a little comfry too thanks for all you share
Hi Kathy!
I hope you find the recipe helps relieve some of your pain issues! Keep me posted if you run into any questions making it!
Too bad I could not share my “abundance” of dandelions. ?
Janet:I would Love some of them!! Ours here in the South are itty Bitty!!
Hi Jan! Thank you for sharing yet again another amazing recipe, I can’t wait to read your book. I wanted to ask you about beeswax and emulsifying wax. I have seen that you use both for different recipes. How do you decide which one you are going to use and which do you prefer? I really appreciate all you do!
Hi Brooke! After many years of using beeswax, I have to admit that I’ve really come to favor the consistent and lighter results that emulsifying wax gives to a lotion recipe. The only reason I use beeswax in recipes now is because I know that some people favor it over e-wax & I want to have options for them too. How natural emulsifying wax is – is something of a personal decision. It’s made from plants (if you buy a kind such as is sold at Mountain Rose Herbs – other types might not be so purely sourced). But then it’s processed quite a bit. You could kind of compare it to soy wax, only not quite as processed intensively as that. So, if you feel that soy wax candles are okay to use, then you should be okay with emulsifying wax. If you like the pure unprocessed nature of beeswax, you might want to stick with that for lotions/creams. Beeswax does tend to make a heavier product, because it can’t hold the amount of water that emulsifying wax does and requires more oil, so I find it’s best used for rich, moisturizing creams. Currently, I’m using a beeswax based cream for around my eyes and an emulsifying wax based lotion for the rest of my face. So, the two can also live in happy harmony. :)
sorry…forgot to add that I am very interested in keeping my products natural.
glad I found this recipe, I get horrible leg cramps at night, and have severe pain in my right foot, & rls. gonna make this and hope it works. I stand on my feet for 8 hrs at night.
Hi Carrie! I’m happy you like the recipe & I hope it helps! :)
Hi Jan! I was wondering the shelf life if you do use the above mentioned preservative?
Hi Karen! I usually tell people 3 to 4 months, because I haven’t specifically tested past that date. I have a feeling it will last longer, but it’s always been used up before then to know for sure.
Thanks for all your wonderful recipes. Just a quick question can this be used on children I have a 11 years old daughter that have knee pain because of a gymnastic injury and I will love to try some natural remedies for pain
Hi Paula! Yes, I specifically use this on my kids because it’s more gentle than something with tons of essential oils in it (like my Aches & Pains Balm recipe, also on this site).
I hope you find it helps your daughter!
Can the dandelions be put in a dehydrator to speed up the drying process?
Hi Rhonda! They can, but just keep an eye on them, since they tend to more easily turn into fluff that way.
Awesome recipe! I can’t wait to try this!
Hi Susannah, Happy you like the recipe & hope you find the lotion useful!
bought your book its fab love it cant wait to get making some lovely things, thank you
Hi Jane! Thank you for buying a copy of the book! I’m so glad that you like it! :)
Hi Jan,
I’m attempting the slow infusion method at the moment. It’s been almost a week and I seem to be running into a problem.
First off, I picked the dandelions and laid them out for a few days. Some dried a bit more than others. Some had these teeny green bugs (aphids I suppose) – which I don’t think were there when I picked the flowers – on them which I tried to remove as best as I could but I think one or two slipped into the jar with the dandelion which I only noticed after I’ve filled the jar with oil. I used a glass jar with a metal screw lid, and infused the dandelions with olive oil. I’ve placed the jar in a corner near the windowsill, behind a box so there’s no direct contact with light from the window but the jar will benefit from being in a ‘cool area’.
I’ve given it a bit of a shake three times now, including today, but today I noticed the oil seems to be seeping out the jar some how. It wasn’t there the last time I gave it a shake, and I’ve screwed the lid on as tightly as I could.
Would you be able to advise if there’s something I did wrong / that I should rectify? Like, should I place the jar elsewhere, or is the jar I’m using not airtight enough etc?
I just hope that the infusion would still be usable and that I hadn’t had wasted all that oil and dandelion-picking. =/
I’m new in this homemaking game and am really looking forward to making this recipe – I’m absolutely enjoying your blog!
Hi Khai! If you suspect that there’s a bit of moisture in the jar (in that a few flowers weren’t completely dried or some aphids were in there), then it’s a good idea to cover with a layer of cheesecloth or a scrap of old t-shirt (fasten it on with a rubber band or hair tie) instead of an air-tight lid. This lets the oil “breathe” so any excess moisture can evaporate. If your oil looks and smells fine – with no mold or anything, or musty/rancid scent, it sounds like it’s still doing good! To be sure, you could also do a quick infusion and finish it on up.
To do that – Uncap the jar, set it down in a saucepan that has a couple inches of water & heat the pan over a lowish burner for about an hour. Your oil should be heated through at that point and you can remove from heat, let cool for a bit (maybe an hour or so or until cool enough to handle), then go ahead and strain it. Cover lightly with a scrap of cloth/cheesecloth and let it sit for a day or so undisturbed. Any water or unwanted stuff left in the oil will settle as a sediment on the bottom of the jar. Carefully pour your oil into a clean fresh jar, leaving that bottom layer behind and then cap tightly. And you’re done! :)
Hi, we’re can I get magnesium oil or how can I make it myself.
Regards
Hi June! I get some from my local health store or this kind from Amazon – http://amzn.to/179ndIk
You can find directions how to make your own magnesium oil on the internet, but in looking for a link, found this:
http://www.ancient-minerals.com/blog-post/bath-flakes-vs-oil/
So, for optimum results, you may want to buy a ready made version.
Thankyou Jan?I will have a look.xx
Nice site! I’m going to try this. I make a comfrey “lotion” by infusing dried comfrey in witch hazel. It works great. Have you ever used witch hazel to make items?
Hi Eliza! Your comfrey lotion sounds wonderful! I love infusing herbs in witch hazel too. I often combine half witch hazel and half apple cider vinegar and infuse with various herbs for liniments. You can also include witch hazel in a lotion or soap recipe. It’s great stuff! :)
Hi Jan, instead of adding magnesium oil to this recipe would I be able to just add the magnesium flakes to an olive oil infusion? I make salves and would prefer to leave water out of the recipe. Thanks
Hi Kelly! In spite of its name, magnesium oil is actually water based (it just has an oil-like appearance due to being super saturated), and the flakes are water soluble. So, you could make your own magnesium oil by diluting the flakes with water (I think equal parts is the general starting point). There are some reports that you get a less pure and less effective product that way though, but I haven’t personally tested out the homemade version to know for sure how it compares. Unfortunately, I don’t believe that the flakes would dissolve in, or impart benefits to an oil infusion.
Thank you!
Hi Jan and thank you for always sharing great stuff! I made a blend with shea butter instead of emulsifying wax. Is it my understanding that it’s ok that way, just a lighter product with e-wax? Thanks again!
Hi Lisa! Emulsifying wax works on a molecular level, keeping the oils and water bound together in your lotion. Because of that, lotion recipes that call for emulsifying wax are able to hold a lot of water, which makes them light and easily absorbed.
Other lotion/cream recipes (and I have some of those on my site too) rely solely on mechanical emulsion using beeswax, but since the water and oils aren’t tightly bound on that molecular level as e-wax does, it’s a bit trickier to make & will separate sooner. You also need a much higher oil/butter to water ratio or you’ll end up with a curdled looking or separated mess. Shea butter won’t really act in either of those ways, so can’t be substituted. It might help thicken up a lotion though.
If you don’t have emulsifying wax, this dandelion magnesium lotion recipe won’t work correctly without it.
You might want to check out this one instead:
https://thenerdyfarmwife.com/make-lotion-leg-cramps-growing-pains/
It has shea butter and beeswax (no e-wax), and you could infuse the oil with dandelion flowers if you have some on hand. :)
My dearest teacher. Thank you very much for your lessons! I have a question. I make the lotion. It was marvellous but after hours started a part of water (a small amount) to separate from the rest mix. What wrong have I done? Thank you in advance and forgive me for my bad english.
Hi Irene! Your English sounds great! :) It could be your emulsifying wax. Different types have different properties and requirements for use. Was it labeled Emulsifying Wax NF?
Can you use this for blisters on the feet?
Thank you.
Hi Ramona! I haven’t tried it on blisters before, so I’m just not sure. Are they mild blisters, like the kind you get from wearing new shoes all day?
Or very bad blisters that won’t heal properly? If the second one, you could look into raw honey: https://thenerdyfarmwife.com/how-raw-honey-helped-save-my-diabetic-dads-foot/
i love your recipes are awesome
Thanks for the kind words Lorraine! :)
Hiya,
With the preservative you listed what is the shelf life? Does it still need to be refrigerated if you have the preservative in? Also I adore your site! Just discovered it yesterday and I have been scouring it looking at all your recipes!
Hi Courtney! With the preservative, it should keep at least 3 months and probably longer. We use up lotions too fast to know for sure how much longer it would last. With the preservative added, you won’t have to refrigerate it.
So glad that you’re enjoying the site & recipes! :)
I just eat my dandelions every day for the magnesium and all the other detoxifying and pain relieving effects that come with it, but my husband won’t. He suffers with knee joint pain, leg cramps and headaches. Maybe I’ll make some lotion for him to apply. Thanks to you and my daughter in law who sent me your sight. Deborah Richmond Author of Living Dande A Green Cookbook, a collection of over 200 green recipes and some testimonials of how people cured their cancer and other diseases. Feel the Joy!
Hi Deborah, Sounds like a fantastic book!! I hope you enjoy the lotion! :)
Can I use coconut oil to infuse my dandelions? Thanks
Hi Stacie, You sure can! I use the heat method to infuse coconut oil with dandelions, such as in this post:
https://thenerdyfarmwife.com/whipped-dandelion-coconut-oil-moisturizer/
How is the texture of this lotion? Is is greasy? Does it absorb well? I just finished my dandelion infusion and ordered the ingredients I needed. It sounds amazing!! Can’t wait to try it.
Hi Stephanie! It’s fairly light and absorbs well, just make sure you only apply a small amount at a time. Hope you enjoy the lotions! :)
I love your recipes, website and book!
I’m wanting to make the dandelion magnesium lotion for gifts, can I quadruple the recipe without harming the results?
Thanks!
Hi Karen, So happy that you enjoy the recipes, site & book! :) I’ve tripled this recipe before with no problems – the only thing I recall changing was to slightly increase the e-wax to 7 grams, instead of 6, and then tripling the recipe. This allows the larger amount of lotion to set up a little faster. In theory, quadrupling the recipe should work well too, but I haven’t personally tried that much at once.
I, i’m Carolina, live in Brazil and love your site. This idea is simple, practical and delicious. I loved the result. Thanks for sharing!
Hi Carolina, I’m glad you like the recipe! :)
Does it hurt the infused oil if I included dandelion leaves in it too? I didn’t realize it was just the flower heads and I’ve been letting it infuse in a dark spot for 3 weeks.
Hi Jennifer! It won’t hurt the oil at all – sometimes a few leaves get caught up in my oil too. :)