Cedarwood & Oatmeal Soap
This simple natural soap features:
- oatmeal, for visual texture and to soften skin as it gently exfoliates,
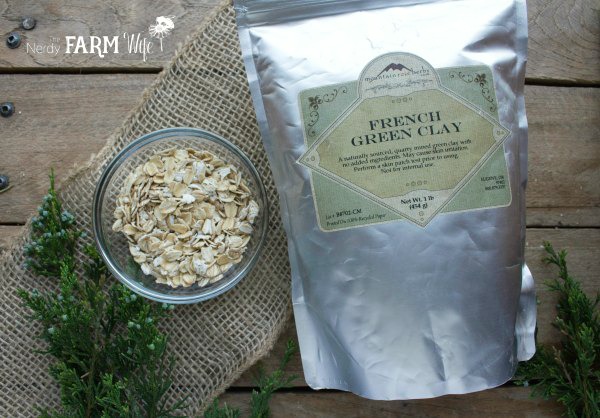
- French green clay, for a natural green color and mild cleansing properties,
- along with cedarwood “Atlas” essential oil for a clean woodsy scent.

According to my favorite reference for essential oils (The Complete Aromatherapy & Essential Oils Handbook for Everyday Wellness), cedarwood “Atlas” (Cedrus atlantica) is mildly astringent, antibacterial & antifungal, making it a good addition to products for acne, eczema, psoriasis and oily skin. (Though if you sell soap, you can’t make any sorts of health claims like that for it.)
Cedarwood “Atlas” is sometimes thought of as a masculine scent and is a popular addition to men’s grooming products. That doesn’t mean that this soap is just for guys though; the scent is a favorite of many, including myself!
In this recipe, I offer two different scent options. If your essential oil supply is limited, you can use just cedarwood essential oil. If you have them available though, a small amount of vetiver and clove essential oils really adds a wonderful depth and helps anchor the scent.
Ingredients Needed
Measurements of oils, lye and distilled water are by weight. An accurate scale is required to make soap.
- 16 oz (454 g) (57.14%) olive oil
- 8 oz (227 g) (28.57%) coconut oil
- 4 oz (113 g) (14.29%) sweet almond or sunflower oil
- 3.95 oz (112 g) lye (6% superfat)
- 9 oz (255 g) distilled water
- 2.5 teaspoons French green clay
- 1 tablespoon rolled oats, finely ground in a coffee grinder
- cedarwood “Atlas” essential oil (* see amount or blend suggestions below)
Yield: about 2.5 pounds (1.13 kg) soap, or 7 to 8 bars
* For a light scent, use 20 grams of cedarwood “Atlas” essential oil, or for a stronger scent try 30 grams.
If you have vetiver and clove essential oils available, try this blend instead of plain cedarwood:
- 28 g cedarwood “Atlas” essential oil
- 4 g clove essential oil
- 4 g vetiver essential oil
Before You Begin
If you’ve never made soap before, be sure you’re completely familiar with the process before proceeding.
You may also find my Handmade Natural Soaps eBook Collection helpful – it includes:
- Handmade Natural Soaps eBook
- All Natural Milk Soaps eBook
- DIY Specialty Soaps eBook
- Natural Facial Soaps eBook
- Essential Oils in Soapmaking Guide
- Troubleshooting Guide
- Plus Helpful Printables and Charts

Directions to Make
Step 1: Make the Lye Solution
Wearing gloves, goggles and long sleeves, weigh the water into a stainless steel or heavy duty plastic (recycle symbol number 5) pitcher. I use an old Tupperware pitcher or plastic containers meant for mixing paint that I found in my local home improvement store. (Never use aluminum utensils or pots when making soap as it will react adversely with lye.)
Next, weigh the lye into a small cup or container. Sprinkle the lye into the water (not the other way around or you might get a lye volcano) and gently stir with a heavy duty plastic or silicone spatula or spoon until the lye is completely dissolved. The temperature will get really hot. Work near an open window, outside or under an exhaust fan. Avoid breathing in the resulting strong fumes that linger for a few moments. (If you have sensitive lungs, breathing problems, or are concerned about the fumes, consider wearing a mask such as THIS ONE.)
Step 2: Add the French Green Clay
Add the French green clay to the hot lye solution and stir well until incorporated.
Set the lye solution aside in a safe place where it won’t get disturbed and allow it to cool down around 30 to 40 minutes before mixing with the oils.
Step 3: Weigh and Heat the Oils
Weigh out the coconut oil and melt it in a double boiler or over low heat until melted. While that melts, weigh out the olive and sweet almond (or sunflower) oils and place them in a heat-resistant soap making pot, bowl or pitcher for mixing.
Pour the hot melted coconut oil into the other oils. That should bring the temperature up to somewhere around 90 to 100°F (32 to 38° C).
Step 4: Combine and Mix Until Trace
Pour the lye solution into the warm oils. Using a stick or immersion blender (looks like THIS and is not a handheld mixer) stir the solution with the motor off for around 30 seconds. Turn the motor on and blend for a minute or so. Stir for another 30 or so seconds with the motor off, then again with the motor on and so forth. Don’t run the stick blender continuously so you don’t risk burning out the motor and/or causing excessive air bubbles in your finished soap.
Alternate with this method until a light trace is reached. “Trace” is when your soap batter gets thick enough to leave an imprint or tracing, when you drizzle some of it across the surface.
Step 5: Add the Oatmeal and Essential Oil(s)
At light trace, stir in the finely ground oatmeal and essential oil(s) by hand until thoroughly blended.
Step 6: Pour Into Mold
This is a cold process soap recipe, which means you don’t cook it or add any extra heat, so at this point it’s ready to pour into the mold.
After pouring, cover gently with a sheet of freezer or parchment paper, then a blanket or towel to help hold in the heat.
Peek at your soap every so often. If you see it developing a crack down the middle, it’s getting too hot, so move it to a cooler place in your house.
You might see it change from darker to lighter colors in spots and even take on a translucent, jelly type texture, especially in the middle. That’s all perfectly normal – it just means your soap is going through gel phase.
After 24 hours, remove the freezer/parchment paper and blanket/towel, then let your soap stay uncovered in the mold for 2 to 3 days or until it’s firm enough to release fairly easily.
Step 7: Cure and Enjoy!
After unmolding the loaf of fresh soap, allow it to sit in the open air for another day or two, if needed, then slice it into bars. Cure the cut bars in the open air for at least 4 to 6 weeks.
This time is needed to evaporate out excess water, making sure your finished soap is harder and lasts longer when used.
Store the finished soap in a cool area away from excess heat, sunlight and humidity.


Everytime I have made soap it turns out looking very nice but after a few days in the soap dish it gets very soft. Was wondering if this recipe makes a hard soap or will it get soft soon after? I am just a beginner so maybe I am doing something wrong? If you have any suggestions they are more than welcome.
Thanks
Hi Sandy! How long are you letting the soap cure for? After the 4 to 6 weeks of standard curing time, it might need a few extra weeks too – this time allows the extra water to evaporate out, making it last longer.
You may also be using too much water in your recipe. You can reduce the water amount down to 2 parts water to 1 part lye. (So if a recipe needs 1 oz of lye, use 2 oz of water.) That will make it reach trace faster though, so be prepared to work more quickly to add in essential oils, etc before pouring into a mold.
It also depends on how many “soft oils” you have in your soap. For example, this soap is high in olive and sunflower oil, so it will start off softer, but after many weeks of curing will harden up. For a recipe that gets harder earlier, you can look for ones that contain tallow, lard, coconut butter or kokum butter. (Palm oil also hardens soap, if you’re not a palm-free soapmaker.)
Also, what type of soap dish are you using? One with slots or drainage holds that lets the water easily drain out will help a lot!
I hope one of those ways helps! Happy soapmaking! :)
It’s the soap dish. Make sure to get the type of dish that does not have the soap sit in a puddle. Sitting in a puddle will make a natural soap get soft. Get a draining type of soap dish. Most are made of wood. Buy two (you can find some inexpensive ones on eBay and ETSY) and let the dishes take turns drying out every 3 weeks or so and the wood will last a good long time.
Thanks for sharing your tip Annie! :)