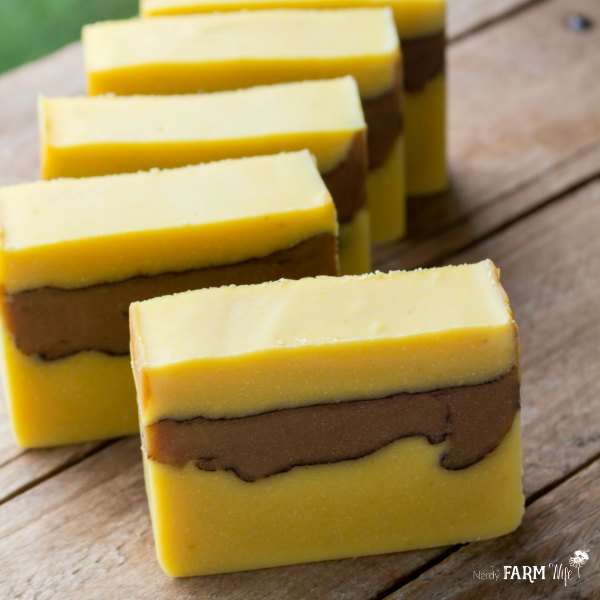
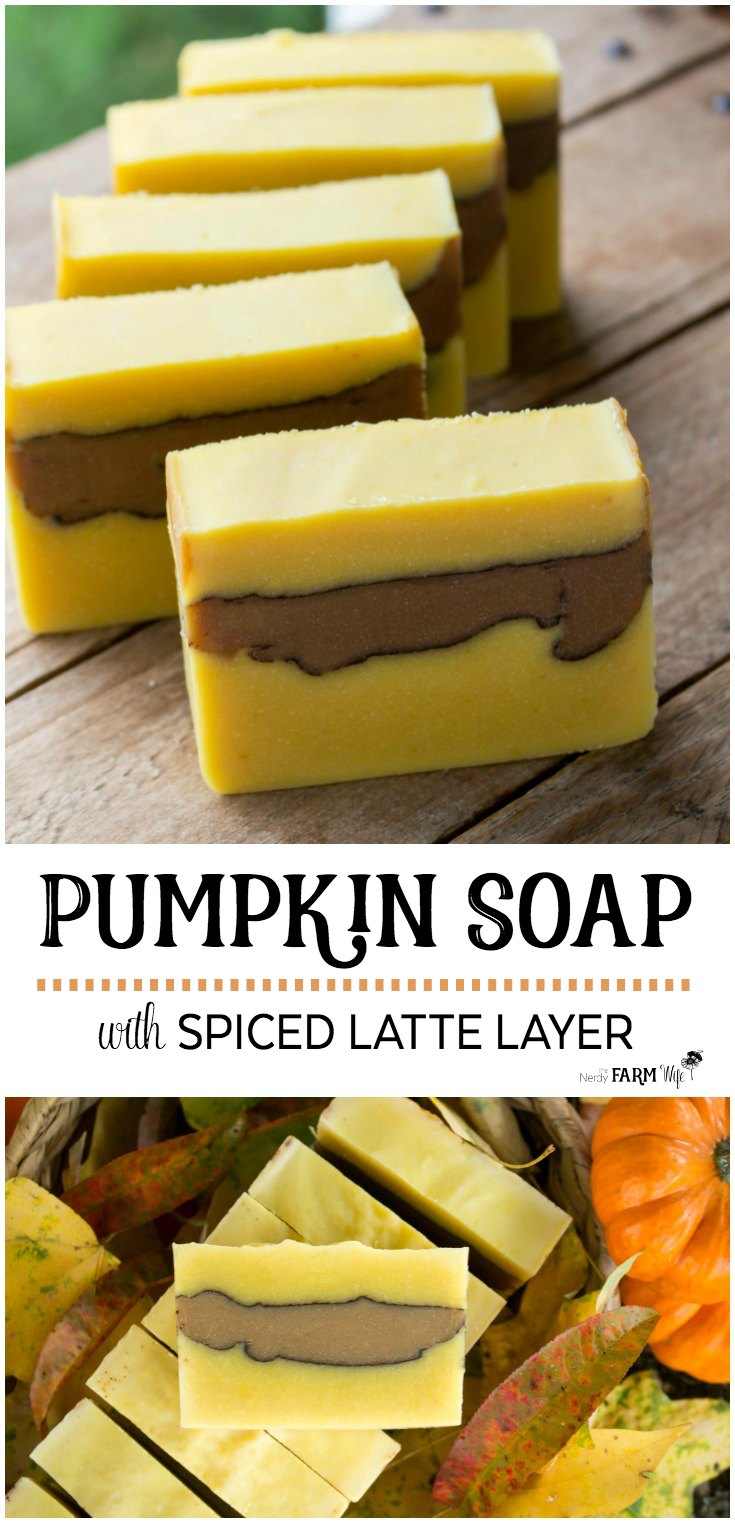
Pumpkin Spice Soap (with Spiced Latte Layer)
This fall favorite soap is made with real pumpkin puree and features a spiced layer that’s deliciously scented with coffee, cinnamon and clove essential oils, and highlighted by two contrasting pencil lines made of cocoa powder.
It’s a brand new addition to my Soapmaking Success e-course, but was so well received by local friends and perfect for the season, that I had to share here on my website too!
Since it’s part of the course, I’ve included the accompanying recipe printable (further down in this post).
Video of Pumpkin Spice Soap
Here’s a video of me making this recipe so you can see all of the steps visually. (Sometimes an ad plays first, but the video will play right after! If you have an adblocker, the video player won’t be visible.)
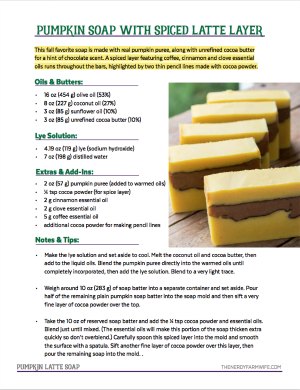
Pumpkin Spice Soap – with Spiced Latte Layer Ingredients:
Lye Solution
- 4.19 oz (119 g) lye (sodium hydroxide)
- 7 oz (198 g) distilled water
Oils & Butters
- 16 oz (454 g) olive oil (53%)
- 8 oz (227 g) coconut oil (27%)
- 3 oz (85 g) sunflower oil (10%)
- 3 oz (85 g) unrefined cocoa butter (10%)
Extras & Add-Ins
- 2 oz (57 g) pumpkin puree (added to warmed oils)
- 1⁄4 tsp cocoa powder (for spice layer)
- 2 g cinnamon essential oil
- 2 g clove essential oil
- 5 g coffee essential oil (coffee absolute)
- additional cocoa powder for making pencil lines
Notes & Tips:
Make the lye solution and set aside to cool. Melt the coconut oil and cocoa butter, then add to the liquid oils. Blend the pumpkin puree directly into the warmed oils until completely incorporated, then add the lye solution. Blend to a very light trace.
Weigh around 10 oz (283 g) of soap batter into a separate container and set aside. Pour half of the remaining plain pumpkin soap batter into the soap mold and then sift a very fine layer of cocoa powder over the top.
Take the 10 oz of reserved soap batter and add the 1⁄4 tsp cocoa powder and essential oils. Blend just until mixed. (*Important Note: The essential oils will make this portion of the soap thicken extra quickly, so don’t overblend.)
Carefully spoon this spiced layer into the mold and smooth the surface with a spatula. Sift another fine layer of cocoa powder over this layer, then pour the remaining soap into the mold.
Soap mold used is a regular Crafter’s Choice Silicone Mold (find here). The mesh teaspoon used for sifting on cocoa powder lines was purchased HERE from Mountain Rose Herbs.
Click HERE or on the image below for the printable PDF recipe.
You may also enjoy my Handmade Natural Soaps Ebook Collection – it includes:
- Handmade Natural Soaps eBook
- All Natural Milk Soaps eBook
- DIY Specialty Soaps eBook
- Natural Facial Soaps eBook
- Essential Oils in Soapmaking Guide
- Troubleshooting Guide
- Plus Helpful Printables and Charts


Loved the video! Thank you for sharing. I’ve dabbled in soapmaking for over twenty years, but there’s always more to learn.
Thank you for sharing!
Hi Toni, I’m so glad you enjoyed the video! :)
Where did you get the soap cutter?
Hi Karen! My husband made that one, but you can find similar at Bud’s Workshop on Etsy:
https://www.etsy.com/shop/budhaffner
I only have coffee fragrance oil, would that work?
Hi Elsa! I haven’t personally tried it, but I think it should work! :)
I don’t have the coffee essential oil, what could I add to mix with the cinnamon and clove? I want to buy it, but I don’t want to wait to make the soap!
Hi Regina! You could leave out the coffee essential oil and just have a warm spice scent, or you could try a slightly fruity scent instead by adding a bit of patchouli and orange with the clove & cinnamon. :)
I love that you use natural colours and essential oils. You book and course have been a huge inspiration to me.
Thank you Liz! I appreciate hearing that! :)
what size loaf pan did you use
never mind I found it. :)
Great! I’m glad you found it! :)
Do you think I could try this with goats milk instead of the water?
Hi Gail, Yes, I think that sounds very lovely! :)
I made this last night. I didn’t allow it to go through gel stage. I was concerned it would overheat. Waiting with fingers crossed to see how it turns out. Did you let yours gel or not. I didn’t see anything in your notes about that. Thanks for the recipe.
Hi Mary! Yes, I let mine go through gel phase. I almost always let my soaps gel, mostly because I prefer that way, especially how it helps natural colors develop nicely, but also I don’t have a lot of free refrigerator space. :) I hope your soap turns out well!
Because this is cold process, I need to cover and wrap this for the 24-48 it is in the mold correct? Sorry, I am still new to this. Thanks!
Hi Sabrina! Yes, I would cover it lightly with a sheet of wax paper and then something light such as a pillow case to start. Since this soap has ingredients that can heat up more easily, you probably don’t have to wrap it heavily. If you notice that it’s developing a crack down the middle, that means it’s heating too much, so you’d want to uncover it then so it can cool better. Good luck with your soap! :)