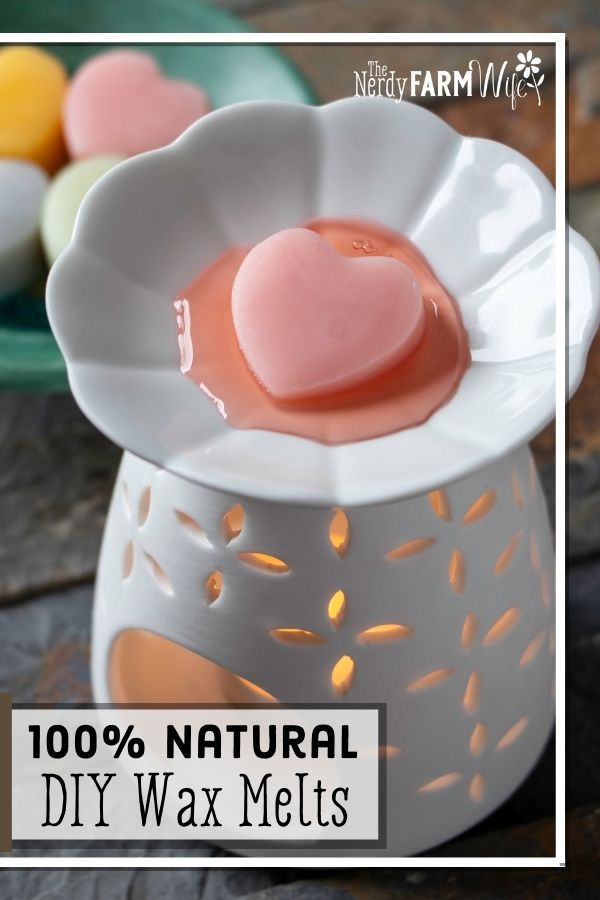
DIY All Natural Wax Melts
These homemade natural wax melts are made with coconut oil and beeswax, naturally scented with essential oils, and colored with plant based powders!
Commercial wax melts are loaded with synthetic fragrance oils that can often be problematic for those of us with allergies, asthma, or chemical sensitivities.
Instead, try these do-it-yourself melts made with just a few simple and all natural ingredients.
The suggested essential oil amounts given below are calculated at 5% and based on the IFRA category 12 safe rates for candles and air freshener products (which ranges from 5 to 11%) per the results at EOCalc.
(It’s not necessarily good to use higher amounts of essential oil, just because it’s in the range – when I was testing this project for my Big Book of Homemade Products, I tried a higher amount of peppermint essential oil and within a few minutes of melting, my daughter and I both started getting a headache!)
When a wax melt first starts heating, you may not smell the essential oil right away, but give it time to start melting and then you will!
100% Natural Wax Melts
Yield: 8 to 12 wax melts, depending on mold size
- 1/2 cup (113 g) coconut oil
- Natural colorant from the list below
- 1/4 cup (28 g) beeswax
- Essential oil from the list below
To Make the Infused Coconut Oil
In a mason (canning) jar or other heatproof container, combine the coconut oil and natural colorant.
If you’d like to minimize speckles in the final product, secure the colorant in a heat seal–style tea bag first.
Set the container down into a small saucepan containing 1 to 2 inches (2.5 to 5 cm) of water, then place the pan over a low burner for 1 hour to allow the color to infuse into the coconut oil.
To Make the Melts
Strain the infused coconut oil into a new container. I use a dedicated jar for beeswax-based projects, or you may want to use an upcycled soup can for easiest cleanup.
Add the beeswax to the infused coconut oil, and place the jar or can into the small saucepan of water used to infuse the oil. (This forms a makeshift double boiler so you can safely melt the wax.) Refill the water if needed, so the pot doesn’t dry out during heating.
Heat over a medium low burner until the wax melts, about 30 to 40 minutes.
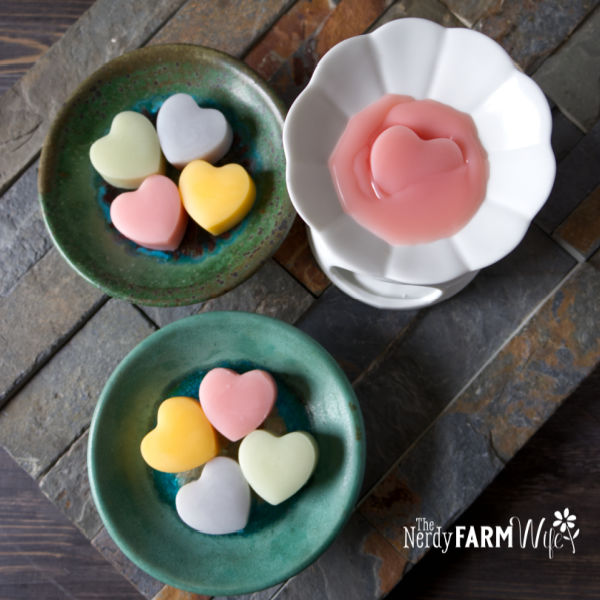
Remove from heat and let cool for 5 minutes. Stir in the essential oil and pour the melted wax mixture into a small silicone mold such as holiday themed candy molds, or you could use silicone ice cube trays to create wax cubes. Placing the molds on a cookie sheet makes it easier to move them around without spilling hot wax.
Leave your homemade wax melts in the mold for 2 to 3 days then remove and store in glass jars.
Keep melts out of sunlight during storage, since natural plant colorants will fade fairly easily once exposed to light.
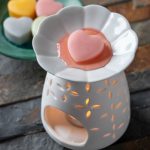
(I bought the wax warmer shown from Amazon.)
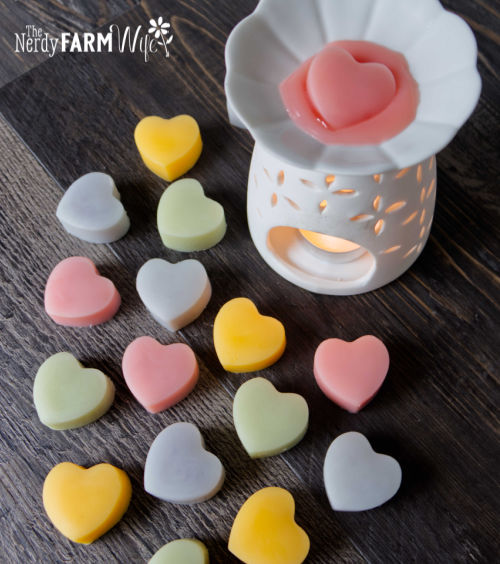
Natural Colorant Options
- 1/8 tsp indigo powder (blue)
- 1/2 tsp chlorella powder (green)
- 1/8 tsp alkanet root powder (pink)
- 1/4 tsp annatto seed powder (orange)
Suggested Essential Oil Scents
5% usage rate, or 7 g (abt 3/4 tsp) total per batch; you could also create your own blends using other favorite oils, such as Lavender Bergamot, or Cedarwood & Fir needle, or Orange Cinnamon Clove, etc.
- Peppermint
- Cedarwood Himalayan
- Pink Grapefruit
- Lavender
- Sweet Orange
I most often use organic essential oils from Mountain Rose Herbs, but other brands I’ve had good experience with include Plant Therapy, Bulk Apothecary, New Directions Aromatics, Wholesale Supplies Plus, and Brambleberry. (I don’t recommend most of the inexpensive brands found on Amazon, they’re usually mislabeled and cut with artificial fragrances which makes them so cheap.)
DIY All Natural Wax Melts
Equipment
- canning jar, to infuse coconut oil
- optional: heat sealed tea bag, to prevent speckling in coconut oil
- small saucepan, filled with several inches of water
- tin can or dedicated jar, to melt beeswax and coconut oil together
- small silicone candy molds
Ingredients
- 1/2 cup coconut oil (113 g)
- 1/8 tsp or more, from the natural colorant list below
- 1/4 cup beeswax (28 g)
- 3/4 tsp essential oil from list below (7 g)
Instructions
To Infuse the Coconut Oil
- Combine coconut oil and natural colorant in a heatproof canning jar or container.
- If available, place the colorant in a heat seal tea bag to minimize speckling.
- Set the jar of oil down into a small saucepan filled with several inches of water.
- Place the pan over a low burner and allow the color to infuse into the coconut oil for 1 hour.
- Strain the infused oil into an empty tin can (for easy cleanup) or a dedicated jar/melting container for beeswax.
To Make the Wax Melts
- Add the beeswax to the infused coconut oil.
- Place the can or heatproof container down into the small saucepan filled with several inches of water.
- Heat over a medium low burner for 30 to 40 minutes, or until completely melted.
- Do not leave melting oil or wax unattended during this time, and keep an eye on the water so it doesn't evaporate out.
- Remove from heat and let cool for 5 minutes.
- Stir in the essential oil of choice and pour the melted wax mixture into small silicone candy molds.
- Leave undisturbed for 2 to 3 days, to allow the melt to fully harden.
- Remove from mold and store in a cool, dark area.
- Keep melts out of sunlight during storage, since natural plant colorants will fade fairly easily.
Notes
- 1/8 tsp indigo powder (blue)
- 1/2 tsp chlorella powder (green)
- 1/8 tsp alkanet root powder (pink)
- 1/4 tsp annatto seed powder (orange)
- Peppermint
- Cedarwood Himalayan
- Pink Grapefruit
- Lavender
- Sweet Orange

This looks lovely! Can you use candelilla wax in place of bee’s wax? Thank you!
Hi Sharon! I think that could work! I would adjust the amount of candelilla wax lower though – it’s harder than beeswax so you don’t need as much.
When I’m swapping out beeswax for candelilla, I usually start with about half as much candelilla wax.
So in this recipe, that might be somewhere around 1/8 cup (14 g) candelilla wax to start with.
Then test one and see how it melts for you, and you can fine tune the amounts of coconut oil or candelilla wax from there. ?
Thanks, Jan. Yes, I’ll start with half the amount. This is a fantastic recipe!
So happy you like it! I’d love to hear how the candelilla wax works out!
Thanks Jan for this wonderful recipe. I’ll certainly make it.
I was trying to find something like this to put around the house for Christmas.
Merry Christmas!
Maria
Hi Maria, I hope you enjoy the recipe! That sounds like a great idea – you could even make some seasonal blends, like cinnamon, clove, and orange, or evergreen scents. (Those are on my to-do list to experiment with too!) :)
Merry Christmas to you as well!
Thanks Jan for more great ideas for these melts!