9 Quick Tips for Beginner Melt & Pour Soapmakers
Are you new to making melt and pour soap with natural ingredients? These quick tips for beginners will get you started in the right direction!

Tip #1
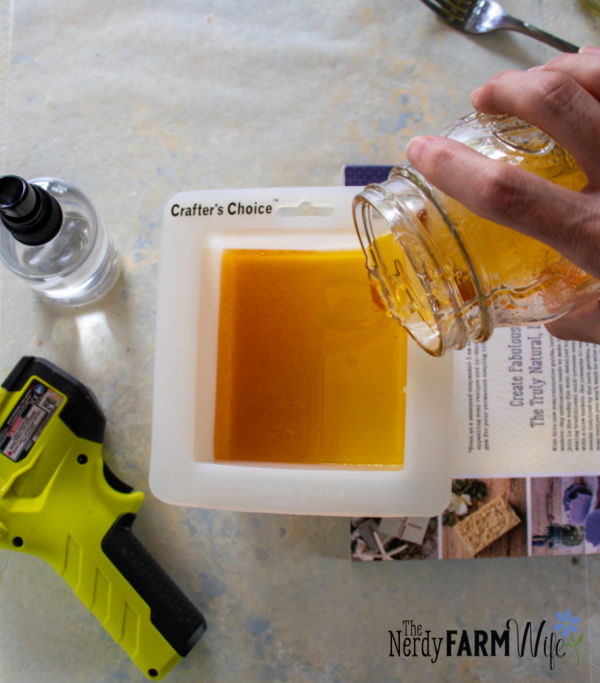
Spritz the inside of an intricate mold with rubbing alcohol right before filling with soap base. The alcohol will help the soap base settle into all of the nooks and crannies for a cleaner impression and design.
Tip #2
When adding a powdered natural colorant to soap base after it has been melted, try diluting it in 2 to 3 times as much rubbing alcohol and mix until it’s completely dissolved. Strain this mixture through a fine mesh sieve if you notice lumps that won’t dissolve. Stir small portions of the diluted colorant into the melted soap base until you reach a color that you like.

Tip #3
Save leftover scraps from projects, along with soaps that didn’t turn out as you wanted, and store them in an airtight plastic storage box. They can be remelted and repurposed for making mini embeds or accents.
Some links on this site are affiliate links; I only recommend products I personally use and enjoy. As an Amazon Associate, I earn from qualifying purchases.
Tip #4
Bits of undissolved colorants often migrate to the bottom of the jar or container the soap was heated in. When you pour the soap through a fine-mesh sieve, leave behind the very last bit of soap in the jar or container where any speckles have accumulated.
Tip #5
If your soap turns out a stronger color than you wanted, chop it up and melt it with an additional few ounces of plain soap base to dilute or lighten the color.
Tip #6
The smooth surface of melt-and-pour soap tends to easily show fingerprints. These can be removed or minimized by gently wiping over the surface of a finished soap with a soft cloth or paper towel dampened with rubbing alcohol.
Tip #7
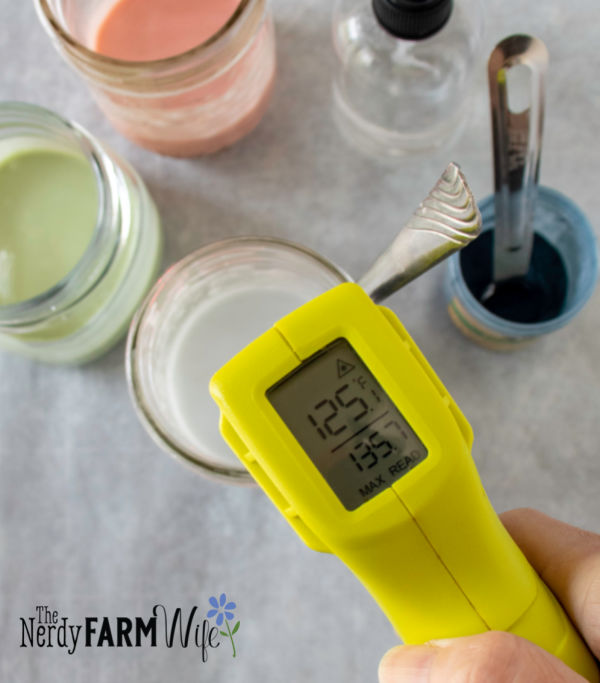
Unless a recipe directs otherwise, let the soap base cool to under 135°F (57°C) before pouring. This cooler temperature keeps more of the natural colorant particles or additives suspended in the soap base, so they won’t settle to the bottom of the soap mold.
Tip #8
Weigh or measure essential oils out into a glass shot-size measuring cup, instead of plastic. Some essential oils, especially citrus, can easily eat through plastic when undiluted.
Tip #9
Stir gently when mixing melted soap base to avoid creating a lot of air bubbles, which can stand out in clear soap projects. If you’re concerned about the amount of bubbles in your melting/mixing container, try spritzing a spray or two of alcohol into the jar and gently stir it into the hot soap, spritzing another time or two, if necessary to dissolve the bubbles.
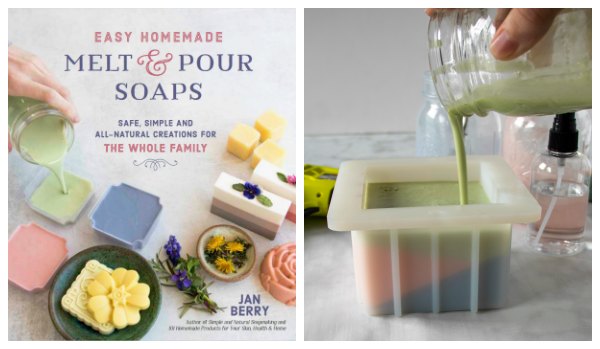
Looking for more creative melt and pour soap ideas? Check out my print book, Easy Homemade Melt & Pour Soaps. It’s filled with helpful tutorials, natural colorant galleries, essential oil blends, plus 50 recipes with full color photos of each project!
Available from your favorite bookstore or the following online shops:
- Bookshop.org (supports indie bookstores!)
- Amazon (US)
- Barnes & Noble
- Books-A-Million
- Book Depository
- IndieBound
- Amazon (UK)
- Amazon (CA)
- Booktopia (Australia)


thanks for the tips
Hi Deandra! So happy to hear that you found the melt and pour tips helpful! :)
I love this book! Ordered from Amazon. Thanks, Jan
Hi Carol! Thank you so much for ordering the book and I’m so happy to hear you like it! ❤
Hi Jan,
I bought your book and I love it. Keeps me inspired to make my own soaps. One issue that I haven’t seen addressed yet is the leaking of the color from the natural colorants. So far I used turmeric and purple kaolin clay and in both cases I noticed that the color leaks and stains the sink/counter/bathtub. Is there any solution to that?
Thank you!
Hi Lucia, That’s such a great question! If your soap is leaking color, then it’s a good idea to try reducing the amount of colorant. Try cutting it in half and see how that does, then adjust from there.
Something I also do with melt and pour is dab a bar dry with a clean, dry washcloth after a shower/bath and then store the soap on a dry soap dish between uses. It’s a little extra step that I don’t always remember to do! But it does help the soap last longer too.