Peach Flower Glycerite & Face Cream (experiments!)
In this article, I’ll explain how I made a double glycerin infusion using fresh peach flowers, then how I used that glycerite to make a daily-wear face cream with niacinamide (vitamin B3).

Last year, I spotted peach flower extract in some antipollution skincare products and became intrigued!
After doing some research I found out that peach (Prunus persica) flowers (or flower extracts):
- have anti-oxidative and collagen-protective activities
- may be useful for protection against UVB-induced skin damage when topically applied
- are classified as moisturizing and skin conditioning
- can be used with peach twigs and leaves to make a soothing elixir or used externally as a tincture for insect bites
I also recommend reading this excellent overview of using peach in herbal medicine by Kiva Rose.
Since peach blossoms are only around for such a limited time, I finally got my chance to play with them this month. This article is a summary of my experiments, plus the recipes I used. :)
PS: This experiment was also made to help update the information and recipes in my Handmade Lotions & Creams eBook collection. Check it out for more information on infusing herbs and flowers into lotions and creams!

Peach Flower Experiments
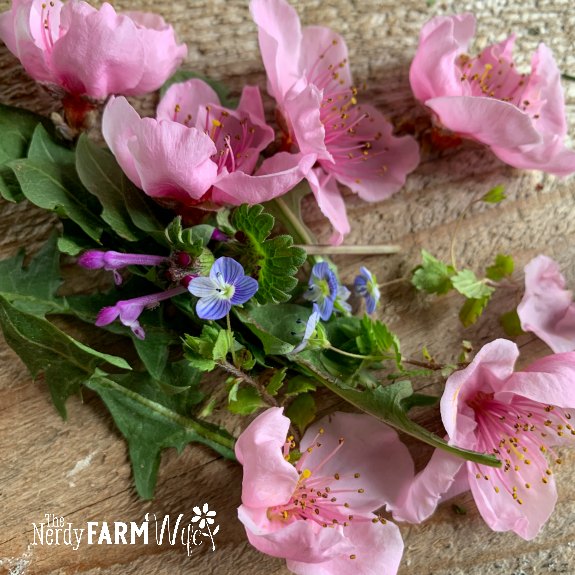
Collecting the blossoms:
I selectively picked just a small amount of blossoms from each of our four peach trees, since bees enjoy the nectar and the wildlife enjoy the peaches later in the year. (Especially bears – we had five trees, but last year an exuberant bear split one while feasting!)
Making the peach flower glycerite:
My research seemed to indicate that peach flower’s benefits were best extracted through water or alcohol. I could make a tea to use in my face cream, but I wanted something longer lasting so settled on making a glycerite, since it’s water-based.
(Vegetable glycerin, or infused glycerites, can be used in lotions and creams at a rate of around 2 to 4% of the recipe to soften and moisturize skin.)
I also infused a small amount of dried peach blossoms in oil to use in my face cream, though I’m unsure what, if any, benefits are transferred that way.

I ended up making a double glycerite.
First, I made a hot glycerite (inspired by recipes from the Indie Herbalist and Herbalista Free Clinic), but felt the resulting color was too pale, so strained and used the first infusion with a second fresh batch of flowers, in the same way I make rose glycerite.
Peach Flower Glycerite Recipe
Ingredients
- 1/4 cup (4 g) chopped peach flowers for the 1st infusion
- another 1/4 cup (4 g) chopped flowers for the 2nd infusion
- 1/2 cup (135 g) vegetable glycerin, plus extra as needed
- optional: 1 tsp witch hazel
Directions for First Heated Infusion
Combine the first 1/4 cup of chopped flowers and glycerin in a half-pint canning jar. Cover with the jar’s cap and shake well.
Place the jar down into a saucepan containing several inches of water.
Heat over low to medium-low heat for about 3 to 4 hours.
Keep an eye out so the water doesn’t evaporate from the pan. Refill the water as needed.
Once finished infusing, remove from heat and let cool overnight before straining through a fine mesh seive.
Add enough extra plain glycerin to the infused glycerin to return to working with 1/2 cup.
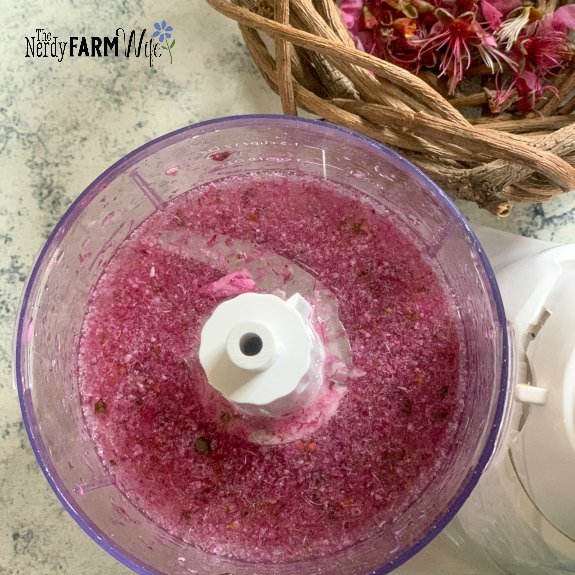
Directions for Second Cold Infusion
Combine the 1/2 cup infused glycerin from the above step, with a fresh 1/4 cup batch of peach flowers.
This time, blend the flowers and infused glycerin together using a mini food processor.
At this step, I also added 1 teaspoon of witch hazel to help with the extraction. This is optional and if you do add the witch hazel, be sure to label your extract “Not for internal use.” so no one accidentally ingests it.
Pour the flower and glycerin slurry into a jar and cap with its top.
Tuck away in a dark cabinet for 3 to 4 weeks.
Once done infusing, strain through a fine mesh sieve, using a spoon to help press and scrape the flowers against the sieve to extract as much infused glycerin as possible.
Label and store in your refrigerator or a cool dark place.
The shelf life of glycerites is generally expected to be around 1 year.

Peach Blossom Face Cream Recipe
Once my glycerin was made, I was ready to use it to add a special touch to lotions and creams!
You can use an infused glycerite in any lotion or cream recipe, at the rate of around 2 to 4% of the recipe, but this is the face cream I made with it first.
(I based this recipe off of “Raspberry Seed Every Day Lotion” in my Handmade Lotions & Creams course.)
Featured Ingredients
- Raspberry Seed Oil (Rubus idaeus) – high in vitamins and essential fatty acids, protective and antioxidative
- Carrot Seed Oil (Daucus carota) – (the carrier oil, not the essential oil), nutritious and high in vitamins, used in sun care preparations
- Sesame Oil (Sesamum indicum) – absorbs quickly, good for all skin types, anti-inflammatory, may be helpful for eczema and acne; I first infused this with dried peach flowers. (Use light sesame oil, not the toasted kind.)
- Niacinamide, or Vitamin B3 – improves appearance of mature, damaged, wrinkled, hyperpigmented, or blemished skin. Often used in anti-pollution serums and creams since it reduces damage from free radicals.
Tips for using vitamin B3 (niacinamide) in lotions & creams: Keep your lotion or cream at a pH of 6 to avoid skin irritation or flushing of skin; don’t combine with acidic ingredients. I used this particular recipe as my base, because it’s reliably a pH of 6, so no adjustments needed for the niacinamide. Add B3 at a rate of 2 to 5% to the water phase of lotion and cream recipes.
Ingredients
You need an accurate scale that can measure in grams for this recipe. THIS little jeweler’s scale is what I use.
- 15 g sesame oil (infused with peach flowers)
- 5 g raspberry seed oil
- 3 g carrot seed oil
- 6 g emulsifying wax (I use Mountain Rose Herbs brand)
- 2 g peach flower glycerite
- 2 g niacinamide (vitamin B3) powder
- 66 g distilled water
- 1 g Optiphen Plus (or for an organic approved natural preservative, use 4 g Leucidal SF Complete and reduce water to 63 g)
Directions
Add the oils and emulsifying wax to a half-pint (250 ml) canning jar or other heatproof container.
Weigh the distilled water, glycerite, and niacinamide into a second half-pint jar. Cover this jar with a canning lid or saucer to prevent evaporation.
Place both containers into a saucepan containing 1 to 2 inches of water, then set the pan over a medium-low burner for about 15 to 20 minutes. This gives time for the wax to fully melt while the water combination reaches a nearly matching temperature. Remove from heat once the wax has completely melted.
Carefully pour the hot contents of the two containers together.
Using a fork (or one beater attached to a hand mixer), stir the cream briskly for about a minute, then set aside to cool for 5 minutes, checking and stirring frequently. To speed the cooling process, place your mixing container in a bowl of ice water. Stir occasionally, for around 30 seconds at a time, as the cream cools and thickens.
Check the temperature. Once it’s below 104°F (40°) add the preservative and mix well. It may take up to 24 hours for your cream to reach its final thickness.
Pour or spoon into jars or bottles. Make sure the cream is completely cool before putting tops or lids on, to avoid condensation (which can more easily promote mold.)
Store the face cream in a cool spot, out of direct heat and sunlight. Avoid storing in a bathroom, as the fluctuating heat and higher humidity can negatively affect shelf life.
Shelf life of face cream made with Optiphen Plus is estimated to be 6+ months. Shelf life with Leucidal SF Complete may be about 2 to 3 months. If you don’t use a preservative, store in the refrigerator and use up within one week.
(Here’s why I ALWAYS use preservatives, even though I’m pretty crunchy and like stuff as natural as possible.) :)


Hi Jan,
Just writing to say thank you for inspiring me in so many ways! I have a couple of your books and I’m always thumbing through for creative inspiration ? I live in Uganda (East Africa)
Hi Tendo, Thank you for the kind comments! I appreciate you buying the books & so happy to hear you enjoy them! :)
Hello Jan.What an interesting experiment. It made me think, I wonder if the red maple leaves in glycerite will work? https://www.nutraingredients-usa.com/Article/2018/08/23/Maple-leaf-extract-may-prevent-wrinkles-research-suggests
Hi Alla, That is such an interesting idea – thank you for sharing!! I’ve tried red maple leaves in melt and pour (the color didn’t last), but completely didn’t think of trying it in a glycerite or face cream. Definitely putting this on my list to try this fall!! Thank you! :)
Did you separate the petals from the blossoms, or use the whole blossoms, stamen and all? I’m trying this with cherry blossoms.
Hi Christina! I used the whole blossom, stamen and all, then also added some petals that were floating down around me as they fell from the tree. (So just the very freshly fallen ones from the ground.) Cherry blossoms is a great idea! I also made a batch of apple blossom glycerite that I plan to use in a similar way. :)
Jan – I love this! I’m wondering if cherry and/or apple blossoms would be skin-beneficial?
Hi Kimberly, Yes, I think so!
I made some with apple blossoms too after looking up apple blossom extracts.
I’ve also seen promising cherry blossom extract information, but sadly the deer keep eating all of our cherry trees so I have none to play with yet! :)
https://pubmed.ncbi.nlm.nih.gov/25065693/