Honey Butter Finger Bites
When I was in junior high school, I took a candy making class with my mom and sisters. It was a lot of fun and I learned so much from that day!
This week, I was browsing through some loose piles of various recipes I had printed off over the years, looking for new ideas, and discovered that I still had the sheaf of handouts that the instructor gave everyone who attended. Not only that, I found a second set of copies, sooooo… sorry Mom or Sister 1 or Sister 2 – I think I have your copy too! Oops… :)
The recipe for “Butterfinger Bars” caught my eye since it only called for three ingredients, unfortunately one being corn syrup.
I don’t use corn syrup for a multitude of reasons, however, it’s easy to exchange in equal measure for honey. It doesn’t always work out in every recipe, but it more often does.
So, here’s what I came up with:
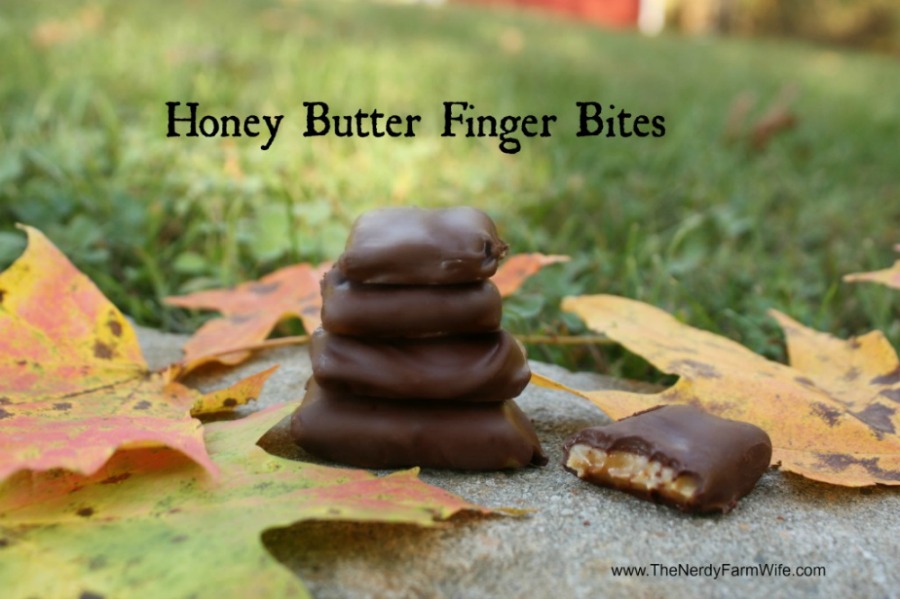
Honey Butter Finger Bites
(Gluten, Dairy, Soy, Corn Free)
- 2/3 cup honey
- 1/2 cup peanut butter (or other nut butter)
- chocolate chips for coating (Enjoy Life are gluten, dairy & soy free)
Cook honey in a heavy saucepan on medium heat until it reaches soft crack stage (around 275 degrees F.) Remove from heat and stir in peanut butter.
Beat for a few minutes, mixture will start to stiffen. Spread onto parchment lined baking sheet, place in refrigerator or freezer until firm.
Use kitchen scissors or knife to cut into pieces. If you’ve frozen the candy a bit too long, you can also crack it into pieces.
Melt chocolate chips gently over low heat, in a double boiler, or in the microwave on 50% power for a minute or so. Dip pieces into the chocolate to coat, return to parchment paper and freezer. Store in your freezer for a crunchy treat that is quite addictive!
If you wish to give these as a gift or pack in a lunchbox, they do very well sitting out at room temperature for about 24 hours. For extended freshness, store in the freezer for up to 3 months.


Hi there. Wondering if I could have permission to share your photos with credits on my Fb page. This looks great and my readers will LOVE it!
Hi! You certainly can – thanks for asking and sharing! :)
Hi, I was wondering the same thing. I’ve been developing a “healthy snacks” page at Katahdin Pediatric Dentistry on facebook and was wondering if I could share this idea there? Thanks!
Hi Laura, yes you can definitely share away! Thanks! :)
How long are these good for outside the freezer ? — thinking about as gifts, look yummy n simple, like so many of the best things in life.
Hi Lara! I’m not sure, but I’ll go pull one out of the freezer now and put it in a baggie on the counter and see what it does. I’ll write back here with the results tomorrow! :)
Lara, I let one sit out all night on my counter, in a baggie. My house temperature stays in the lower 70’s and it held up beautifully! It’s just chewy instead of crunchy, but it tastes yummy. You could definitely give as gifts, just make sure to tell them for freshest results to store in the freezer (or fridge if they like a softer texture.)
They look so yummy and easy to make. Might have to pick up some chocolat chips to try this. :)
Very quick and easy! I hope you get to try them! My hubby wants me to make him some with milk chocolate chips next time and I also thought white chocolate might be good for me… :)
Hi Lara! I was just wondering, because I’m trying to not use the microwave (at all!) how would you melt the chocolate otherwise? I’m thinking double boiler. What is your suggestion?
Hi Sandy! I try not to use the microwave much myself and often melt chocolate over low heat in a small saucepan. I know you’re supposed to use a double boiler, but I’ve never had a problem as long as I’m very attentive to it. If you do have a double boiler, then that would work great too! :)
I know I am responding to an old post, but Detoxinista Megan suggests to melt the chocolate in an oven-safe bowl. I tried it for this recipe and it worked perfect! 5 minutes at 400. Some of the chips weren’t completely melted, but after I stirred them they were. It worked great!
Thanks for sharing that great tip Colette!
These sound great! Thanks for sharing with us at Foodie Friends Friday.
Thanks Dawn! :)
There’s NOTHING Nerdy about these bars! OMG! Love homemade Butterfinger ideas- and this recipe sounds so easy! Found it on Foodie Friends Friday… have a good weekend!
Ha! :) Thank you Beth, you have a great weekend too!
Oh my…I can’t wait to try these! Thanks for sharing.
I hope you enjoy! :)
Yum… this sounds awesome!! Thanks for sharing it!!
Hi Kim H, Thanks! :)
I knew this was you :) It was the honey candy theme that tipped me off! I was just thinking that I had to look up your other honey candy recipes from the other GF Friday recipe link up, and now here’s another. Beautiful photo! Can’t wait to try. Thanks for saving those old jr high candy info shees (which is amazingly insane btw).
-Dana
Ha! I love using the honey! :) I can’t believe I saved them either! I throw away EVERYTHING – I’m a chronic de-clutterer. They somehow managed to hide in my cedar hope chest for many many years with my baseball card collection (which I haven’t thrown away either.) :D
Those look just perfect, thank you!
Jan, I have been speaking to you about your soaps…but you don’t have a contact email listed. How will I know if I forget your site when you have soap available?
Hi I updated my FAQs to help you out!
I can’t believe this is only 3 ingredients! I love that you can use honey instead of corn syrup. Adding to my Christmas candy-making list :)
Hi Tammy! I hope you and yours enjoy! :)
Yes, I’d like some of these now, please. Pretty please, will you deliver! YUM Thanks for linking up at our Gluten Free Fridays party last week! I have tweeted and pinned your entry to our Gluten Free Fridays board on Pinterest! :) I hope that you’ll join us this week to share more yummies! Also, be sure to stop back by to see who the winner of the Planet Rice will be! The winner will be announced at GFF #9 Cindy from vegetarianmamma.com
This batch is long gone! :) Thank you for the tweet and pin and letting me link up to your great party!
I want to let you know that this is my host favorite recipe from last week’s Foodie Friend Friday party. I have made them today.. although I used biscoff spread and nutella as we have a peanut sensitivity in our house. Was planning on using sun-butter but didn’t have enough. Not sure if I will dip them in chocolate or not as I like them the way they are, especially the nutella ones. Please stop by Foodie Friends Friday to grab your host favorite button ~ or you can stop by my blog tonight when the party opens up for this week…Thanks for sharing this and I hope to see you this week for our Linky Parties.
Thanks for the honor! :) Nutella sounds sooo yummy – definitely want to try that version. My daughter prefers them undipped too.
It looks and sounds delicious substituting the honey for the corn syrup!
Thanks for sharing at the Clever Chicks Blog Hop!
Kathy
The Chicken Chick
Thanks Kathy! :)
Looks yummy. Wonder if we could use our Thrive Honey Crystals in it?
I had to look those up! :) Rehydrated, it should work in a similar fashion – even though it’s part cane sugar, as long as you hit the 275 degree soft crack stage, it should work! (I think.) :D
Wow! What a simple recipe…but with outstanding results! Thanks again for sharing, Jan. Your posts – and this one is a great example – are well laid out and thoroughly professional. We will definitely be making these treats at Ladybug’s Mew. Best regards, Farmer Doug.
Thanks for the kind words, Farmer Doug! :)
Oh Jan, you just made my Halloween! Butterfingers are my favorite, so I will definitely be giving these a try! How long would you say it takes to get to the ‘soft crack stage’? I don’t have a thermometer so I’m going to try to guess-timate. :-)
Hi Lauren! You really need to hit the temp pretty close. But, if you don’t have a thermometer, you can do a cold water test.
Good luck with making them and I hope you enjoy! :)
Oh, wow! I haven’t had a candy bar since my milk allergy diagnosis over 2 years ago. I am going to have to try this!
That’s a long time without a candy bar! I hope you enjoy them! :)
I cannot wait to make this recipe! They are simply beautiful. Thank you for sharing it with us!
Michelle
Thanks for the feature Michelle! :)
you have great recepies. thanks good stuff.
Thanks Tina! I’m glad you like them! :)
Wonder how Agave syrup would work? It has a lower glycemic index, meaning it will not raise the blood sugar (or give the corresponding drop later) that honey would…my husband is diabetic and would love to have ‘candy’ again. If I get a chance to try it, I’ll let you know how it came out. Blessings
Hi De, I used agave syrup at one time for my son, but never tried making candy with it. However, it seems it should work in a similar fashion as honey or maple syrup does in a recipe. I hope it works for you, if you get to try it. I would love to hear how it turns out!
Thank you! I can’t wait to make these with walnut butter for my daughter (who just turned 9) as part of Halloween. By the time Halloween rolls around, we will have been on GAPS Diet for over 2 years. I will have to make the chocolate for coating myself, but already have a recipe for that. I’m also planning on making some of your other recipes for Halloween this year, such as the “tootsie rolls”. My daughter will be so excited to eat those. Before GAPS, we still ate organic, so she had never had a tootsie roll (or butterfinger, for that matter) before. She knows what the candies are, but has never eaten them.
I hope your daughter enjoys them! :)
I can’t see where in this recipe it say to add the peanut butter–can you please tell me when to add the peanut butter in. Thankyou
Hi Angelique! It’s right under the ingredient list: “Cook honey in a heavy saucepan on medium heat until it reaches soft crack stage (around 275 degrees F.) Remove from heat and stir in peanut butter.”