How to Make Pencil Lines in Melt & Pour Soap (+video)
Learn how to make charcoal pencil lines in melt and pour soap. (It’s easy!)
Charcoal pencil lines are a design technique used to create a striking line of separation between layers of soap.
While they might look tricky, they’re actually quite easy to make!
(Want to make pencil lines in cold process soap instead? Check out my article: How to Make Pencil Lines in CP Soap.)
Here’s a video I made to demonstrate the process! (Often an ad plays first, but the video will play right after!)
Some links on this site are affiliate links; I only recommend products I personally use and enjoy. As an Amazon Associate, I earn from qualifying purchases.
Materials You’ll Need to Make Pencil Lines
To add charcoal pencil lines to your melt and pour soap projects, you’ll need the following materials:
- Activated Charcoal Powder
- Isopropyl (rubbing) Alcohol
- Sponge Brush
- Loaf Style Soap Mold
- Melt & Pour (Glycerin) Soap Base
How to Make the Pencil Lines
Step 1
To make a pencil line, first pour a layer of soap into a soap mold and spritz the top with alcohol to remove air bubbles. Let this layer sit for 15 to 20 minutes to firm up.
Step 2
While the soap in the mold is cooling, mix the charcoal powder with two to three times as much alcohol.
For example, if you have 1 teaspoon of charcoal, dilute it with 2 to 3 teaspoons (10 to 15 ml) of alcohol.
Step 3
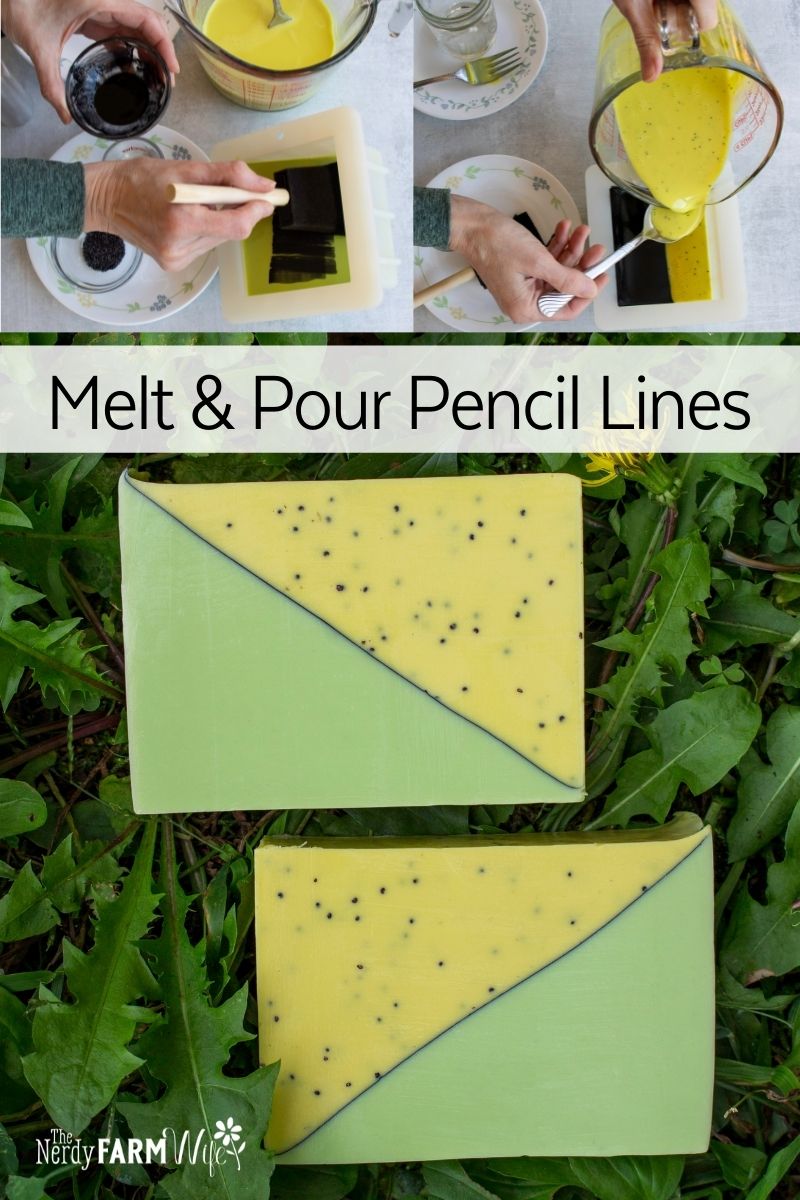
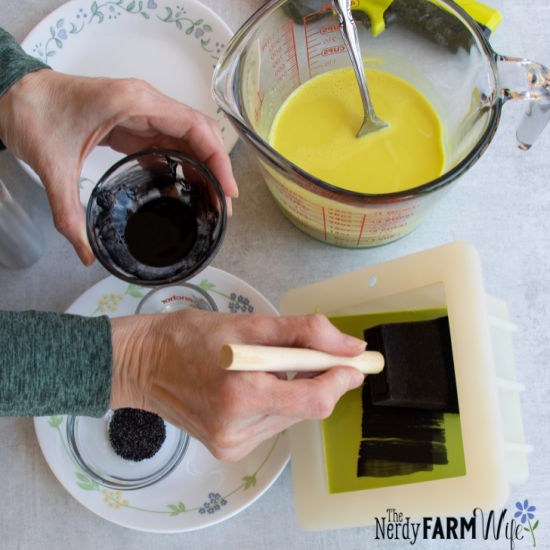
Use the sponge brush to gently and evenly paint the diluted charcoal over the surface of the soap in the mold.
Don’t press too hard or you’ll cause divots and wrinkles.
You don’t need to spritz the soap with alcohol first, since you’re already painting alcohol directly all over it, and any extra puddles of liquid might cause thin spots or smears.
Let the charcoal layer (pencil line) dry for about 5 minutes.
Tip: Use cotton swabs or paper towels dipped in alcohol to help tidy up smeared corners and edges during and after making the soap. The sponge brush can be washed out under running water and reused many times.
Step 4
Prepare the next layer of soap, monitoring and occasionally stirring until it’s 130 to 135°F (54 to 57°C).
If it’s hotter than this temperature, it may melt the layer underneath; if it’s too cool, it can become gloppy and hard to pour, which is likely to disrupt the pencil line at this stage.
Step 5
When the second layer’s soap is ready, lightly spritz the surface of the pencil line in the soap mold with alcohol.
Don’t hold the spray bottle too close; hold it farther away so a fine mist settles over the inside of the mold rather than heavy bursts that leave uneven spots.

Step 6
Pouring over a spoon to slow down the flow, gently pour the soap into the mold, moving slowly across the surface as you go to keep from pouring too much in one spot.
Spritz the top surface with alcohol to eliminate air bubbles.
Step 7
Keep the soap in the mold for 6 to 8 hours.
Remove and slice into bars, laying the loaf on its side first, to prevent charcoal smudges across the surface of the cut bars.
Use paper towels or cotton swabs dipped in alcohol to clean up any stray charcoal marks on the finished soap.
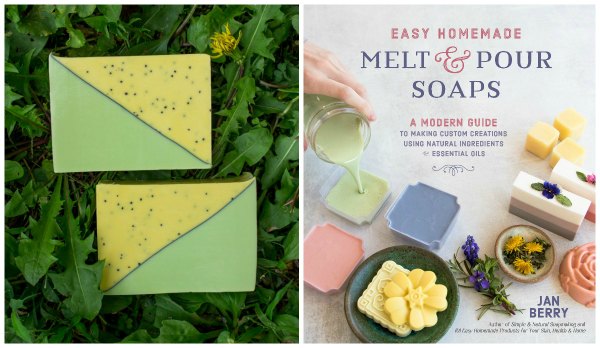
Looking for more creative melt and pour soap ideas? Check out my print book, Easy Homemade Melt & Pour Soaps.
It’s filled with helpful tutorials, natural colorant galleries, essential oil blends, plus 50 recipes and full color photos of each project!

