Growing Asparagus From Seed
Here’s how to grow your own asparagus plants from seed! These perennial plants will provide homegrown food from your garden for years to come!

Surprisingly easy to start from seed, asparagus plants have a 3 to 4 year up-front time investment while they’re establishing themselves in your garden, but it’s well worth it.
If you’re willing to give these perennial plants the time and care they need to settle their roots in your garden, they can produce plentiful early-spring harvests for you for years and years!
Asparagus Colors
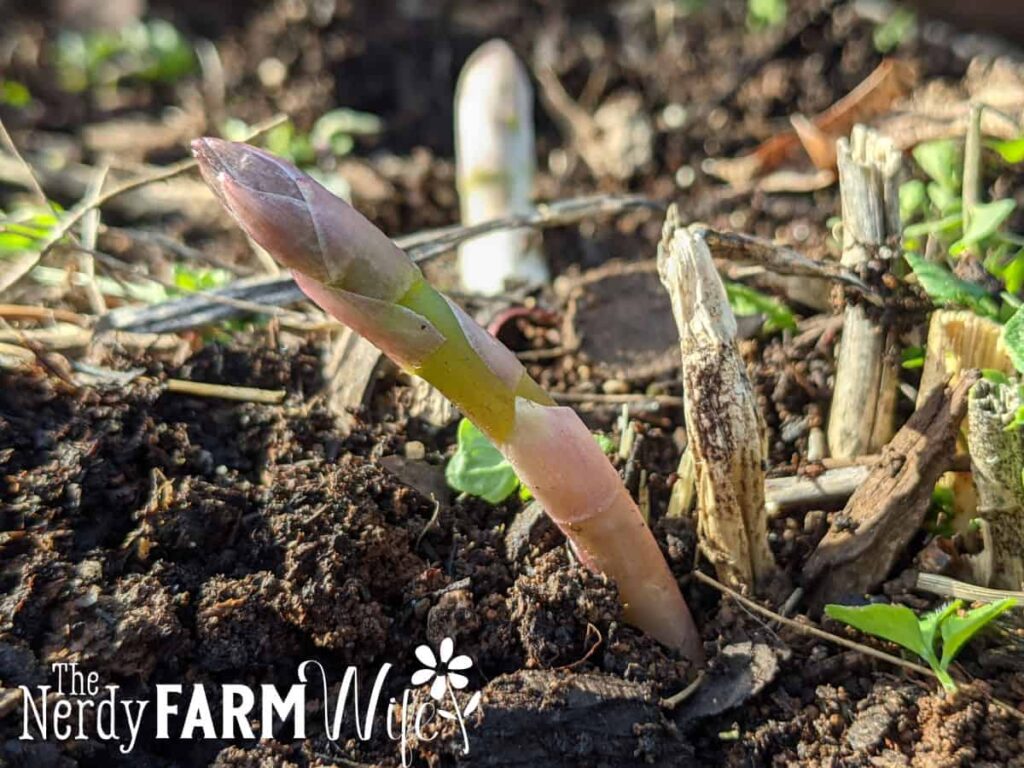
Asparagus can come in green, purple, and white. Green is the most common in the US, with purple being much harder to find.
As for white asparagus- that one’s actually a green asparagus in disguise! To get that color (or rather, the lack of it), green asparagus is covered and kept in the dark in a way that ensures it gets no exposure to the sun, preventing it from starting to photosynthesize (which is what would turn the spears green).
As is usual for purple-colored vegetables, purple asparagus loses its color when cooked, turning green. White asparagus, however, stays white/creamy and pale in color when cooked, and green stays very green!

How to Grow
- Start asparagus seeds indoors 2-3 months before your estimated final frost date. I soak my asparagus seeds for 24 hours in room temperature water before sowing them.
- Chose a growing container that will give the asparagus roots space to develop. I like to use use 4″ plastic pots with drainage holes in the bottoms.
- Sow asparagus seeds 1/2″ deep. You can plant anywhere from 1-7 seeds per 4″ pot- I usually end up with something like 4-5 in one pot. Just poke a hole in the soil with your finger, drop a seed in, and cover it back up.
- Seeds will usually germinate within 2 weeks to 1 month after sowing. Keep the seeds and plants warm, moist, and underneath a good strong source of light, like a grow light, or your sunniest window.

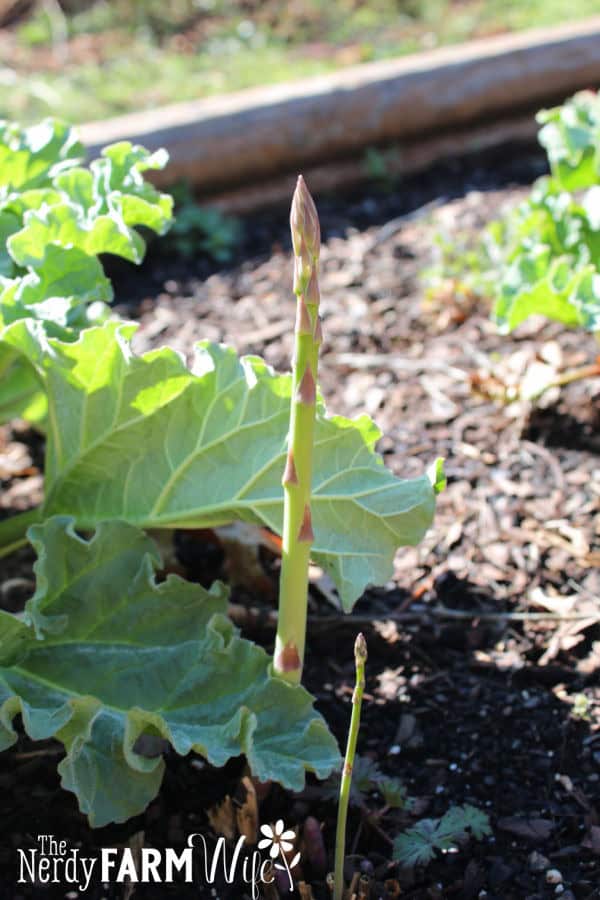
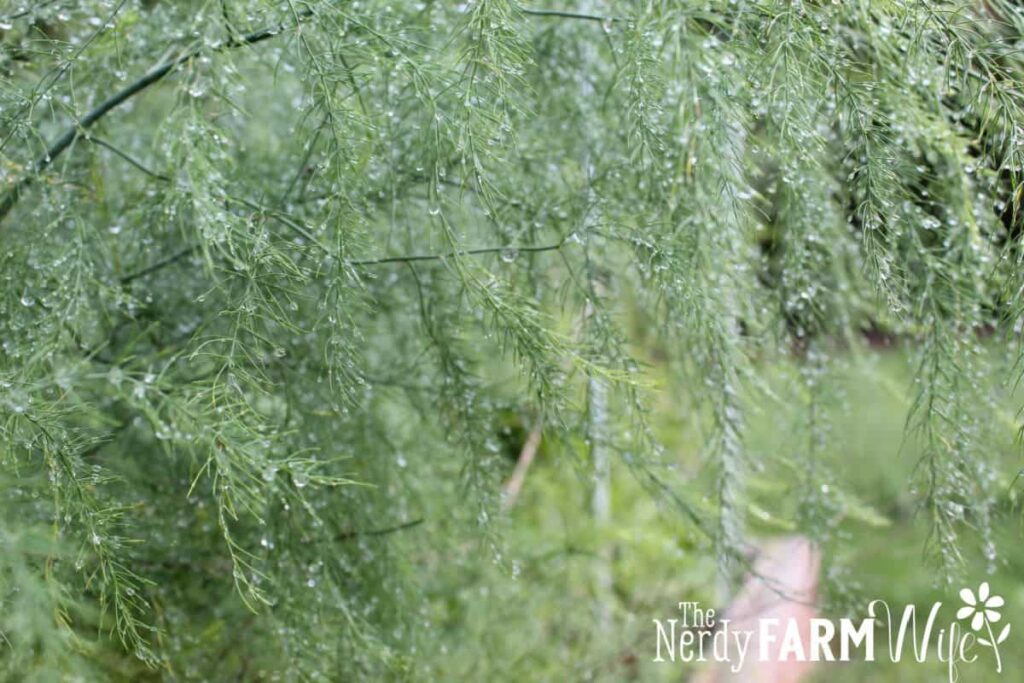
- As the seedlings grow, they’ll produce multiple shoots of thin, ferny stalks and leaves. These come out of the soil, not from a main stem. Each shoot is not its own plant- it’s all from the same seed and roots. Avoid damaging or trimming the ferny leaves, and make sure the plants get plenty of light!
- Asparagus seedlings should be at least 12 weeks old before transplanting out to the garden, and should have undergone hardening-off for at least 2 weeks beforehand. Transplant baby asparagus out in spring, after all risk of frost has passed.

How to Prepare & Plant an Asparagus Bed
Choose a spot that gets full sun (at least 6+ hours of direct sunlight), and make a bed of rich, well-draining soil with plenty of organic matter, all thoroughly worked in. Through this prepared, enriched soil, dig a trench. It should be about 8″ deep, and at least that again as wide.
Now, people have their different preferences for what goes in their asparagus trenches. What I like to do is scatter a small amount of bonemeal along the bottom, then add 2″ of rich, well-rotted compost or manure, mounding the middle up a bit so I have a small hill going down the length of the trench.

Plant asparagus in the prepared bed, with plants being spaced 12-24″ apart. Be careful with the roots, gently spreading them out a bit in the trench. Think kind of like an octopus, with the crown in the center being the body.
The image above shows a baby plant, while the image below is a 2 year old root crown.

Cover with just 2-3 inches of soil– fill in the rest as time goes on, as the crowns develop and the plant grows. Keep a sharp eye out for weeds, and pluck them out as soon as possible to reduce root competition.
Raised beds vs. in the ground
I’ve grown asparagus in both a raised bed and from plants set in a tilled garden plot. Both produce plentiful harvests each spring; however, I will say that it’s much, much easier to keep the raised bed free of weeds.
Given the choice, I would set any of my future asparagus planting in raised beds, personally. But that’s just my choice, as someone who likes to avoid having to weed the garden as much as possible!

The first four years:
Asparagus needs a long time to establish itself- kind of like planting a tree! Also like when you plant a tree, your asparagus is going to need a couple of years and a little bit of care before it can start producing food for you. But if you put that care and time in, your asparagus can produce for you for years and years!
From when you put your asparagus seedlings in the ground, all the way up to full maturity, here’s what to do for your asparagus to get it healthy, well-established, and strong, year by year.
Year One
- Water regularly throughout your asparagus’ first growing season. Try to aim for a thorough, deep watering once a week, if the rain doesn’t provide that for you.
- Technically optional, but still very helpful- I like to add a good layer of mulch to my asparagus beds from the first year on, heaping it about 1-3 inches deep. It helps keep the weeds down, and reduces the water demand by keeping the soil moist for longer. I like use straw or woodchips, but you can use whatever your mulch of choice is.
- It’s important to keep the asparagus bed weeded so the roots don’t have any competition. Additionally, make sure to avoid damaging or pruning any of the leaves– the plant needs them to grow strong crowns!
- When fall and winter arrive, wait for the foliage of your asparagus plants to die. It will turn brown or yellow, no trace of green. Only after you are certain that the foliage is dead, you can cut it back to 2″ above the ground. This helps to prevent overwintering asparagus beetles. This applies to all years beyond this point.
Year Two
- Your plants will send up shoots in spring. This year, begin gradually backfilling the trench as the seedlings grow. The shoots should be distinctly larger than last year’s, starting to be more recognizable as actual asparagus.
- You can’t harvest any spears this year without damaging the plant’s productivity in the long run, so let those shoots grow up into ferns. The ferns this year will also be much larger than last year’s- still, avoid damaging them, if at all possible!

- Watering can be less frequent this year. It’s a good idea to water your asparagus during dry periods, and of course, like most plants, if the rain doesn’t provide it, then asparagus enjoys a good weekly watering, but overall the plants should be less fragile.
- Keep the beds weeded. It’s very important for asparagus to not have to deal with root competition while they’re working on developing good, strong root crowns.
- I do top the mulch up yearly, from this point on, usually right before winter.
Identifying Male and Female Asparagus Plants
At two years old, you should be able to start being able to tell which of your asparagus plants are male or female.
They’re easy to tell apart: later in the season, females produce bright red (poisonous!) berries, and the males do not. The blooms are also different, but you’d need a magnifying glass just to tell them apart, so it’s easiest simply to wait for berries to form!
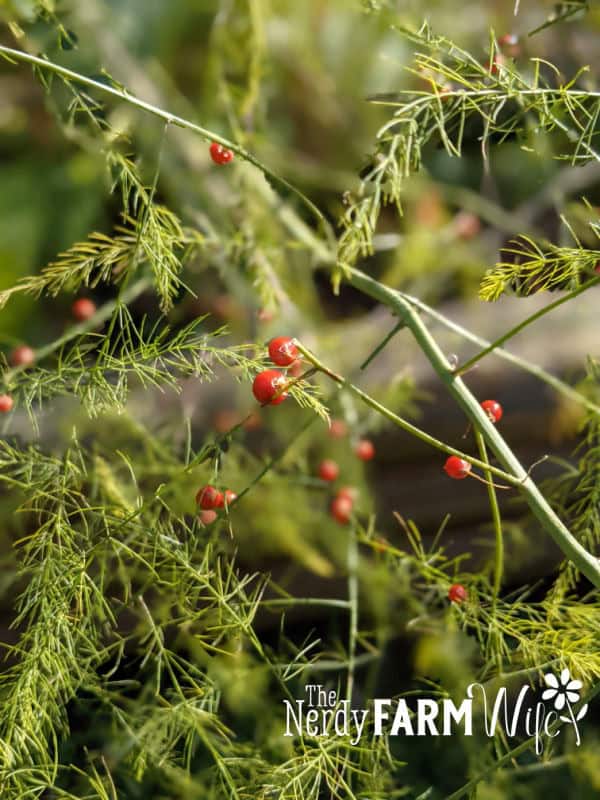
Male and female plants both produce delicious, edible spears. Male asparagus plants do, however, produce a larger number of spears as opposed to the female plants- This is why sometimes you see ‘all male’ asparagus varieties: male plants are preferred by commercial growers for those larger spears.
Some gardeners remove female plants entirely. Sometimes it’s because of the lesser yields, sometimes it’s because the berries have a tendency to produce surprise volunteer asparagus plants. We keep our female plants. They may not produce as many spears, but they still taste just as good!
Year Three
- From this year on, it’s recommended to top-dress your asparagus with a little general fertilizer or compost each spring. I’ve found you don’t need to be too strict about this- I’ve forgotten and skipped a year a few times and it’s been fine- but it’s not something to neglect entirely, or your asparagus might start developing nutrient deficiencies or struggle to produce.
- Continue to keep the asparagus beds weeded. If your asparagus plants dropped seeds last year, you might find some volunteer babies in the bed once spring rolls around. Transplant or weed out these seedlings so as not to negatively impact your existing crowns.
- This is the first year that you can take a small harvest! Some people prefer to wait another year before their first harvest to build up the crowns more, but ultimately, it seems come down to personal choice. If you do decide to collect a harvest, I recommend picking lightly and sparingly; I personally only harvest for a 2-week period before allowing the rest of the asparagus spears to grow out into ferns.
- Watering needs should be about the same as year two. Mulch maintenance continues, if you’re using it, with winter or spring top-ups (if you’re doing it in spring, then put it over top the top-dressed fertilizer or compost).
Year Four (and beyond)
- The plants are now fully mature with strong crowns, and will have the same yearly care requirements from this point on.
- Beds should be continually maintained through weeding and yearly mulching and top-dressed fertilizer. Keep removing baby plants as they pop up, if you kept your female asparagus, to reduce potential root competition. Provide water as needed when the soil dries out.
- For the fourth year, I like to harvest from the asparagus patch for no more than 4 weeks. For the fifth year and beyond, I then move on to harvesting through the full season (which is roughly around 6-8 weeks long).
- If you’re planning on trying to keep your asparagus patch going for years and years (potentially decades!) make sure to add some new baby plants to the patch every few years! Since a single asparagus plant tends to live for around 10-15+ years, it’s a good idea to plan to have your younger plants already fully established and capable of producing by the time the older ones die out. Adding a new planting every 5 years or so should do it!

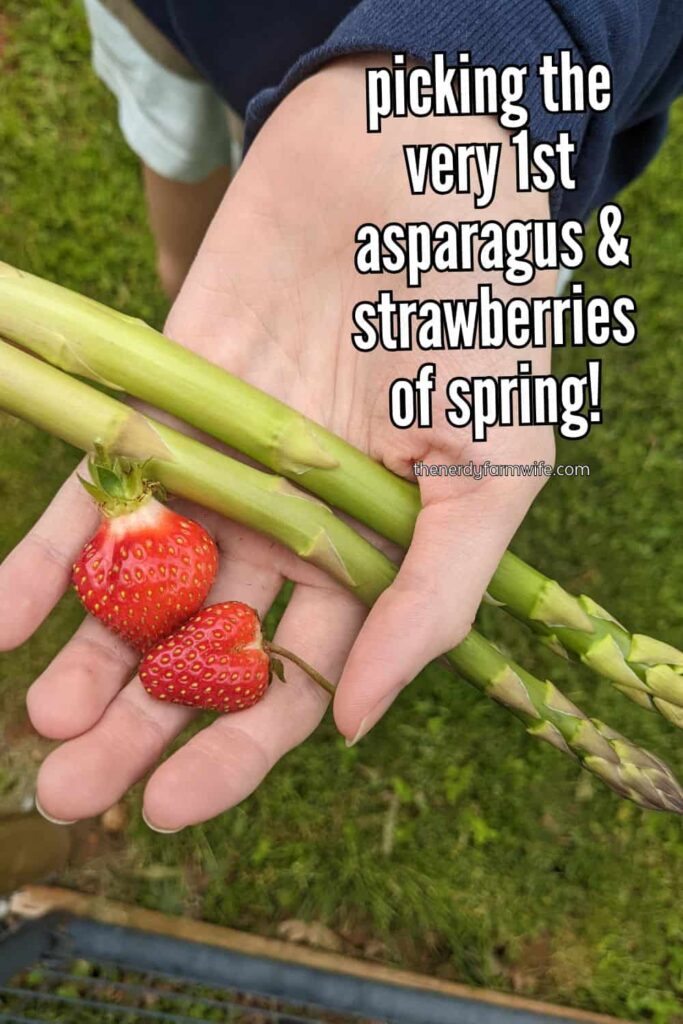
How to harvest & store homegrown asparagus:
Harvest your asparagus spears when the sprouts are anywhere from 6-10″ tall. They grow fast, and asparagus that’s grown too tall isn’t as tender and tasty, so it’s best to check daily!
Once they’ve reached the right height, harvest them by either snapping them by hand, or using a sharp knife to cut the asparagus at soil level.
Store fresh asparagus in the refrigerator, with the snapped/cut ends set in a jar or cup filled with about one inch of water.
Loosely covering them with a plastic bag over the top and changing out the water in the cup/jar frequently can help extend the shelf life further.
For a much longer shelf life, asparagus can also be blanched and frozen (extends shelf life to around 8 months), or pickled and canned (extends shelf life to at least 1 year after canning).

